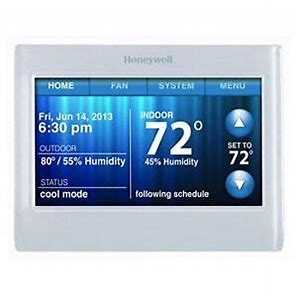
How do I wire my WiFi 9000 Color Touchscreen Thermostat?
The basic installation / quick start guide is included with your thermostat (Touch here for a digital copy).
You will need:
- Philips Screwdriver
- Flat-Head Screwdriver
- Smartphone or tablet
- Level
- Home Wi-Fi Password
You May Need:
- Wire Stripper
- Needle-nose Pliers
- Drill and 7/32 Drill Bit
Removing your old thermostat:
Turn the power off – at your breaker box or at your HVAC system (typically controlled by a mounted light switch on the furnace / air handler)
Check that the system is off – Switch your thermostat to heating or cooling and wait 5-7 minutes. If the system does not start, power is off (If your thermostat lost power when you turned off the breaker / switch, your power is off.)
Remove your old thermostat from the wall plate – Look for screws, buttons or clasps. Unscrew the screws or depress the clasps and pull the thermostat gently away from the wall plate
Check your wires – Your thermostat cannot operate with line voltage systems. Line voltage systems have thick wires black or white wires with wire nuts. Contact Customer Support for model recommendations if you have this type of wiring. Also, this thermostat cannot operate with a “communicating” system. Communicating thermostats typically have wires labeled DATA, or 1,2,3. Contact an HVAC contractor for more information on compatible thermostats.
Take a picture of your wiring – be sure to be able to clearly see each wire and the terminal markings they connect to.
Remove any jumpers – Jumpers, or small loops of wires, connect multiple terminals together.
Label the wires with the included stickers that match the terminals they are connected to.
Do you have a wire connected to the C terminal? – A C-Wire is required to power up the thermostat
If you do not have a C or common wire, your thermostat screen will not power up. The C wire connects to the C terminal on the HVAC systems’ 24VAC transformer.
A C or common wire that does not connect directly to the C on the transformer, but instead connects to another common may experience random restarts / shutoff.
Option A – Finding the C-Wire: There might be an extra wire pushed into the wall or wrapped around the wire bundle. Gently pull the wire bundle out of the wall to check for unused wires. If you have an unused wire, connect that wire to the C terminal on your new thermostat. Connect the other end of the unused wire to the C terminal on your heating/cooling system (or the zone panel if your home uses more than one thermostat to control temperature). Be sure any other wire(s) connected to the C terminal stay securely connected when you re-tighten the terminal. Not all heating/cooling equipment use the C label for the 24 VAC common wire. If your heating/cooling equipment does not have a C terminal, check the system manual or contact the manufacturer to find out which terminal is the 24 VAC common. Complete installation by following the remaining steps in this guide.
Option B – Using the C-Wire Power Adapter: If you do not have an unused wire in the wall, see the C Wire Adapter Installation Guide included with the T9 and T5+ thermostat. For Wi-Fi thermostats that do not include the C Wire Adapter, go to https://shop.honeywellhome.com/category/Accessories to order.
Disconnect the wires and remove the old wall plate
Bundle and insert the wires through the new back plate
Insert the screws /wall anchors
Insert the jumper loop below the R and Rc terminals if you only have one R or Rc wire. If you have separate R and Rc wires, remove the jumper loop
Connect the wires to the appropriately marked terminals on the wall plate
Attach the thermostat faceplate and turn the power back on.
Wiring Details:
The thermostat uses 1 wire to control each of your HVAC system’s primary functions, such as heating, cooling, fan, etc. See the diagram below for what each wire controls on your system:
- Y – Compressor Stage 1 (Cooling)
- Y2 – Compressor Stage 2 (Cooling)
- G – Fan
- C – Common
- L/A – A – Input for heat pump fault
- W -O/B – Heat Stage 1 (Heating) / Reversing valve for Heat Pump systems
- W2 -Aux/E – Heat Stage 2 (Heating) / Backup Heat
- R – 24vac (Heating transformer)
- Rc – 24vac (Cooling transformer)
How do I connect my WiFi 9000 Color Touchscreen Thermostat to WiFi and register it?
Connecting your thermostat to Wi-Fi can be performed during the initial setup and configuration, or later at a time you choose.
Connecting to Wi-Fi – Initial Setup:
After the Configuration step during the initial install, you will be prompted to connect your Smart Wi-Fi 9000 to your Home Wi-Fi.
The Smart Wi-Fi 9000 uses a 2-step connection and registration process
Step 1 – Connect the thermostat to your home Wi-Fi (Setup on thermostat display)
Step 2 – Register your thermostat. (Performed in the My Total Connect Comfort web portal)
*Registration cannot be performed with the mobile app, currently only supported via the web portal*
Step 1 – Connecting the thermostat to your Home Wi-Fi
Once installed and configured, the thermostat will prompt you to connect to Wi-Fi.
Select your Home Wi-Fi network name and touch CONNECT. (For hidden networks, touch the OTHER button to enter the network name / SSID manually)
Enter the password for your Home Wi-Fi network. Touch NEXT
You will receive a “Success” message. Continue
Step 2 – Register your thermostat
Registration is completed at mytotalconnectcomfort.com/portal
Touch the “Add Device” icon and Input the MAC ID / CRC for your device. (MAC ID / CRC are located on your thermostat information card, on the back of the thermostat, or from the Menu > Equipment Status screen])
Complete the security check (if prompted) and follow the directions within the web portal to complete the registration.
Unable to Register:
If your device connects to Wi-Fi, but fails to register, it may already be registered to another user. If known, contact the previous owner and ask that they delete the device from their account. If the previous owner is not known, contact resideo Customer Care to unregister your device. You will require the MAC ID (located on the back of your product) to complete the un-registration process.
Trouble Connecting?
If you experience inability to connect, failure to register, or frequent Wi-Fi signal loss, verify the following:
*You may need assistance from your Internet Service Provider to verify/ change some settings*
- Are you connecting to a 2.4GHz bandwidth Network (Simultaneous 2.4/5GHz networks that experience connectivity failure may require a separate dedicated 2.4 network to be configured)?
- Connect directly to the router signal – Not recommended for use with signal booster, satellites, or extenders
- Recommended WPA2-AES Network Security Protocol
- DHCP Enabled (Static networks not supported)
- UPnP / P2P Enabled
- Band-Steering Disabled
- The following are not supported:
Business Networks (Enterprise networks, guest networks, or networks that require logging in via a web page/portal) are not supported
Gateways or Network switches can block some traffic to Resideo and are not supported.
What are the features on my WiFi 9000 Color Touchscreen Thermostat?
Weather / Forecast:
When connected to Wi-Fi and registered on mytotalconnectcomfort.com, the thermostat can display the outdoor weather temperature and 8-hour forecast for your area (based on zip code).
From the thermostat idle screen (touch the main display to toggle between the Active and Idle main screens), touch the weather icon at the bottom center.
Voice Control:
Voice control is no longer available on Honeywell Home / Resideo thermostats directly. Voice control can be provided by the My Total Connect Comfort mobile app once connected and registered.
Color Scheme:
Choose from a list of pre-set color schemes or create your own using 359 different color options, Shade 0-100%, and brightness 0-100% for both background and text.
Reminders:
From the Preferences screen, you can setup reminders for your system’s air filter and humidifier pad (10-150 days run time, 30-75 days, or 3-15 calendar months)
Circulate:
Available under the Fan setting, the Circulate feature turns on the fan for 30% of the time every hour in order to circulate the air in your home.
Hold:
Adjust the temperature setpoint. A temporary hold is placed on the thermostat until the next schedule change occurs. The thermostat will then automatically resume following the schedule. Change the time the thermostat will resume the schedule using the Hold Until clock. Press Permanent Hold to maintain the new setpoint indefinitely. Press the green Hold button and select Cancel Hold to resume following the schedule.
Schedule:
The user guide has detailed steps on using the schedule for your thermostat. Click here to access the user guide.
Screen Lock:
The thermostat has 3 settings for the screen lock: Unlocked, Partial Lock, and Full Lock
–Unlocked: All settings are adjustable
–Partial: Setpoint changes are allowed. All other settings are locked
–Full: No changes are allowed
Locking the thermostat:
Touch MENU. Touch SECURITY SETTINGS. Touch the CHANGE LOCK MODE option.
Touch the desired lock setting. Touch DONE.
Touch the CREATE PASSWORD option.
A passcode will be displayed. Record this 4-digit code for your records. Touch OK.
Touch DONE to return to the Main Menu or thermostat display.
Unlocking the thermostat:
Touch MENU. Touch SECURITY SETTINGS.
Enter the passcode.
After the last digit is entered, the thermostat will advance to the SECURITY screen.
Touch CHANGE LOCK MODE. Touch UNLOCKED. Press Done to return to the thermostat Main Menu.
Locating my passcode:
The screen lock passcode is not adjustable on any Honeywell Home / resideo thermostat. To obtain the passcode, remove the thermostat faceplate by pulling it gently away from the wall plate. On the label on the back of the thermostat face-plate, locate the DATE CODE. (4-digit number located on the right side of the label)
The passcode is calculated by adding 1234 to the date code. (For example: A date code of 1644 would have a passcode of 2878)
Backlight:
The thermostat has an adjustable inactive screen brightness. This allows the user to dim the screen to their desired preference when not active. (When actively using the thermostat display [i.e. – touching buttons / making changes] the thermostat screen defaults to full brightness. This feature is not adjustable.)
Adjusting Screen Brightness:
Touch MENU. Touch PREFERENCES. Touch Backlight.
Select the desired backlight brightness. Test the backlight brightness by touching the TEST BACKLIGHT icon (during testing, touch the screen again to end the test).
Smart Response Technology: (also referred to as Smart Recovery, Smart Start, and Adaptive Intelligent Recovery)
The thermostat has the option to begin your schedule setting changes early in order to reach your desired temperature at the start of the schedule period. When active, the thermostat “learns” how long it takes to reach setpoint within your home, and starts heating or cooling early. (ex. “My home is 65° at night, but set to 70° at 7:00a.m.” Rather than waiting until 7:00a.m. to start warming up, Recovery begins Heating the home early [based on its algorithm and learned behavior] and starts heating the home at 6:00a.m. (actual start time will vary), reaching the 70° setting by 7:00a.m.) When active, RECOVERY is displayed on the thermostat screen in the top right corner.
Turning Recovery On / Off:
Touch MENU. Touch PREFERENCES. Touch SMART RESPONSE TECHNOLOGY.
Touch the ON or OFF icons to enable or disable SMART RESPONSE. Press DONE when complete
Clock:
When connected to Wi-Fi, the thermostat displays the local time based on the account creators Zip Code (as related to Time Zone). When not connected to Wi-Fi, the clock can be configured on the thermostat display. 12hr or 24hr time displays are optional, as is Daylight savings time (DST)
Clean Screen:
The Clean Screen feature disables the thermostat screen for 30 seconds. Wipe your thermostat with a clean, damp cloth. After the timer runs out, the thermostat screen is reactivated and returns to the main display.
Temp Scale:
You can adjust the temperature display settings at any time. Display temperatures are available in Fahrenheit or Celsius
Auto Changeover:
The changeover feature (also referred to as Changeover) allows your thermostat to automatically switch from heating to cooling, or vice versa, depending on the temperature in your home. The thermostat has a mandatory 1.5° differential or “swing”, so even if you set your thermostat heating temp to 70° and the cooling temp to 70° and turn changeover on, the temperature must rise or fall at least 1.5° before the thermostat will switch modes. (For the previous example, if the thermostat is in “auto”, but last called for heating, the temperature would have to climb to 71.5 degrees before switching to cooling mode and turning on)
Reset:
The thermostat has 2 reset options: Factory or Schedule
Factory Reset: clears all of the thermostats programming and resets it to factory defaults
*Prior to performing a Factory Reset, we recommend recording your current ISU configuration (see Setup and Configuration)
Schedule reset: clears the schedule and resets it to the daily default schedule listed below:
Wake 6:00a.m. Cool 78 Heat 70
Away 8:00a.m. Cool 85 Heat 62
Home 6:00p.m. Cool 78 Heat 70
Sleep 10:00p.m. Cool 82 Heat 62
Equipment Status:
This option displays what is currently being controlled by your system and its operational status. (ex.- If your fan is on, it will display your heating and cooling stages as OFF, but will show your fan as ON)
This screen also displays the thermostat model, software versions, and date code information
You can also connect this thermostat to Amazon Alexa and Google Assistant to control it through the other voice assistants in your home.
How do I configure my WiFi 9000 Color Touchscreen Thermostat?
*When configuring your thermostat, it is important to configure it correctly for your system type. Incorrectly configuring your thermostat can lead to inefficient operation and in extreme cases, damage to your system*
When first installed and powered on, the thermostat will guide you through the initial configuration.
Configuring during initial setup:
Select your preferred language (English / French / Spanish)
Select where the thermostat is installed (Home / Business)
Enter the thermostat name (typically the building or room the thermostat is installed in)
Select what functions your thermostat controls (heating / cooling / both)
Select your system type (forced air / heat pump / hot water or steam)
Select your fuel source (gas/oil / elec.)
Select your system efficiency (low / high)
*For heat pump applications, select your reversing valve setting (O on cool / B on heat)
*For hot water / steam applications select your heat source type (hot water / steam)
Select your number of cooling stages (1/2)
Select your number of heating stages (1/2)
Success! The thermostat can now control your system
At any time, the configuration of your thermostat can be modified from the Menu > System Setup screen.
Additional settings are configurable from the Menu > Preferences screen
Why won’t my WiFi 9000 Color Touchscreen Thermostat screen power up?
The thermostat operates between 20-30 VAC, “supplied” to the R/RC terminals and “returning” through the C terminal. A C wire, connected to C on the equipment, is required for the thermostat to power itself.
Verify the furnace / air handler door is closed, the power switch is on, and the breakers are on.
Confirm you have a C wire in the C terminal. If your previous thermostat did not use a C wire, it’s unlikely that it is connected at the equipment. Verify the C wire is connected to the C terminal in your furnace or air handler.
Check your jumper loop. If you have a wire in the R terminal and no wire in the RC terminal, verify the jumper loop is inserted. If you have a wire in the R terminal and a wire in the Rc terminal, the jumper loop will be removed.
Advanced steps:
Using a multimeter, measure the AC voltage between your R/ RC wire and your C wire. Your thermostat operates between 20-30VAC, any reading outside this range should be addressed by a Professional Contractor.
Why is my WiFi 9000 Color Touchscreen Thermostat not following my schedule?
Your thermostat is equipped with the Smart Response Technology feature, which allows the thermostat to “learn” how long it takes to reach a desired setpoint and begin heating or cooling earlier than your scheduled start time. To disable this feature, go to Menu – Preferences on your thermostat screen.
Other causes can include incorrect time setting on the thermostat, or if connected to WiFi and registered, incorrect zip code being listed under the location settings. *Only available to modify from the My Total Connect Comfort web portal – not currently supported in the mobile app*
Why is my WiFi 9000 Color Touchscreen Thermostat set to heating, but I feel cool or mild air and not heat?
Check your jumper loop. If you have a wire in the RC terminal and no wire in the R terminal, insert the jumper loop. If you have a wire in the R terminal and a wire in the Rc terminal, remove the jumper loop.
Check your wiring. If you have a heat pump, you may or may not have a backup heat source. (W controls your first stage of heating for Gas/Oil/Electric systems. O/B and Y control your first stage heating for heat pump systems. Backup heat sources must be connected to the W2, Aux, or E terminal for proper functionality.) If necessary, follow the wires back to your furnace or air handler and confirm the wires match the terminals on the control board.
Check your configuration. Most commonly, O/B is energized in Cooling (O on cool). For Rheem or Ruud brand heat pumps, the O/B must energize on heating (B on Heat).
Why is my Heating not Working on my WiFi 9000 Color Touchscreen Thermostat?
Your primary cooling (1st stage) is controlled by the Y terminal on your thermostat. (Or the Y and O/B terminal if you have a heat pump system) In addition, the G terminal is activated to turn on the fan in your home to circulate the cooler air.
Confirm the furnace / air handler door is closed and turned on. Check the circuit breaker to your equipment.
Confirm the thermostat is set to Cool mode and the setpoint (the smaller number at the top of the thermostat display), is set to a temperature lower than the display temp (the larger number in the center of the display).
Confirm the message “Cool On” is solid (not blinking) on the thermostat display.
Confirm your wiring is correct, and the wires have good contact in the terminals (tug gently on the wires)
Advanced steps:
Using a multimeter, measure the AC voltage between your Rc wire and your Y wire. Your thermostat operates between 20-30VAC, any reading outside this range should be addressed by a Professional Contractor.
Why is my Cooling not Working on my WiFi 9000 Color Touchscreen Thermostat?
Your primary cooling (1st stage) is controlled by the Y terminal on your thermostat. (Or the Y and O/B terminal if you have a heat pump system) In addition, the G terminal is activated to turn on the fan in your home to circulate the cooler air.
- Confirm the furnace / air handler door is closed and turned on. Check the circuit breaker to your equipment.
- Confirm the thermostat is set to Cool mode and the setpoint (the smaller number at the top of the thermostat display), is set to a temperature lower than the display temp (the larger number in the center of the display).
- Confirm the message “Cool On” is solid (“Waiting for Equipment” is not displayed ) on the thermostat display.
- Confirm your wiring is correct, and the wires have good contact in the terminals (tug gently on the wires)
Advanced steps:
Using a multimeter, measure the AC voltage between your Rc wire and your Y wire. Your thermostat operates between 20-30VAC, any reading outside this range should be addressed by a Professional Contractor.
How do I change or reset the WiFi connection on my WiFi 9000 Color Touchscreen Thermostat?
Wi-Fi Reset:
The thermostat connects to the home Wi-Fi from the thermostat menu.
Touch the Menu from the thermostat Main screen.
Scroll down and touch Wi-Fi Setup. Touch “Change Network”.
Select the desired Wi-Fi Network and touch “Connect”.
Enter the Wi-Fi password and Touch Next.
Why can’t I connect my WiFi 9000 Color Touchscreen Thermostat to WiFi ?
Trouble connecting?
If you are unable to complete the WiFi connection process, attempt the following before proceeding:
Attempt to connect and register the thermostat to a mobile hotspot. This allows the registration data to bypass any network security that may be causing the connection failure. Once successfully registered, a Wi-Fi Reset can be performed to move the thermostat to the home Wi-Fi network.
Wi-Fi Network Recommendations:
If you experience inability to connect, failure to register, or frequent Wi-Fi signal loss, verify the following:
*You may need assistance from your Internet Service Provider to verify/ change some settings*
2.4GHz bandwidth Network only (Simultaneous 2.4/5GHz networks that experience connectivity failure may require a separate dedicated 2.4 GHz network to be calibrated)
Connect directly to the router signal – Not recommended for use with signal booster, satellites, or extenders.
Business Networks (Enterprise networks, guest networks, or networks that require logging in via a web page/portal) are not supported.
Gateways or Network switches can block some traffic to Honeywell / resideo and are not supported.
Recommended WPA2-AES Network Security Protocol
DHCP Enabled – Static networks not supported
UPnP / P2P Enabled
Band-Steering Disabled
Do the color of the wires correspond to the letters on my new thermostat?
There is no code governing wire colors and thermostat connections. The thermostat should be wired by the letters found next to the wire screw terminal block. If you do not know the letter labels, then you can trace the wires back to the air handler/furnace or heat pump/ac unit. That will allow you to determine the function of each wire at the system and then allow you to attach it to the matching terminal on the thermostat.
What extra features do I get by connecting to WiFi and registering my WiFi 9000 Color Touchscreen Thermostat?
When connected to the My Total Connect Comfort web portal and mobile app, the Smart Wi-Fi 9000 gains access to a variety of features and functionality. In addition to the thermostat controls, internal settings are available, as well as settings unique to the thermostat “location” and mobile app itself.
To use your thermostat remotely, registration must first be completed at www.mytotalconnectcomfort.com. Once registered, the My Total Connect Comfort mobile app can be used to control the thermostat, as well as the web portal. (Registration can only be completed at the web portal currently)
*Integrations with 3rd party applications / devices (such as Google Home, Samsung Smart Things, etc.) can only be completed once the thermostat is registered at My Total Connect Comfort. When integrating with these 3rd party devices/apps, make sure to select the app version you are currently using when prompted by the 3rd party application. (ex. – North America users that select the Honeywell Internationl My Total Connect Comfort app, instead of the North American My Total Connect Comfort app may experience inability to control their device)*
Smart features include:
- Remote control of your thermostat from your mobile device
- Managing users and schedules on the go
- Voice control through Amazon Alexa, Google Assistant, and more
- Rewards from your utility
Account Settings:
Edit My Profile – Modify your name, address, and email or delete your account
Change my password – enter a new permanent password
+Grant Customer Support Access – allows Customer Care to access your account for troubleshooting / maintenance
+Add Location – create a new location to register devices
+Grant User Access – add / remove other account holders access to your locations / devices
Location Settings:
Modify / delete the location name, type, and address. Add / remove notification contacts. Add/remove devices.
Thermostat Settings:
High temperature notification – 32°-104° : Immediately, 15 min, 30 min, 45 min, 1-6 hrs
Low temperature notification – 32°-104° : Immediately, 15 min, 30 min, 45 min, 1-6 hrs
High humidity notification – 5%-95% : Immediately, 15 min, 30 min, 45 min, 1-6 hrs
Low humidity notification – 5%-95% : Immediately, 15 min, 30 min, 45 min, 1-6 hrs
Wi-Fi connection lost notification – 1-6 hrs offline
Failed to make changes notification – Immediately, 15 min, 30 min, 45 min, 1-6 hrs
Repeat Notification reminder – 1-6 hrs
All Clear notification – Immediately
Heat/Cool system notifications – Once
Thermostat Functions:
Setpoint: Adjust the desired temperature of your home
Mode: Change the system mode (Settings include: Heat, Cool, Off, Auto, and Em Heat [Emergency Heat] depending on the configuration of your thermostat. Auto mode is only available if your thermostat is configured to use Auto-Changeover. Emergency Heat is only available if your thermostat is configured for a heatpump with emergency heat.
Fan: Change the Fan setting. (Settings include On, Circulate and Auto). On turns the fan on permanently, Auto only turns on the fan when Heating or Cooling is being provided. Circulate runs the fan 33% of every hour.
Schedule: View / Modify the current schedule or enable Geofencing
Outdoor Weather / Forecast: Display current outdoor weather (based on zip code related to accuweather) and display 5-day forecast
Can I lock my thermostat so that no one can change the settings?
Varies by model. Refer to your thermostat manual for the Screen Lock feature.
The T9/T10, T5/T6, RTH9580WF, the RTH9585WF, and the TH9320WF (WiFi Color Touchscreen) all have a screen lock feature.
Keep in mind that the screen lock feature only blocks changes on the thermostat screen itself. Users with access to the thermostat via the Total Connect Comfort or Honeywell Home mobile apps can continue to control all functions via their app.
Specifications
WiFi Color Touchscreen Thermostat
| Thermostat Type | Programmable, Communicating |
| WiFi Specifications | 802.11b, 802.11g, 802.11n, 2.4GHz range |
| Color | Silver |
| Includes | Thermostat, Wall Plate, Screws, Anchors, Quick Start Guide, Thermostat ID Card, Wire Labels, User Guide |
| Program Modes | 7-Day Programmable |
| Utility Rewards | Yes |
| Display Type | Touch Screen |
| Power Supply | Hard-wired |
| Product Height | 3.5 in |
| Product Length | 4.5 in |
| Product Width | 0.8 in |
| Warranty | 1 Year |
| Control Functions | Heating, Cooling |
| Alerts and Reminders | Filter Change 1, Humidifier Pad (through app) |
| Energy Star Certified | Yes |
