CARTON CONTENTS
REMOVE ALL PARTS FROM CARTON AND IDENTIFY EACH ITEM SHOWN. MAKE SURE ALL PARTS ARE LOCATED BEFORE DISPOSING OF PACKING MATERIALS.
*Available on select models only. Accessories not included with your model may be purchased separately by visiting hoover.com.
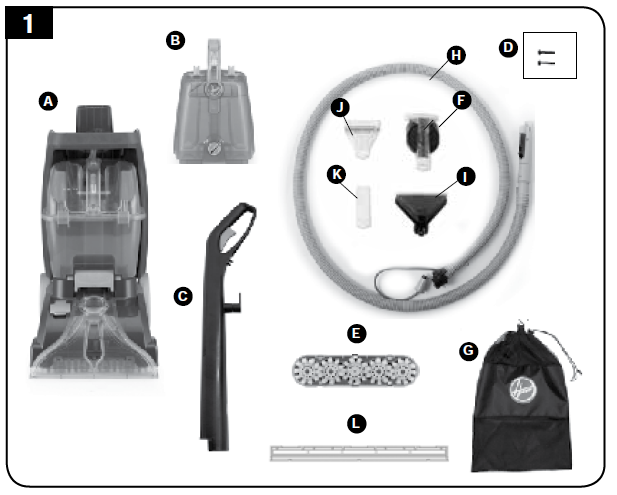
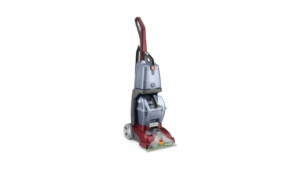
A. Carpet Washer
B. Water/Solution Tank
C. Upper Handle
D. Handle Screws
E. SpinScrub® Brush Assembly
(Pre-assembled in unit)
F. SpinScrub® Hand Tool*
G. Mesh Tool Storage Bag*
Tools Included in Mesh Bag
H. Accessory Hose
I. Stair Tool*
J. Upholstery Tool
K. Crevice Tool*
L. Squeegee Tool*
HOW TO ASSEMBLE
NOTE: PHILLIPS SCREWDRIVER NEEDED FOR ASSEMBLY.
ATTACH HANDLE
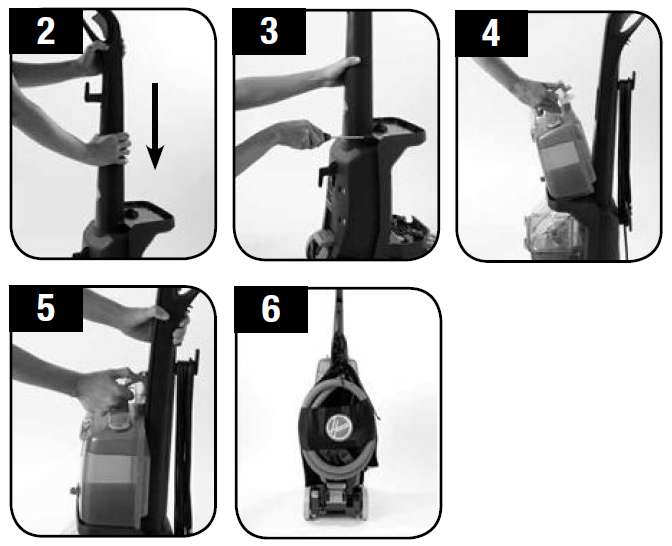
1. Position upper handle and slide down into carpet washer base (Fig. 2)
2. Insert both screws and tighten with screwdriver (Fig. 3).
PLACE SOLUTION/ WATER TANK
3. Position bottom of tank onto Carpet Washer (Fig. 4).
4. Push tank handle while supporting back of cleaner with other hand until Solution Tank clicks into place (Fig. 5).
5. Check to make sure tank is securely latched.
STORE TOOLS
6. Place tools and hose into Mesh Tool Storage bag provided.
7. Mesh Tool Storage Bag should not be hung on the Carpet Washer while the Carpet Washer is in use.
8. Mesh Tool Storage Bag can be conveniently stored either on the back of the unit or hung elsewhere by the provided hook (Fig. 6).
CORD STORAGE
9. Wrap cord around cord hooks for convenient storage. Attach the plug end to cord.
ATTENTION
Prior to use, consult with Carpet Manufacturer on cleaning recommendations for natural fiber carpeting (including silk and wool), soft carpeting, and loop Berber carpeting. Do not use on rugs or carpet when dry cleaning is recommended.
FEATURES
LIST OF FEATURES
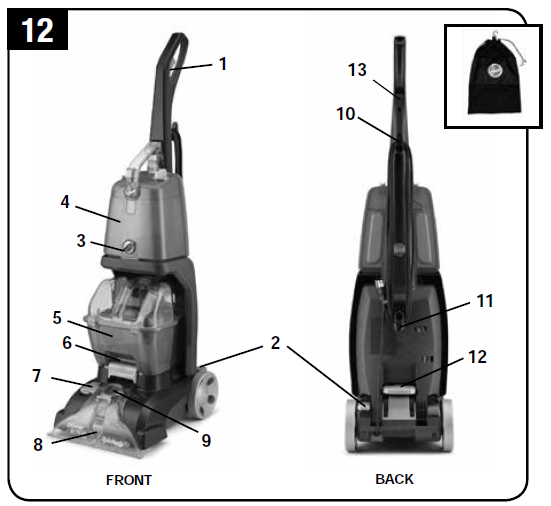
- Solution Trigger: Press to release cleaning solution
- ON/OFF Pedal
- Wash/Rinse Selector
- Clean Water/Solution Tank
- Dirty Water Tank
- Dirty Water Tank Latch
- Solution Tube Connection Port
- Nozzle
- Accessory Hose Connection Port
- Cord Storage Hook
- Cord Storage Hook (Does not rotate)
- Handle Release Pedal
- Cord Clip
