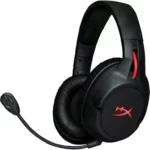
Quick Start Guide
I. Updating the headset and USB wireless adaptor
Before you start the updater, have a micro USB cable ready with your Flight headset and USB wireless adapter. Both the headset and the USB wireless adapter will need to be connected to the PC for the firmware to update properly.
- Connect the headset to a USB port on the PC using a micro USB cable.
- Connect the USB wireless adaptor to a USB port on the PC.
- Run the Hyper X firmware updater.
- Click the Update button when the application is ready.

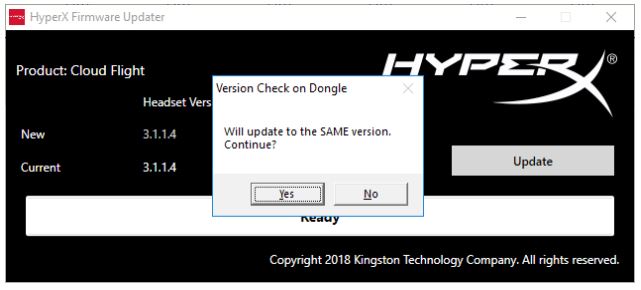
- A prompt will pop up asking if you want to continue. Click the Yes button to continue.
- Wait for the firmware updater to update both the headset and the USB wireless adapter.
- Once the update completes, click the OK button to close the prompt.
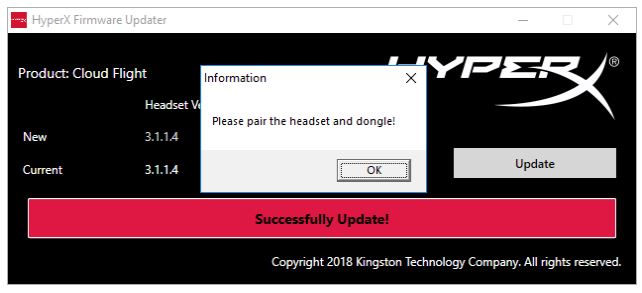
- Reconnect the USB wireless adaptor and pair the headset.


The Flight headset and USB wireless adaptor should now be on the latest firmware.
II. Headset pairing
After you perform the firmware update, the headset and USB wireless adapter will need to be paired together again before use.
- Turn off the headset.
- Plug the USB wireless adaptor into a PC.
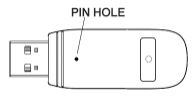
- Use a small pin to press the small button on the back of the USB wireless adaptor.

- The USB wireless adaptor LED will blink rapidly.
- Long press the power button for 10 seconds to enter pairing mode.
- The headset ear cup LED will blink rapidly.
- When the LED on the USB wireless adaptor and the headset ear cup is solid, pairing is completed.