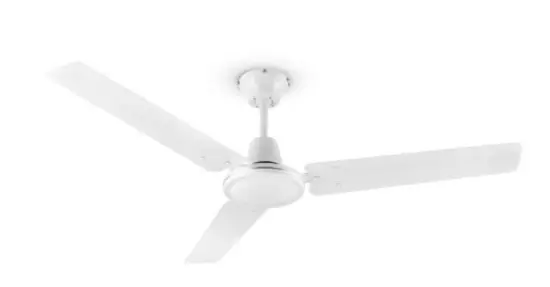
KLARSTEIN 10028295 Spin Doctor Ceiling Fan

Dear Customer,
Congratulations on purchasing this device. Please read the following instructions carefully and follow them to prevent possible damages. We assume no liability for damage caused by disregard of the instructions and improper use. Scan the QR code to get access to the latest user manual and more product information.

TECHNICAL DATA
| Item number | 10028295, 10028296 |
| Power supply | 220-240 V ~ 50-60 Hz |
| Power consumtion | 55 W |
SAFETY INSTRUCTIONS
- Never attach the fan to a power point,but to the ceiling itself.
- The minimum distance between the blades of the fan and the floor must be more than 2.3 m.The minimum carrying capacity of the hook from which the fan is hung must be 100 kg.
- Make sure to install all poles disconnection switch having a contact separation of at least 3 mm between poles in the supply wiring to the ceiling fan.
- The model or type reference of luminaries which may be installed in fans which are constructed for his purpose.
- Switch off the power before connecting.
- The electrical wiring must be in accordance with the local regulation.
- The fan must be properly earthed to avoid the risk of electric shocks.
- Never mount the fan in a moist or wet room.
- Be careful when working near the rotating blades.
| Note: Always have your fan installed by someone who is knowledgeable about electrical wiring |
INSTALLATION
- Locate and mark the canter of the joist. Pass the supply wires throught the hole in the bracket.
Secure the bracket to the ceiling joist by using the flat washers, sping washers and wood screws.

- Hang the fan onto the bracket hook by using one of the holes at the top of the upper canopy screws.
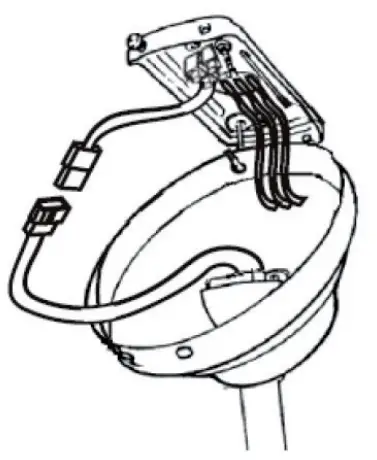
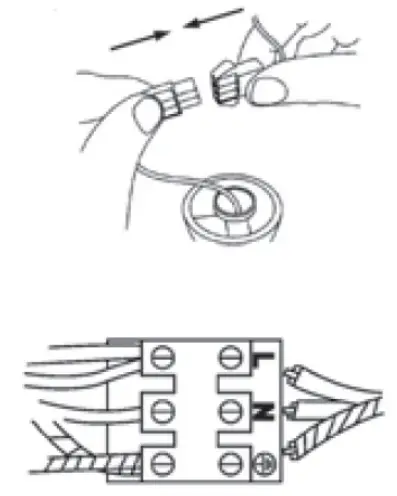
- Connect wires from supply and the wiring terminals as the photo.
Brown wire: “L”
Blue wire: “N”
Green/Yellow wire:
- Lift fan until the screws reach the bottom of the slots and then rotate the canopy counterclockwise until the screws drop into the slot redesses.

- Insert the other two set screws and washers.
Tighten all the screws, make sure that the canopy is secure and that you have not trapped any wires.

- Install the fan blades onto the motor by tightning the hexafonal screws and spring washers.

- Unscrew the regulator cover, Connect wires through the inlet hole according to the diagrams. Mount the regulator on wall on a wooden base block.

USE AND OPERATION
- Turn electricity on before the fan start to work.
- The fan starts to operate when pulling the Three-speed Switch connected by an extension chain on the motor housing.
The fan can be in different speeds as pulling the Three-speed Switch:
- The first pulling = HIGH SPEED
- The second pulling = MEDIUM SPEED
- The third pulling = LOW SPEED
- The fourth pulling = OFF
DISPOSAL CONSIDERATIONS
 |
If there is a legal regulation for the disposal of electrical and electronic devices in your country, this symbol on the product or on the packaging indicates that this product must not be disposed of with household waste. Instead, it must be taken to a collection point for the recycling of electrical and electronic equipment. By disposing of it in accordance with the rules, you are protecting the environment and the health of your fellow human beings from negative consequences. For information about the recycling and disposal of this product, please contact your local authority or your household waste disposal service. |
MANUFACTURER and IMPORTER (UK)
Manufacturer:
Chal-Tec GmbH, Wallstrasse 16, 10179 Berlin, Germany.
Importer for Great Britain:
Chal-Tec UK limited
Unit 6 Riverside Business Centre
Brighton Road
Shoreham-by-Sea
BN43 6RE
United Kingdom