![]()
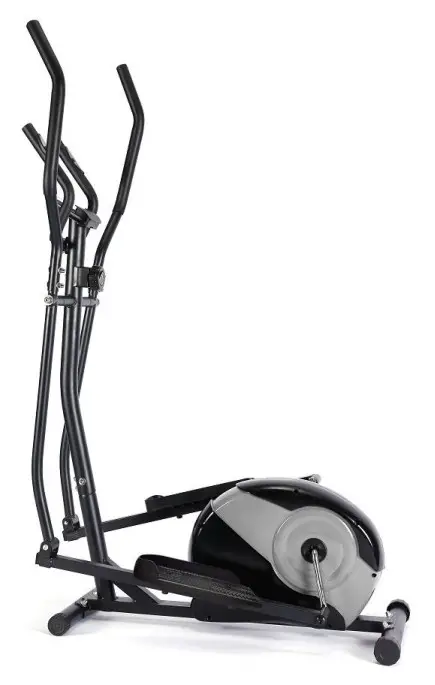
CROSS TRAINER
Key Code:42956952
WARNING! READ ALL INSTRUCTIONS CAREFULLY BEFORE USING THIS PRODUCT. FAILURE OR INCORRECT OR EXCESSIVE TRAINING MAY CAUSE INJURIES.
Important Safety Notice
Note the following precaution before assembling or operating the equipment.
- Assemble this equipment as per the installation directions in the instruction manual.
- Check all the screws, nuts, and other connection components prior to first use and regularly throughout the life of the equipment.
- Set up the equipment on a dry and level surface and keep away from children.
- Place a suitable base (e.g. rubber mat, wooden board, etc.) beneath the equipment in the area of assembly to avoid dirt and etc.
- Before beginning training, remove all objects within a radius of 2 meters from the equipment.
- only use the supplied tools or suitable tools of your own to assemble the equipment or repair any parts of equipment.
- Your health can be affected by incorrect or excessive training. Consult a doctor before beginning the training program. He can define the maximum setting (Pulse. Watts. Duration of training etc) to which you may train yourself and can get precise information during training. This equipment is not suitable for therapeutic purposes.
- Only do training on the equipment when it is the incorrect working way. Use only original spare parts for any necessary repairs.
- This equipment can be used for only one person’s training at a time.
- You can only mount and dismount the equipment safely with two hands grasping the handles when the equipment is stopped and one of the pedals is in the lowest position.
- Always check and adjust the plastic covers at the two ends of the front and rear stabilizer by rotating slowly to ensure the base of equipment is stable before using.
- The cross trainer is not equipped with a freewheel and therefore the moving parts can not be stopped immediately.
- Wear training clothes and shoes that are suitable for fitness training with the equipment. Your training shoes should be appropriate for the cross-trainer.
- If you have a feeling of dizziness, sickness, or other abnormal symptoms, please stop training and consult a doctor immediately.
- People such as children and handicapped persons should only use the equipment in the supervision of another person who can give aid and advice.
- The power of the machine increases with increasing speed, and the reverse. The equipment is equipped with an adjustable knob that can adjust the resistance.
- Please be sure that you operate a cross-trainer according to the instruction manual, periodically check all the parts for signs of wear or damage. If you find defective parts or there is noise when used in the process of assembling and repair, stop operation and use at once, make sure all problems are solved prior to continuing to use.
- The resistance of the product can be adjusted, please select the appropriate resistance.
- Product is in compliance with EN 20957-1 & 9 CLASS HC. Suitable for domestic home use only.
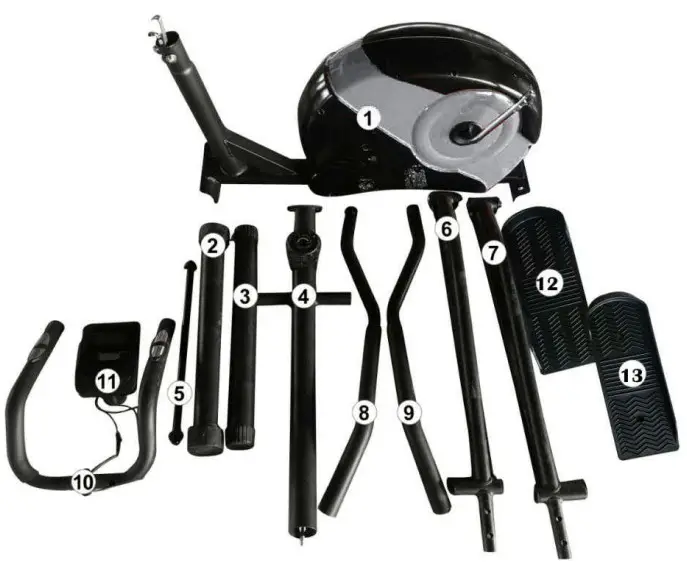
Product Diagram
Hardware
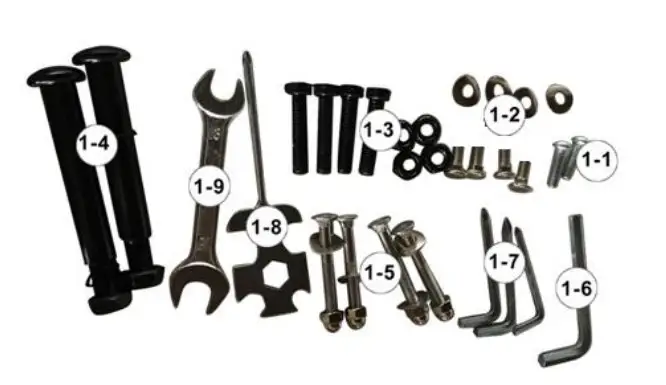
Parts and Hardware List
| Parts No. | Description | QTTY | Parts No. | Description | QTTY |
| 1 | Main Frame | 1 | 12 | Left Pedal | 1 |
| 2 | Front Stabilizer | 1 | 13 | Right Pedal | 1 |
| 3 | Rear Stabilizer | 1 | 1-1 | Screw M8X25mm | 2 |
| 4 | Handlebar Post | 1 | 1-2 | Screw M8X16mm & Washer | 4 |
| 5 | Connector | 1 | 1-3 | Screw M10X45mm & Nut | 4 |
| 6 | Left Pedal Post | 1 | 1-4 | Bolt & Nut | 2 |
| 7 | Right Pedal Post | 1 | 1-5 | Screw M8X6Omm & Washer/Nut | 4 |
| 8 | Left Handlebar | 1 | 1-6 | Wrench M8 | 1 |
| 9 | Right Handlebar | 1 | 1-7 | Wrench M5 | 3 |
| 10 | U-shaped Handlebar | 1 | 1-8 | Multifunction Wrench | 1 |
| 11 | Monitor | 1 | 1-9 | Open Spanner S13-15 | 1 |
Technical Parameters
| Overall size | 99x52x155cm | Product total surface area | 0.51m |
| Maximum user weight | 100kg | Product total weight | 23.8kg |
Assembly Instructions
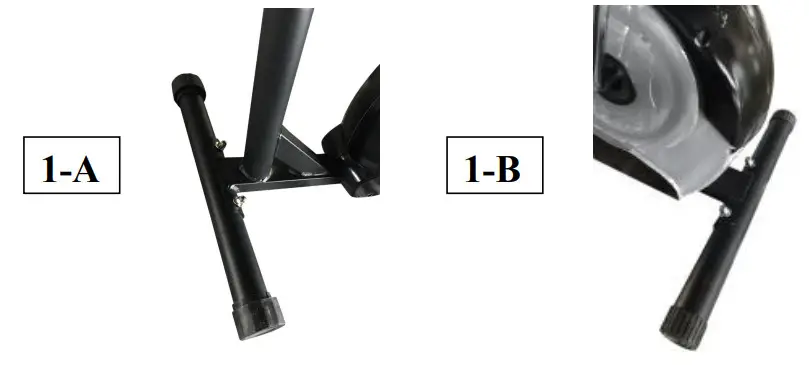
Step 1: Install the Front Stabilizer & Rear Stabilizer.
A. Attach the front stabilizer (Part 2) onto the mainframe (Part 1), secure them with the screws (Hardware 1-5).
B. Attach the rear stabilizer (Part 3) onto the base beam of the mainframe, then secure them with the screws (Hardware 1-5).
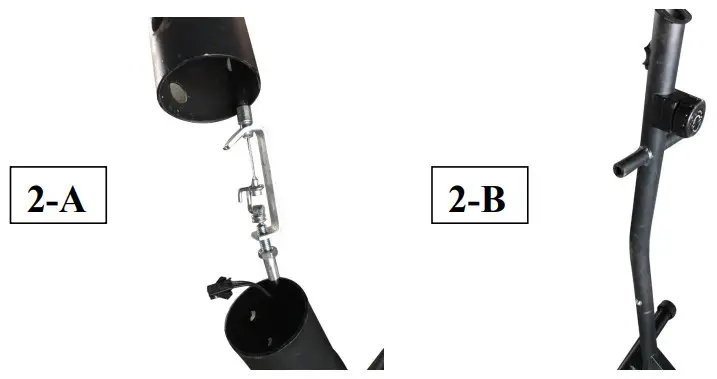
Step 2: Install the Handlebar Post.
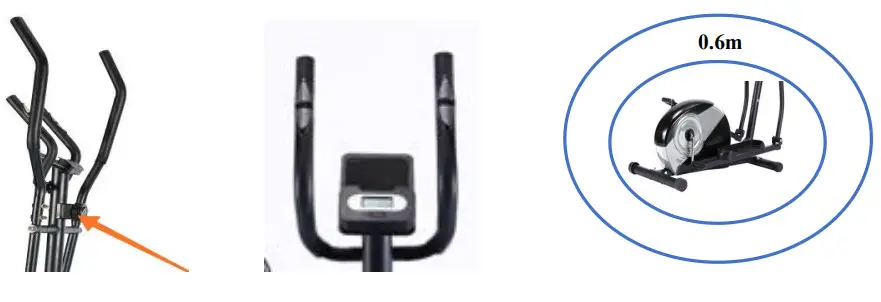
A. Connect the sensor wire together with the one from the handlebar post (Part 4). Connect the tension control cable together through the handlebar post (Part 4) as shown below image.
Note: Rotating the tension adjustable knob can adjust the length of the cable inside the tube from the handlebar post.
B. Insert the handlebar post to the tube of the main section (Part 1), secure them with the screws pre-attached to the hole of the mainframe.
Step 3: Install the Connector.
Take out the connector (Part 5), unscrew the nuts, then insert it into the Handlebar post (Part 4).

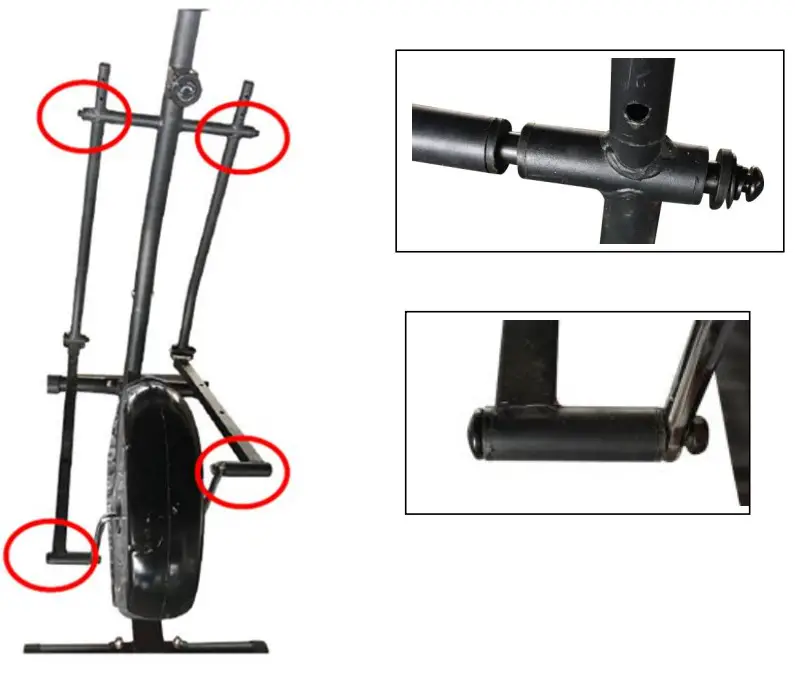
Step 4: Install the Pedal Post.
Assemble the left and right pedal posts (Part 6) & (Part 7) to the part of step 3 through the connector, then screw the bolts at two ends. Connect the left and right pedal post (Part 6) & (Part 7) together with the crank of the mainframe respectively, secure them with the bolt & nut (Hardware 1-4).
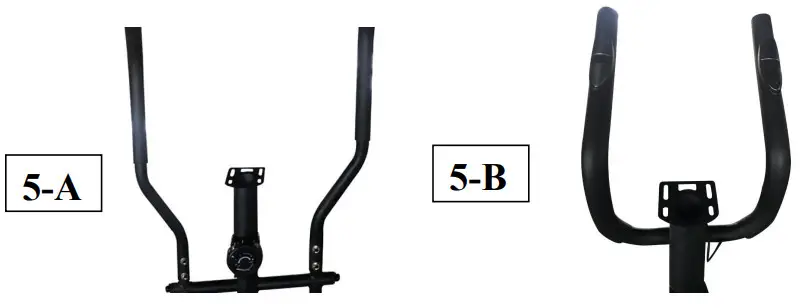
Step 5: Install the Handlebar.
A. Insert the left and right handlebar (Part 8 & 9) to the tube of the left and right pedal post respectively, then secure them with screws (hardware 1-2).
B. Connect the U-shaped handlebar (Part 10) together with the handlebar post, secure them with screws (Hardware 1-1).
Note: Please let the three wires out of the tube. One sensor wire is from the tube of the handlebar post (Part 4), the other two wires are from the U-shaped handlebar (Part 10).
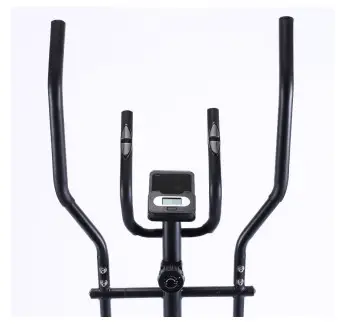
Step 6: Install the Monitor.
Take out the monitor and unscrew the bolts from the back of the monitor, then assemble it on the handlebar post. Connect the three wires from the monitor together with the wires from the part of step 5.
Note: the PULSE wire from the monitor and handlebar should be connected together. The SENSOR Wire from the monitor and handlebar post should be connected together which marked in the same color.
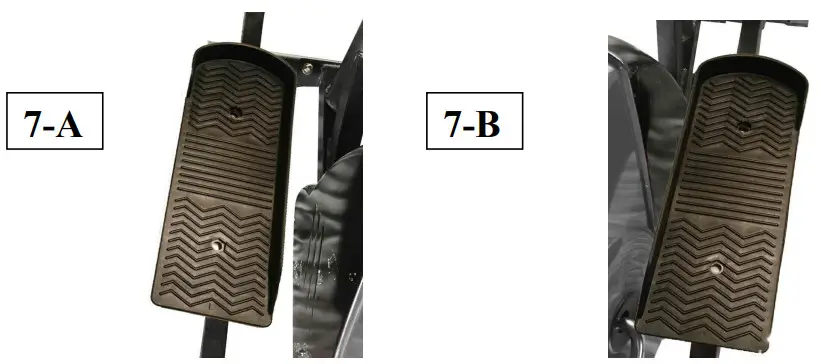
Step 7: Install the Right and Left Pedal
Connect the left & right pedal (Part 12 & 13) together with the left & right pedal post, secure them wiscrews (Hardware 1-3).
Exercise Instructions
A successful exercise program consists of a warm-up, aerobic exercise, and a cool-down. Do the entire program at least two and preferably three times a week, resting for a day between workouts. After several months, you can increase your workout to four or five times per week. Warming up is an important part of your workout and should begin every session. It prepares your body for more strenuous exercise by heating up and stretching out your muscles, increasing your circulation and pulse rate, and delivering more oxygen to your muscles. At the end of a workout, repeat these exercises to reduce muscle soreness.
Monitor Instructions
1) Product specification
TIME……00:00–99:59 Minute: Second
SPEED……0.0–99.9KM/H
DIST……0.00–99.99KM
CAL……0.0–999.9KCAL
ODO……0.0–999.9KM
PULSE……40–240BPM
2) Key Functions for MODE
- SET: Press the button to select SCAN or lock onto a particular function.
- RESET: Press the button for 3 seconds to remove all the records except ODO.
3) Function Instructions
- SCAN: Automatically display the following functions in order, TIME-SPEED-DIST-CAL-ODO-PULSE.
- TIME: Press the MODE key until the pointer advances to TIME. The monitor will display the total working time from starting the exercise.
- SPEED: Press the MODE key until the pointer advances to SPEED. The monitor will display the current speed.
- DISTANCE: Press Mode key until the pointer advances to DIST. The monitor will display the total trip distance from starting exercise.
- CALORIES: Press Mode key until the pointer advances to CAL. The monitor will display the total consumption calories from starting exercise.
- ODOMETER: Press the Mode key until the pointer advances to ODO. The monitor will display the total accumulated distance.
- PULSE: Press the Mode key until the pointer advances to PULSE. The monitor will display the current heart rate in beats per minute.
- AUTO ON/OFF: The system turns on when any key is pressed or when it receives any signal input from the speed sensor. The system turns off automatically when the sensor has no signal input or no key is pressed for approximately 4 minutes.
4) Battery
- This monitor uses 2pcs AAA batteries (not included).
- If inaccurate displays show on the screen, it is suggested to replace the batteries to restart the screen display.
- All data stored on the display will be lost when the batteries are removed and changed.
Use Instruction
- To show PULSE, you should touch both palms on the handrail sensor of the handlebar.
- There is a plum knob located on the handlebar post which is under the monitor. Rotating the knob in a clockwise direction will increase the resistance of the cross trainer, rotating the knob in an anticlockwise direction will decrease the resistance of the cross-trainer.
- Please keep a safety distance of 0.6m around the equipment during exercising.
WARNING! Heart rate monitoring systems may be inaccurate. Over-exercising may result in serious injury or death. If you feel faint stop exercising immediately.
Care and Maintenance Instruction
- Proper use of the equipment can increase its service life.
- Screws can become loose during use so please check and tighten screws on a weekly basis to avoid damage to the equipment or personal injury.
- Special pay attention to the crank which is the most susceptible to wear.
- Remove drops of sweat from the machine immediately after finishing training.
- Wipe clean with a damp cloth. Do not use abrasive material or solvents.
- Failure to perform routine maintenance could result in personal injury and/or equipment damage.
- Keep far away from children when not in use.
- Always store in a dry and ventilated area.
©KMART AUSTRALIA LIMITED
KMART AUSTRALIA – 690 SPRINGVALE ROAD, MULGRAVE, VIC 3170 AUSTRALIA.
KAMRT NEW ZEALAND – REGIONAL OFFICE C/O KMART PAPATOETOE STORE.
HUNTERS PLAZA, GREAT SOUTH ROAD, PAPATOETOE, AUCKLAND, NEW ZEALAND.
Made in China