
kogan AC Wi-Fi Range Extender
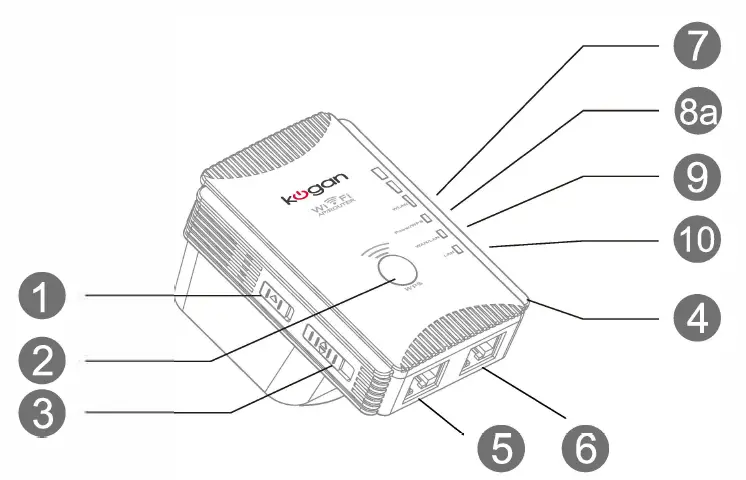
Hardware Overview
Note: Images in this manual may differ from the look of the purchased device. All functionality is identical
- Power ON/Off
- WPS Button
- Mode Selector
- Reset Button
- LAN Port
- WAN/LAN Port
- Wi-Fi Signal Status LED
- Power/WPS LED
- LAN LED
- WAN/LAN LED
Default Parameters
Web Setup: http://ao.setup
Default IP: 192.168.10.1
Password: admin
2.4G SSID: Wireless-N
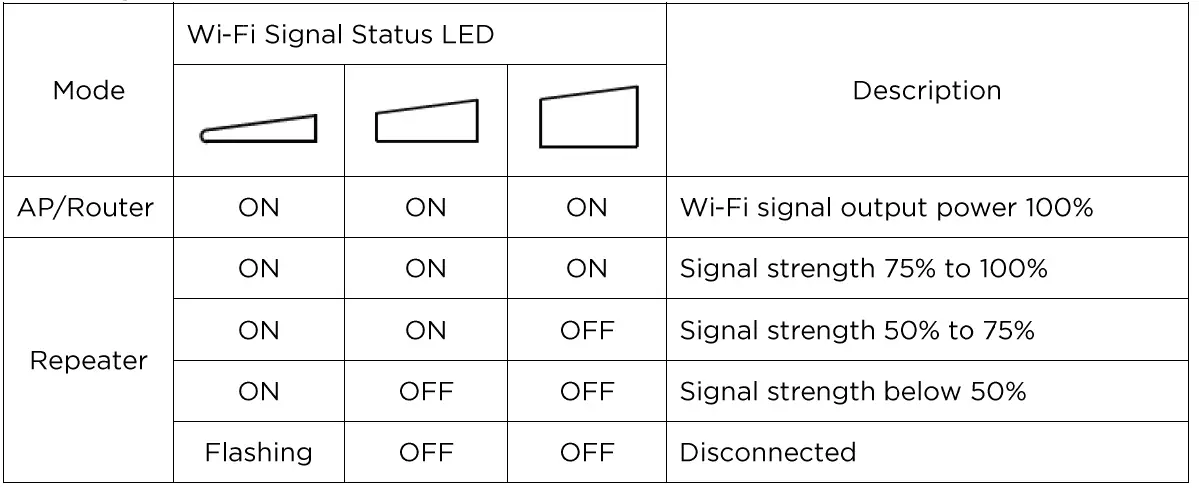
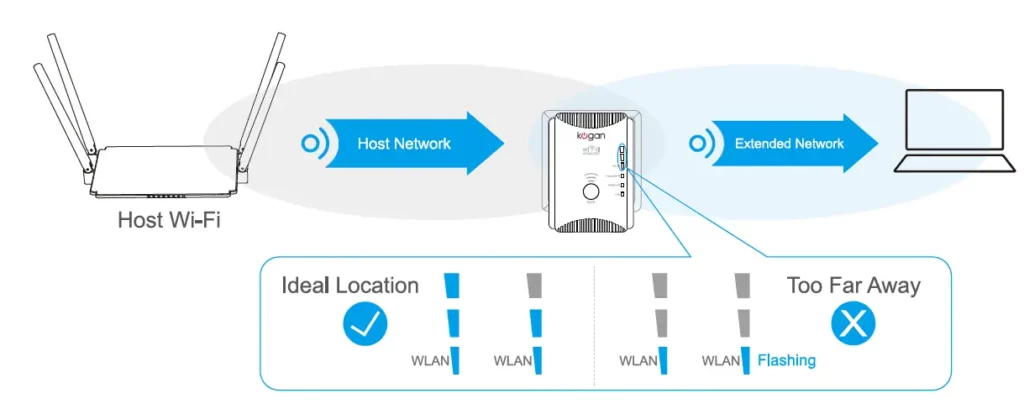
Wifi signal status
NOTE: Avoid installing device where it is heavily surround by objects. This can cause bad signal strength.
Router Mode and Access Point Mode
This device supports Router/AP Mode, select the preferred mode
| Router Mode | PPPoE | Enter the user Name and Password provided bby your ISP, these fields are case sensitive |
| Static IP | Enter the IP Address, Subnet Mask, Default Gateway and DNS provided by your ISP | |
| Dynamic IP | The device gets the IP address from your Host Router or ISP DHCP server | |
| AP Mode | The device gets the address automatically from your host router or ISP DHCP server | |
Setup – Wi-Fi Repeater Mode Using a Web Browser
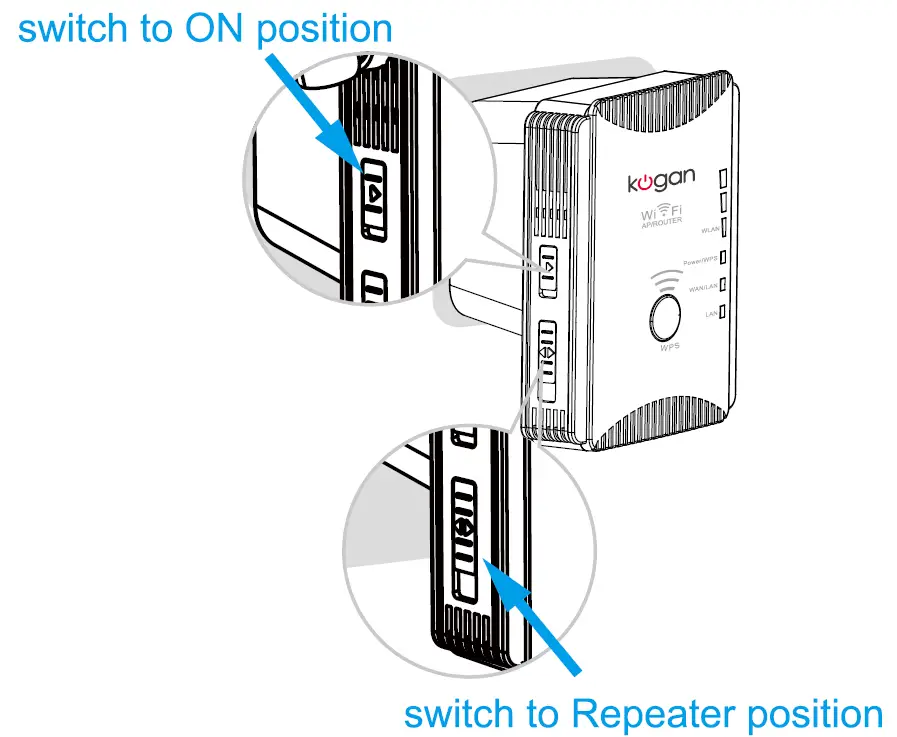
Step 1 – Power On
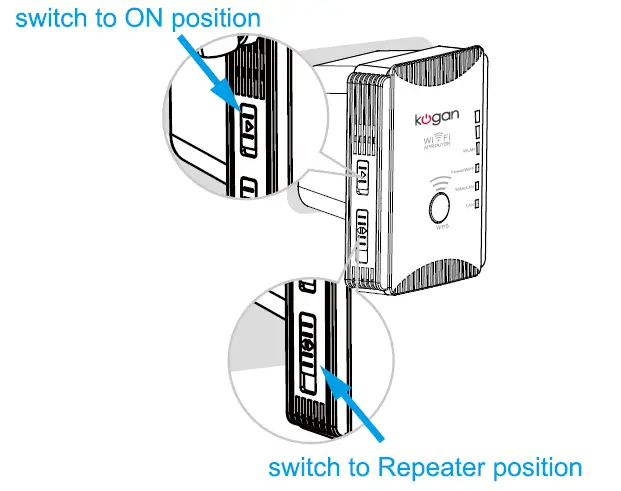
- Switch the mode selector to the Repeater position
- Plug the device into an electrical outlet near your Wi-Fi router
- Shift the power switch to ON and wait until the POWER LED is on and solid green
Step 2 – Connect to the Device
- Disconnect the Ethernet (Wired) connection from your laptop/PC (if applicable)
- Turn on your laptop/PCs Wi-Fi on if off
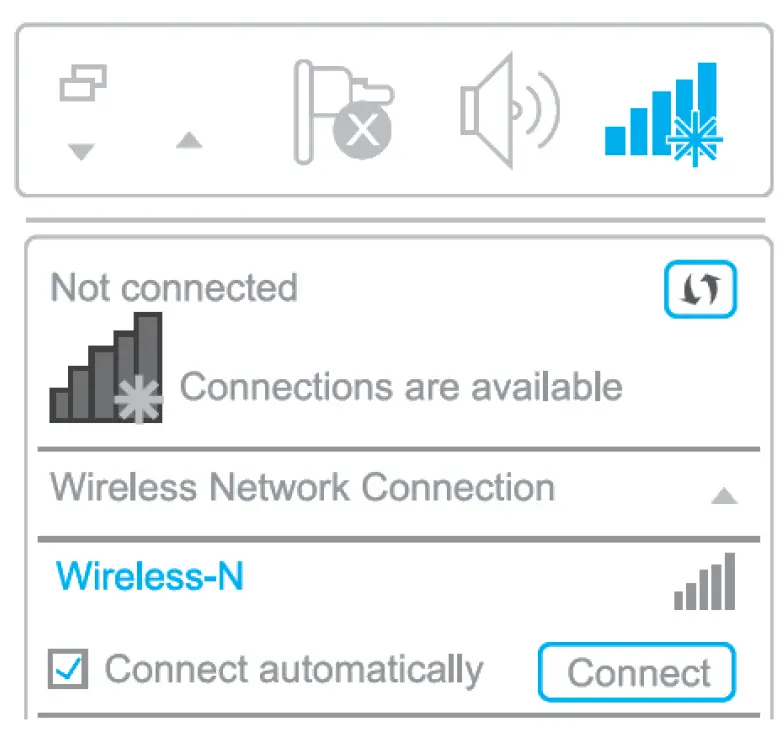
- Click the Wi-Fi icon on the taskbar and connect to the devices network: Wireless-N
- Disconnect the Ethernet (Wired) connection from your laptop/PC (if applicable)
- Turn on your laptop/PCs Wi-Fi on if off
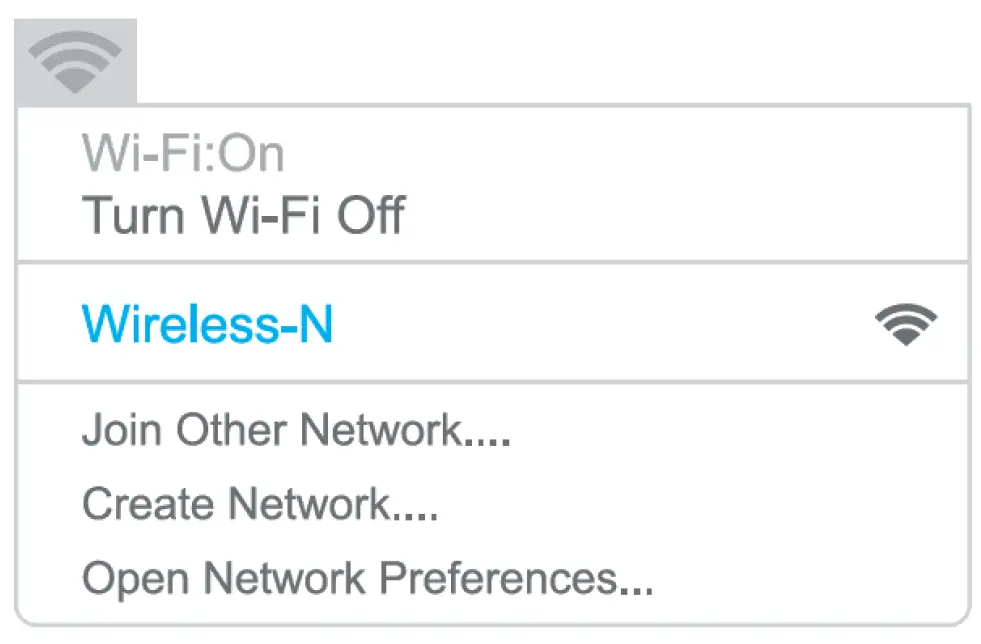
- Click the Wi-Fi icon in the top right corner of the screen, and connect to the devices network: Wireless-N
Step 3 – Configure
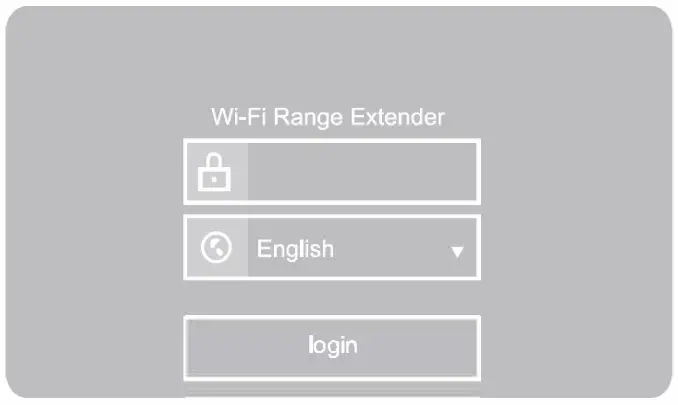
- Launch a web browser and type http://ap.setup in the address field. Enter admin (all lowercase) in the password field at login.
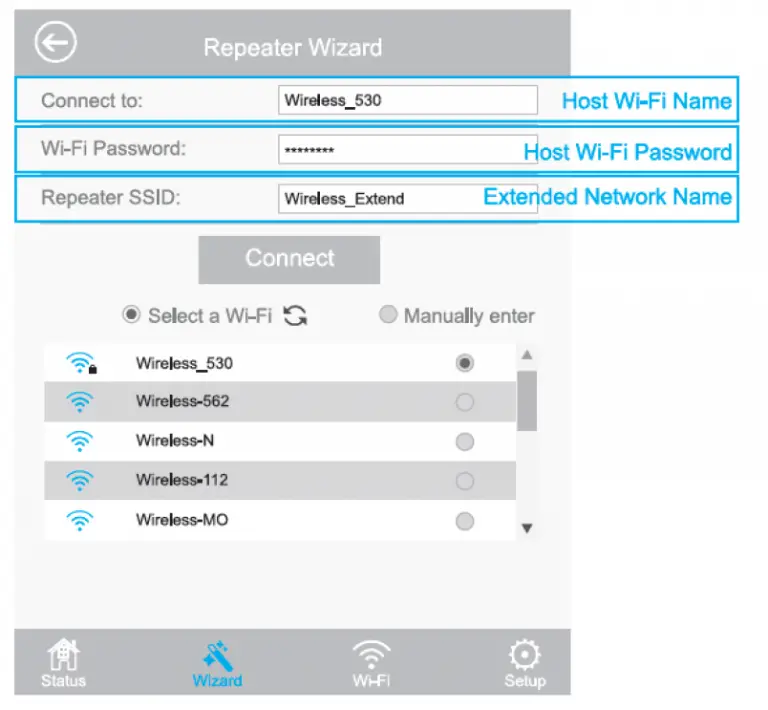
- Click Wizard
- Select the Wi-Fi SSID for your router (Host Wi-Fi) and enter the password. Either keep the same SSID as your host Wi-Fi or create a new name for the extended network.
- Verify your wireless settings and click Connect. The Wi-Fi Signal LEDs should turn on and stay solid, indicating successful connection.
Step 4 – Relocate
- Plug the device into an electrical out about halfway between the host router and the Wi-Fi dead zone. The location you choose must be within the range of your existing host Wi-Fi.
- Wait until the WLAN LEDs are ON. If the signal is weak, relocate it closer to the router to achieve a good (or better) signal quality.

Setup – Wi-Fi Repeater Mode Using a WPS (Wi-Fi Protected Setup)
Step 1 – Power On
- Switch the mode selector to the Repeater position
- Plug the device into an electrical outlet near your Wi-Fi router
- Shift the power switch to ON and wait until the POWER LED is on and solid green
Step 2 – Connect
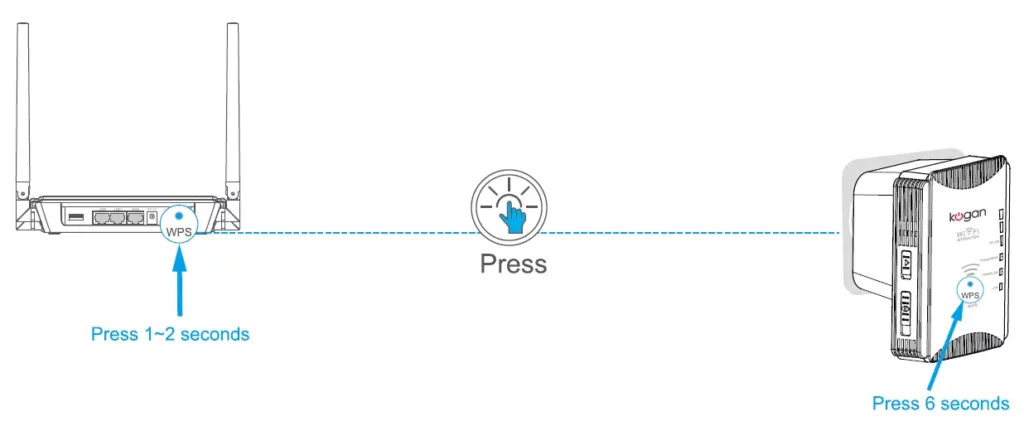
- Press and hold the WPS button for 6 seconds on the device.
- Within 2 minutes, press the WPS button on your host router.
- The device will reboot, please wait a few minutes
- The corresponding WLAN LEDs should turn on and stay solid, indicating successful connection.
Note: Some ISP gateways disable the WPS function by default. If the WPS connection fails, please connect the device using a web browser.
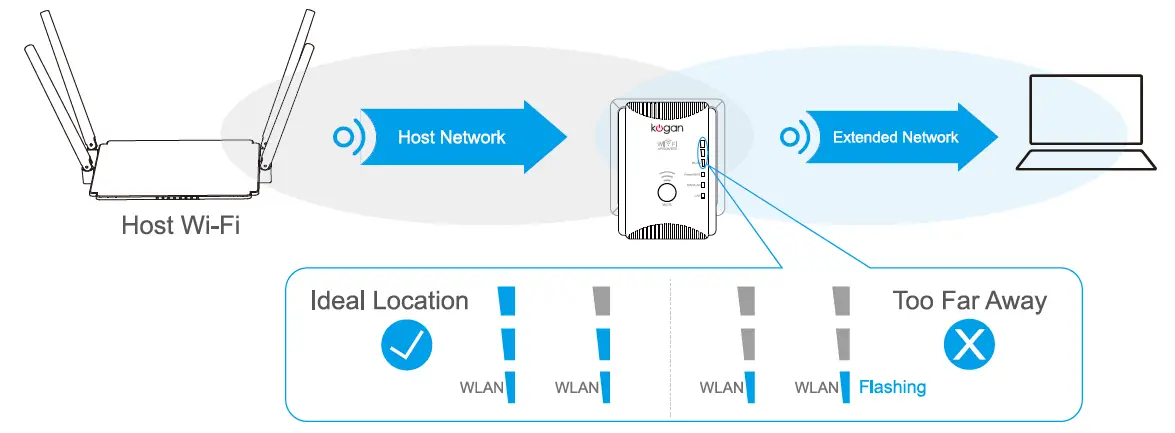
Step 3 – Relocate
- Plug the device into an electrical out about halfway between the host router and the Wi-Fi dead zone. The location you choose must be within the range of your existing host Wi-Fi.
- Wait until the WLAN LEDs are ON. If the signal is weak, relocate it closer to the router to achieve a good (or better) signal quality.
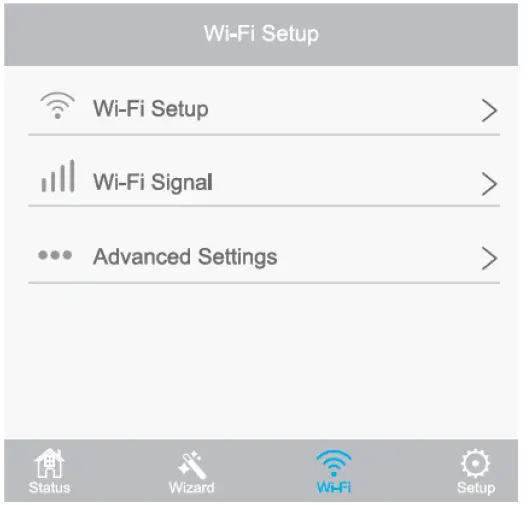
Management via Web Browser
Wireless basic configuration
- Click “Wi-Fi”
- Wireless network settings can be configured from here
Change Login Password
The default password for the device is admin, it strongly recommended the password is changed from the default.
- Go to http://ap.setup and login with the default password admin
- Click Setup->Login Password
- Enter the older password then enter the new password and click Apply
- Use the new password for future login
Firmware Upgrade
Firmware upgrade can fix bugs related to the device. however it is not recommended to upgrade the firmware if the device is working normally and stable.
- Click Setup->Upgrade Firmware
- Click Browse to locate the downloaded new firmware file
- Click Apply and wait a few minutes tor the firmware upgrade to be complete
Note: Do not interrupt the device, close the web browser or power off the device during a firmware upgrade. It may cause the firmware upgrade to fail and the device will become unusable. This voids the warranty.
Troubleshooting
Login page isn’t appearing after typing http://ap.setup
- Make sure the computer is connected to the extended network SSID or connect to the device using an Ethernet cable.
- Make sure your computer is set to obtain an IP address automatically.
- Verify that http://ap.setup is correctly entered in the web browser and press Enter.
What to do if the LEDs do not change to solid after completing setup
- You may have entered the incorrect Wi-Fi password of your host Wi-Fi during the configuration. Please log into the Device’s web-based interface to check the password and try again.
- Please reset the Device and go through the configuration again
Factory Reset
While the device is power on press and hold the reset button until all LEDs momentarily, then release the button and wait for the device to reboot