FAQs
My NumPad/KeyPad is not working, what should I do?
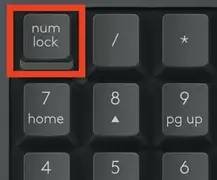
Make sure that the NumLock key is enabled. If pressing the key once doesn’t enable NumLock, press and hold the key for five seconds.
Verify that the correct keyboard layout is selected in Windows Settings and that the layout matches your keyboard.
Try enabling and disabling other toggle keys such as Caps Lock, Scroll Lock, and Insert while checking if the number keys work on different apps or programs.
Disable Turn on Mouse Keys:
- Open the Ease of Access Center — click the Start key, then click Control Panel > Ease of Access and then Ease of Access Center.
- Click Make the mouse easier to use.
- Under Control the mouse with the keyboard, uncheck Turn on Mouse Keys.
Disable Sticky Keys, Toggle Keys & Filter Keys:
- Open the Ease of Access Center — click the Start key, then click Control Panel > Ease of Access and then Ease of Access Center.
- Click Make the keyboard easier to use.
- Under Make it easier to type, make sure all checkboxes are unchecked.
– Verify the product or receiver is connected directly to the computer and not to a hub, extender, switch, or something similar.
– Make sure the keyboard drivers are updated. Click here to learn how to do this in Windows.
– Try using the device with a new or different user profile.
– Test to see if the mouse/keyboard or receiver on a different computer.
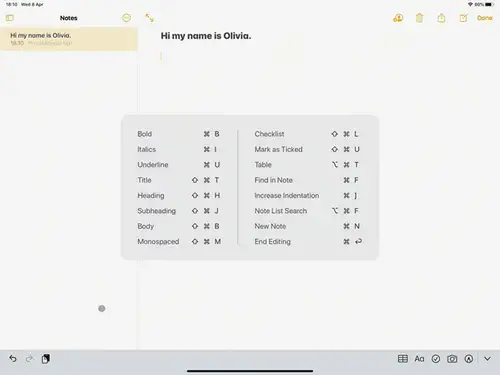
External keyboard shortcuts for iPadOS
You can view the available keyboard shortcuts for your external keyboard. Press and hold the Command key on your keyboard to display the shortcuts.
Change modifer keys of external keyboard on iPadOS
You can change the position of your modifier keys at any time. Here’s how:
- Go to Settings > General > Keyboard > Hardware keyboard > Modifier Keys.
Toggle between multiple languages on iPadOS with an external keyboard
If you have more than one keyboard language on your iPad, you can move from one to the other using your external keyboard. Here’s how:
- Press Shift + Control + Space bar.
- Repeat the combination to move between each language.
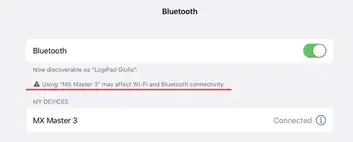
Warning message when Logitech device is connected to iPadOS
When you connect your Logitech device, you might see a warning message.
If this happens, make sure to connect only the devices you’ll be using. The more devices that are connected, the more interference you might have between them.
If you are having connectivity issues, disconnect any Bluetooth accessories that you’re not using. To disconnect a device:
– In Settings > Bluetooth, tap the information button next to the device name, then tap Disconnect.
Can I connect the M350 mouse to the same Unifying receiver used by my K580 for Chrome keyboard?
To connect your M350 mouse and K580 keyboard to the same Unifying receiver, do the following:
1. Download the Logitech® Unifying Software from your Google App Store.
NOTE: You must have the Unifying receiver from your keyboard connected to your device.
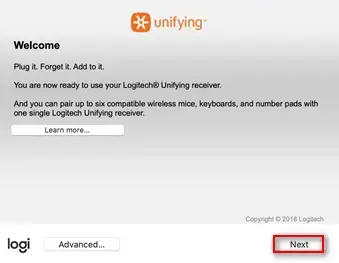
2. Open the Unifying software and click Next in the lower right of the window.
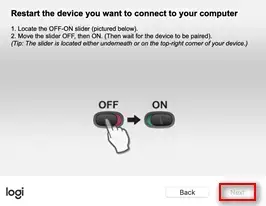
3. Restart the mouse you want to pair to your Unifying receiver by turning it OFF and ON.
4. Click Next in the lower right corner once it’s been enabled.
5. Follow the on-screen instructions to finish pairing your mouse and it will be ready to use.
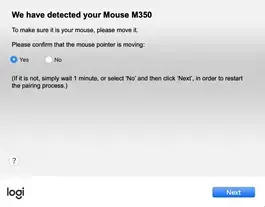
6. If you need to repair your M350 mouse to its original dongle, you will need a Windows desktop or laptop. Download and run the Logitech Connection Utility software and follow the on-screen instructions for repairing.
NOTE: Please see this article if you encounter additional Bluetooth connectivity issues.
Can I pair one channel to the Unifying receiver after connecting both to Bluetooth?
If you’ve previously connected both channels using Bluetooth and want to reassign the connection type, do the following:
1. Download Logitech Options® software.
2. Open Logitech Options and on the home screen, click ADD DEVICE.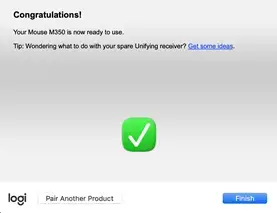
3. In the next window, on the left, select ADD UNIFYING DEVICE. A Logitech Unifying Software window will appear.
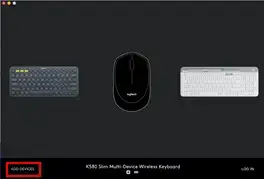
4. Put any channel you want to reassign connectivity in pairing mode (long press for three seconds until the LED starts to blink) and connect the USB Unifying receiver to your computer.
5. Follow the on-screen instructions in the Logitech Unifying Software. Once you complete the steps, your device will be successfully paired to your Unifying receiver.
Unable to re-pair K580 for Chrome OS to device using Bluetooth
If you previously paired the keyboard to your computer or other device and need to repair it, do the following:
1. Forget the device from your computer, phone or tablet.
2. Turn the K580 keyboard OFF and ON.
Put Channel 1 into pairing mode again by pressing for three seconds until the LED starts to blink.
3. On your device, select your keyboard (Logi K580 Keyboard) from the list.
4. In the pop-up window, type the requested code carefully and then press Enter.
5. Click Connect — the keyboard should now be re-connected.
How to switch the K580 keyboard layout depending on your device
With a Unifying receiver connection:
On K580 for Chrome OS, Chrome OS is the default layout. However, if you want to connect to an Android device, do the following:
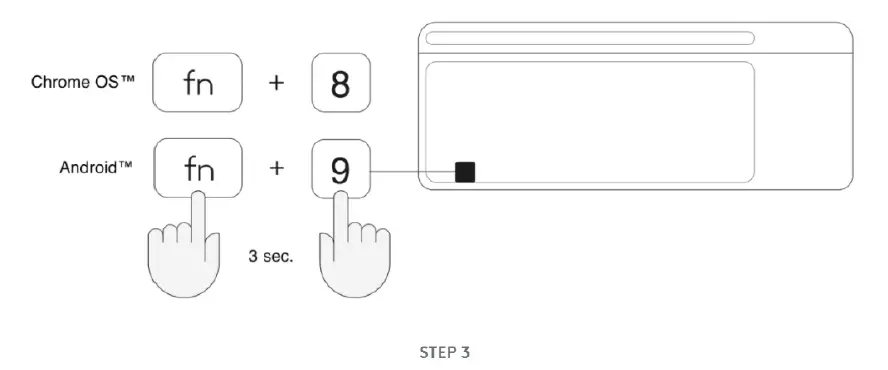
1. Before you connect the receiver to your Android device, press and hold down the FN and 9 keys for three seconds.
2. The OS will be selected after three seconds and you’ll be able to connect the receiver to your device.
With a Bluetooth connection:
Chrome OS is the default operating system layout for your keyboard. However, if you want to switch between layouts do the following:
Once your keyboard is connected to your device using Bluetooth:
1. To select Android: Press and hold down the FN and 9 keys for three seconds.
2. To go back to Chrome OS: Press the FN and 8 keys for three seconds.
3. You’ll see the LED on the selected channel key light up for five seconds to indicate that the layout has been successfully changed.
Battery life and replacement for the K580 for Chrome OS keyboard
Battery information
– Requires 2 AAA batteries
– Expected battery life — 24 months
Battery replacement
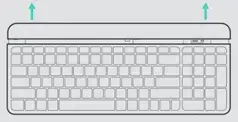
1. Holding your K580 for Chrome OS from the sides, slide up the upper part of the keyboard as shown:
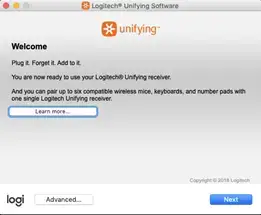
2. Inside you’ll find two different compartments for the USB receiver and for the batteries. You can store the USB receiver in the compartment when it’s not in use. 