
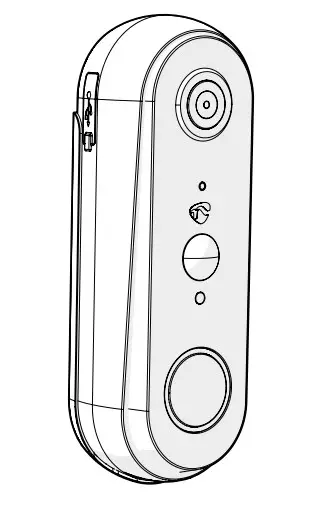
Rechargeable Video Doorbell
100% wireless solution
WIFICDP20WT / WIFICDP20GY

http://ned.is/WIFICDP20WT http://ned.is/WIFICDP20GY
Quick start guide
Rechargeable Video Doorbell
WIFICDP20WT
WIFICDP20GY
 For more information see the extended manual online: ned.is/wificdp20wtned.is/wificdp20gy
Intended use
The Nedis WIFICDP20XX is a Wi-Fi based Video Doorbell that streams recorded video and audio directly to your smartphone or tablet.
This product is intended for indoor and outdoor use.
Consult the local laws and regulations for security cameras before using and installing.
The product is not intended for professional use.
Any modification of the product may have consequences for safety, warranty, and proper functioning.
Specifications
| Product | Rechargeable Video Doorbell | |
| Article number | WIFICDP2OWT | WIFICDP2OGY |
| Dimensions (I x w x h) | 141 x 50 x 32 mm | |
| Video resolution | 1280 px – 720 px | 1920 px – 1080 px |
| Video Compression | H.264 | |
| Viewing angle | 100 ° | 180 ° |
| Image sensor | 1/4’CMOS sensor | 1/2.9″CMOS sensor |
| Night vision range | 5.0 m | |
| Memory | MicroSD card: Up to 128 GB (not included) | |
| IP rating | 1P54 (splash proof) | |
| Working temperature | -20 – 50 °C | |
| Battery type | 1 x 18650 (Li-ion) | 2 x 18650 (Li-ion) |
| Battery capacity | 2600 mAh | 5200 mAh |
| Battery lifetime | Up to 2 months in standby or 200 recordings | Up to 4 months in standby or 400 recordings |
| Power input | 5 VDC ; 2 A (Micro USB) | |
| Standby power | 2 mA | |
| Wi-Fi frequency range | 2412 – 2472 MHz | |
| Wireless connections | Wi-Fi & 433 MHz | |
| Max. radio transmit power | 18 dBm | |
| Compatible indoor chime | WIFICDPC10)c( | |
| Max. distance between doorbell and indoor chime | 20 – 30 m | |
| Infrared LEDs | 6pcs Infrared LEDs with 5 meters visibility | |
| PIR sensor | 3 m | |
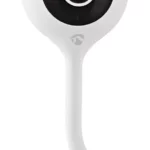
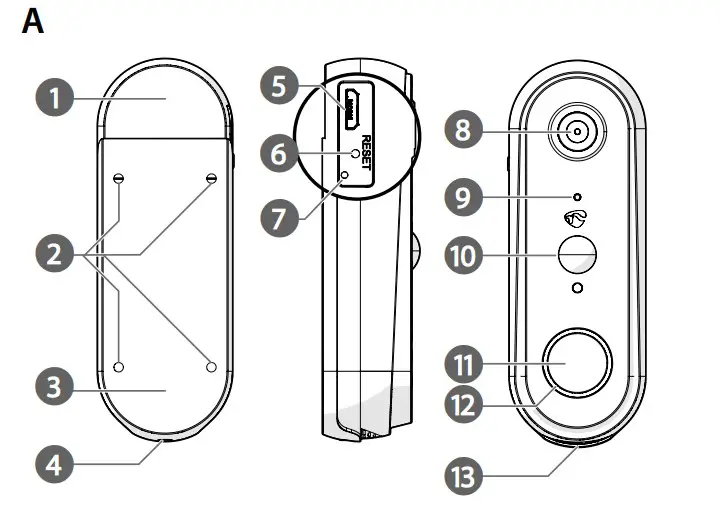
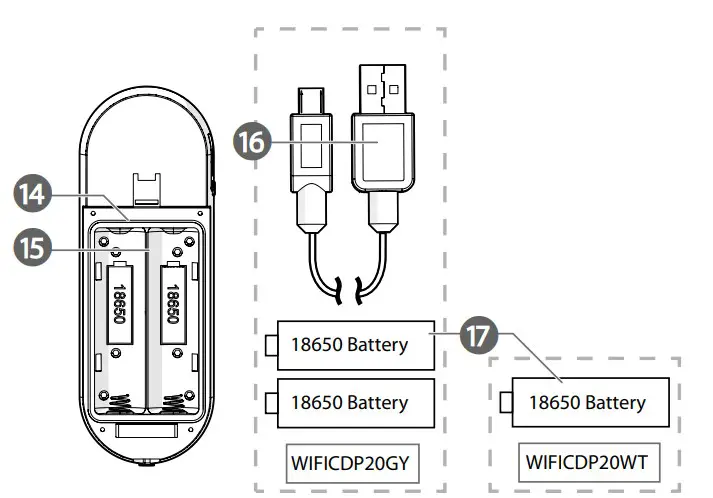
Main parts (image A)
| 1. Battery cover 2. Mounting holes 3.Mounting bracket 4.Hexagonal bolt 5. Micro USB port 6. Reset button |
7.Charging indicator LED 8. Camera lens 9.Microphone 10. PIR sensor 11.Call button 12.Status indicator LED |
13. Speaker 14.MicroSD card slot 15.Battery compartment 16.Micro USB cable 17.Batteries |
Safety instructions
 WARNING
- Ensure you have fully read and understood the instructions in this document before you install or use the product. Keep the packaging and this document for future reference.
- Only use the product as described in this document.
- Disconnect the product from the power source and other equipment if problems occur.
- Do not use the product if a part is damaged or defective. Replace a damaged or defective product immediately.
- Do not drop the product and avoid bumping.
- In the event of a cell leaking, do not allow the liquid to come in contact with the skin or eyes. If contact has been made, wash the affected area with copious amounts of water and seek medical advice.
- Do not use any cell or battery that is not designed for use with the product.
- Do not dismantle, open or shred secondary cells or batteries.
- Do not expose cells or batteries to heat or fire. Avoid storage in direct sunlight.
- Seek medical advice immediately if a cell or a battery has been swallowed.
- Do not short-circuit a cell or a battery.
- Do not store cells or batteries haphazardly in a box or drawer where they may short-circuit each other or be short-circuited by other metal objects.
- Do not subject cells or batteries to mechanical shock.
- Use only the cell or battery in the application for which it was intended.
- Do not mix cells of different manufacture, capacity, size or type within a product.
- Wipe the cell or battery terminals with a clean dry cloth if they become dirty.
- Battery usage by children should be supervised.
- Observe the plus (+) and minus (–) marks on the cell, battery and equipment and ensure correct use.
- Do not use any charger other than that specifically provided for use with the equipment.
- Do not leave a battery on prolonged charge when not in use.
- After extended periods of storage, it may be necessary to charge and discharge the cells or batteries several times to obtain maximum performance.
- Disconnect the power supply before making or breaking the connections to the battery.
- During charging, the battery must be placed in a well-ventilated area.
- Dispose of the cell or battery properly.
- When possible, remove the battery from the product when not in use.
- Clean the product regularly with a soft, clean, dry cloth. Avoid abrasives that can damage the surface.
- Do not use aggressive chemical cleaning agents such as ammonia, acid or acetone when cleaning the product.
- Consult the local laws and regulations for this product before installing and using.
Preparing the product
- Unscrew the hexagonal bolt A4 from the bottom of the bracket
- Unscrew the battery cover A1 to open the product.
- Optional: insert a microSD card (not included) into the microSD card slot A14, to locally store recordings.
- Insert the required batteries into the battery compartment A15.
 – Observe the plus (+) and minus (–) marks on the cell, battery and equipment and ensure correct use.
The status indicator LED Ae blinks red to indicate the product is ready for installation.
If Ae doesn’t blink blue, reset the product by holding the reset button A6 with a pin for 5 seconds.
Installing the Nedis SmartLife app
- Download the Nedis Smartlife app for Android or iOS on your phone via Google Play or the Apple App Store.
- Open the Nedis Smartlife app on your phone.
- Create an account with your e-mail address and tap Continue. You will receive a verification code on your e-mail address.
- Enter the received verification code.
- Create a password and tap Done.
- Tap Add Home to create a SmartLife Home.
- Set your location, choose the rooms you want to connect with and tap Done.
Connecting the app
- Tap + in the top right corner in the Nedis SmartLife app.
- Select the product type you want to add from the list.
- Confirm the status indicator LED A12 is blinking.
- Enter the Wi-Fi network data and tap Confirm.
- Tap Continue and a QR-code will appear.
- Hold your phone with a 15 – 20 cm distance in front of the camera. If the camera has detected the QR- code, you will hear a sound.
- Tap to confirm you heard the sound.
- Give the product a name and tap Done. A12 turns blue. The product is now ready for use.
If A12 doesn’t blink blue, reset the product by holding the reset button A6 with a pin for 5 seconds.
Making video recordings and screenshots
- You can make video recordings and screenshots on your phone, by tapping Record and Screenshot .
Playing back motion detected videos
Motion detected videos are automatically saved on the microSD card, if inserted.
- Tap Playback to open the stored videos.
- Select the day of the recording.
- Zoom and drag the timeline to select the recording.
Declaration of Conformity
We, Nedis B.V. declare as manufacturer that the product WIFICDP20WT WIFICDP20GY from our brand Nedis®, produced in China, has been tested according to all relevant CE standards and regulations and that all tests have been passed successfully. This includes, but is not limited to the RED 2014/53/ EU regulation.
The complete Declaration of Conformity (and the safety datasheet if applicable)
can be found and downloaded via:
nedis.com/WIFICDP20WT#support
nedis.com/WIFICDP20GY#support
For additional information regarding the compliance, contact the customer service:
Web: www.nedis.com
E-mail: [email protected]
Nedis B.V., de Tweeling 28
5215 MC ’s-Hertogenbosch, the Netherlands