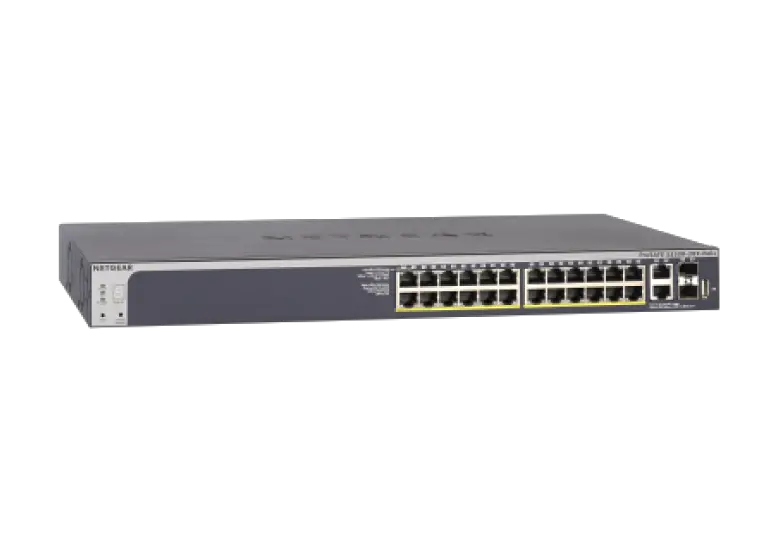
NETGEAR ProSAFE FS526Tv2 Smart Switch

Start Here
Follow these instructions to install your FS526Tv2 and FS728TLP Smart Switches and connect them to the network. Then, consult the FS526Tv2 and FS728TLP Software Administration Manual for information about configuring features such as VLANs, spanning tree protocol (STP), and Quality of Service (QoS).
Verify the Package Contents
When you open the box, verify the package contents. The package includes the following items:
- NETGEAR FS526Tv2 or FS728TLP Smart Switch.
- Rubber footpads for tabletop installation.
- Power cord.
- Rack-mount kit.
- Installation guide (this document).
- Resource CD which includes the NETGEAR Smart Control Center utility and FS526Tv2 and FS728TLP Smart Switch™ Hardware Installation Guide. A link
to the online FS526Tv2 and FS728TLP Smart Switch™ Software Administration Manual is on the resource CD. - Warranty/support information card.
Install the Switch
Prepare the site so that the mounting, access, power source, and environmental requirements are met. If you have any questions about these requirements, see the Hardware Installation Guide for the FS526Tv2 and FS728TLP Smart Switches on your Resource CD.
Install the switch using one of the following methods:
- On a flat surface. Put one of the rubber footpads that came with the switch on each of the four concave spaces on the bottom of the switch.
- In a rack. Use the rack-mount kit supplied with your switch to install the switch in a 19-inch (48.3-centimeter) EIA standard equipment rack. Follow the installation instructions included in the FS526Tv2 and FS728TLP Smart Switch™ Hardware Installation Guide.
Prepare the Administrative Computer
The administrative computer must be Windows-based and have an Ethernet adapter with a connection to the network and a CD drive.
Install the Smart Control Center Utility on the Computer
The NETGEAR Smart Control Center is a Windows-based application that discovers NETGEAR smart switches in your network and helps you to perform management operations like firmware upgrades and IP address assignment.
To install the Smart Control Center utility on the administrative computer:
- Insert the resource CD into your CD drive.
- Run the Setup program to install the Smart Control Center utility. The Installation Wizard guides you through the installation.
Connect the Switch to the Network
If you use static IP addressing in your network, use the Smart Control Center utility to configure a static IP address on the switch before connecting it to your network.
In the absence of a DHCP server, the switch uses a default IP address of 192.168.0.239 with a subnet mask of 255.255.255.0.
IMPORTANT: The DHCP client on the switch is enabled by default. If you use a DHCP server to provide the switch with an IP address, you do not need to configure the switch before connecting it to the network.
To connect the switch to the network:
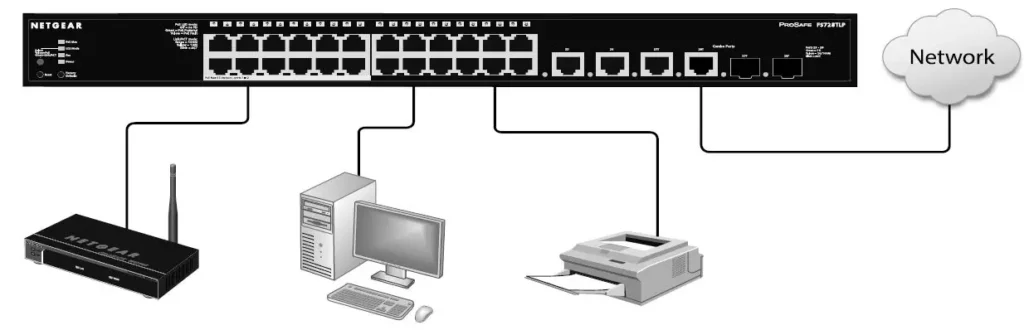
- Connect each computer or other network device, such as a printer or server, to an RJ-45 network port on the switch front panel. Use a Category 5 (Cat-5) unshielded twisted-pair (UTP) cable terminated with an RJ-45 connector to make these connections.
- Connect the switch to your network through any of the ports. The following figure shows an FS728TLP Smart Switch. Your switch might differ.
- Connect one end of the supplied power cord to the switch and the other end to an AC power source to power on the switch.
To configure the switch with a static IP address before connecting it to your network:
- Configure a static IP address on the administrative computer in the 192.168.0.0/24 subnet, for example 192.168.0.1.
- Use a Category 5 (Cat-5) unshielded twisted-pair (UTP) cable to connect the Ethernet port on the computer to any front-panel RJ-45 port on the switch.
- Launch the Smart Control Center utility on the computer to discover the switch and configure the appropriate static IP address for your network. For detailed information about this step, see the online FS526Tv2 and FS728TLP Smart Switch™ Software Administration Manual.
Discover the Switch with the Smart Control Center Utility or Access the Switch with a Web Browser
To discover the FS526Tv2 and FS728TLP switches with the Smart Control Center utility:
- Double-click the Smart Control Center icon on your desktop or select the application from the Windows Start menu.
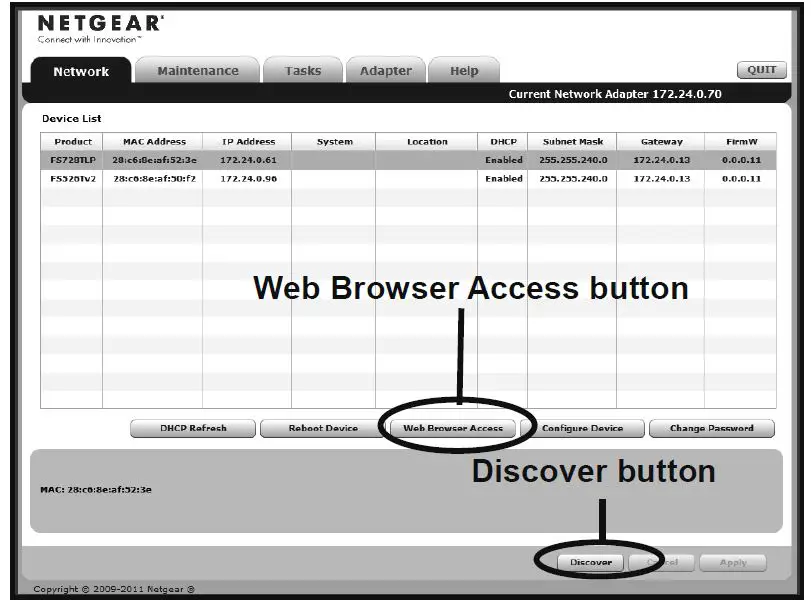
- On the main Smart Control Center screen, click Discover to find your switch in the network. The Smart Control Center utility finds the switch and displays information such as its MAC address, IP address, and model number.

- Click to select the line displaying the details of the switch you want to configure.
- Click Web Browser Access to launch a web browser on the administrative computer. The Login dialog screen displays.
- Enter the default password of password in lowercase letters and click Login. The System Information screen displays.
- Configure the switch for your network. For information about switch features and for assistance with configuration procedures, see the online FS526Tv2 and FS728TLP Smart Switch™ Software Administration Manual. For information about each field to view or configure, click the Help icon available on each page of the switch user interface.
To access the switch with a web browser:
- Make sure that the switch is not connected to a DHCP server. If you do not know whether a DHCP server is on your network or not, only connect the switch to the administrative computer.
- Configure a static IP address on the administrative computer in the 192.168.0.0/24 subnet, for example 192.168.0.1, and configure a subnet mask of 255.255.255.0.
- Enter http://192.168.0.239/ in a web browser. The Switch Login screen displays.
- Enter the default password of password in lowercase letters and click Login. The System Information screen displays.
- Configure the switch for your network.
Troubleshooting Tips
- Make sure that the FS526Tv2 or FS728TLP Smart Switch is operational before you attempt to discover it.
After you power up the FS526Tv2 or FS728TLP switch, wait at least two minutes before you click the Discover button on the Smart Control Center utility. - Make sure that the Ethernet cables are securely plugged in.
For each powered-on device connected to the switch with a securely plugged in Ethernet cable, the corresponding port status LED will light. - Make sure the administrative computer’s network settings are correct.
In most cases, computers are configured to obtain an IP address automatically through DHCP. For help with this, see the FS526Tv2 and FS728TLP Software Administration Manual; a link to the online manual is on the Resource CD. If your network uses static IP addresses, be sure that the switch and computer are configured with valid IP addresses that are in the same subnet.
Support
Thank you for selecting NETGEAR products.
After installing your device, locate the serial number on the label of your product and use it to register your product at https://my.netgear.com.
You must register your product before you can use NETGEAR telephone support. NETGEAR recommends registering your product through the NETGEAR website.
For product updates and web support, visit http://support.netgear.com. NETGEAR recommends that you use only the official NETGEAR support resources.
For the current EU Declaration of Conformity, visit http://support.netgear.com/app/answers/detail/a_id/11621
NETGEAR, the NETGEAR logo, and Connect with Innovation are trademarks and/or registered trademarks of NETGEAR, Inc. and/or its subsidiaries in the United States and/or other countries. Information is subject to change without notice. © NETGEAR, Inc. All rights reserved.![]()