![]()
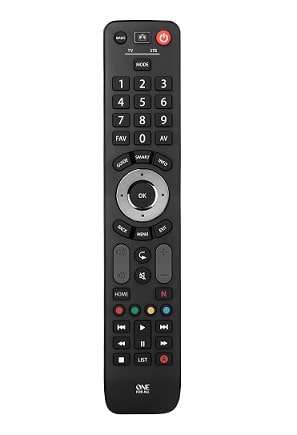
URC7125 SIMPLE SET UP GUIDE


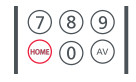
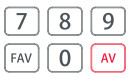
KEY TABLE

HOW TO SET UP YOUR REMOTE
A – SIMPLE SET
simplest is a quick and easy way of setting up the remote to control the most popular brands of each device type with only a few key presses, typically in under a minute per device. The first step is to select which device you are going to set up. The following is a list of Device Modes on the remote control, and the Device types that can be set up on that mode:

| Device Mode | Type of device |
| TV | TV, HDTV, LED, LCD, Plasma, Projector |
| STB | Set-Top Box, Satellite Receiver, Cable Converter, Freeview, DVB-T, IPTV, Media, Streamer |
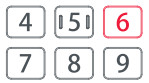
For each Device type, there is a list of the top brands, each with a number assigned to it, for example, 6 for a Samsung TV. Locate your device and brand in the list that follows:
TV
| 1 Bush 2 Grundig 3 LG 4 Panasonic 5 Philips |
6 Samsung 7 Sharp 8 Sony 9 TCL / Thomson 10 Toshiba |
STB: Sat, Cable, DVB-T
| 1 BSkyB / Sky Ireland / Orange 2 Canal+ / CanalSat / Telefonica /Movistar / KPN 3 TechniSat 4 DStv / Multichoice / Foxtel / Sky New Zealand 5 freebox / Vu+ / Deutsche Telekom /T-Home |
6 Humax / Tricolor TV 7 Vodafone / Kabel Deutschland 8 Sky Italia / SFR / Neuf TV 9 Sky Deutschland / Österreich 10 UPC / Cablecom / Ziggo / Virgin Media / Telenet |
HOW TO SET UP YOUR REMOTE
A – SIMPLESET
To set up your device
- Turn on your device (not on standby) and point the OFA remote towards it.

- The remote will send Power every 3 seconds until your device switches off.
- As soon as your device switches off, release the digit.
- The LED will blink twice and go out. The remote should now operate your device.


- If you find one or more keys do not work as you expect, start again at step 1 – the remote will start with the next code in the memory.
HOW TO SET UP YOUR REMOTE
B – SET UP BY CODE
If your brand is not listed in section A, you can set up your device by trying codes individually.
To do this:
- Turn your device on (not on standby).

- The LED will blink twice and go out.

- If the device turns off, your remote is ready to use. If not, repeat steps 3-7 with the next code in the list.


- Some codes are quite similar. If you find that one or more keys do not operate as you expect, try again from step 3 with the next code in the list.
LEARNING
Your One For All remote control can learn any function from any other working remote control.
This can be useful if you are missing one or more functions from your original remote control and would like to add them to the ONE FOR ALL. You can learn onto any key except MAGIC or MODE.
You can also learn a complete device if you can’t find a code.
To learn, firstly make sure you have all your original remote controls to hand, and that they have working batteries in. To learn functions, the original remote should be approximately 3cm from the OFA remote, pointing towards it as shown below:

The LED under the current device will stay lit.

- The LED will blink twice to indicate the key has been learned correctly.
- Repeat steps 4 and 5 for each key you want to learn – remember you can learn from multiple remotes, but only one function per key.


HINTS
- If the LEDs show one long blink at step 6, the function was not learned correctly, please try again from step 4.
- If you find one or more keys don’t work properly after set up, you can re-enter the learning mode at any time by repeating the procedure from step 1.
TO DELETE A LEARNED FUNCTION, THE PROCEDURE IS:
- Hold down MAGIC until the LED under the device blinks twice.
The LED under the current device will stay lit. - Using the MODE key, make sure the LED for the device you want to delete functions from is lit.
- Press 976 – the LED will blink twice
- Press the key to delete twice – the LED will blink twice.
Repeat the above procedure for each key you want to delete.
ACTIVITIES
The Watch TV feature combines TV and STB into a single-mode. In this mode, the Volume and AV keys will control the TV, and the rest of the keys will control the STB.
As the AV key is intended to select the input on your TV and most TVs use a menu to select from a list of inputs, when the AV key is pressed in Watch TV Mode, the Menu Up, Down, Left, Right and OK keys temporarily control the TV. If the OK key is pressed, or no key is pressed for ten seconds, these keys will revert to controlling the STB.
If you hold down the Power key for 2 seconds in Watch TV Mode, the remote will send the Power function for TV and STB.
THE NETTV FEATURE

Set-Top Boxes to have one or more applications they can run to access TV viewing via the internet. Examples of these would be Netflix, YouTube, Amazon Prime, BBC iPlayer, or similar.
To program the macro, you first need to know the device you use to access the service, and then the sequence of keys you need to press to always bring up the service you prefer, For example, some Panasonic TVs will start Netflix by pressing the Apps key, then Menu Down Twice, and finally the OK key. Or on an Apple TV, the sequence is Menu, Menu Down, and OK.
Once you have determined the sequence for your device, follow these steps:
- Sit in front of your device with It switched on (not on standby)
- Hold down the NETTV key until the LED blinks twice and stays lit
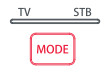
- Use the MODE key to select the device you want to use for the NETTV macro (e.g. TV)
- Now perform the sequence of keys exactly as would normally. The remote will operate your device and the macro is recorded in real-time – so if it normally takes a few seconds for your device to react don’t worry.
- Once you have finished the sequence – and the Streaming Service has started on your device – hold down the NETTV key until the LED blinks twice and goes out. The macro is now stored.
Tips
- Make sure the Evolve Is operating the device in question before programming If you find the Macro doesn’t work as expected, you can just repeat the same sequence to reprogram
- When programming, wait for your device to respond first, the remote will remember the timing
- The NETTV macro is tied to one device, remember to make sure you are watching the correct device.
MACROS
PROGRAM A MACRO
You can program any key on your OFA remote (except MAGIC or MODE) to send multiple commands on a single press –a Macro. This can be useful for controlling multiple devices to put them in a certain state – for instance, you could put your TV on HDMI 1 and press Power on the Set-Top Box to start watching TV.
To program a macro, the procedure is as follows:
The LED under the current device will stay lit.- Next, select the key you want to program the Macro on.
- Repeat steps 4 (if necessary) and 5 to add more keys to the Macro. You can include up to 15 key presses.

- If the LED shows a long blink when you press a key in steps 4 or 5, you have entered too many keys, please try again.
DELETING A MACRO
If you want to remove a macro from a key, please perform the following:
- Press the key the macro is programmed on.
VOLUME LOCK
If you always use one device to control volume, for example, your TV, you can set up the One For All to always control that device, regardless of which device your remote is controlling. To do this:
- Hold down MAGIC until the LED under the device blinks twice. The LED under the current device will stay lit.
- Press 993 – the LED will blink twice.
- Use the MODE key to select the Device you want to lock the Volume to.
- Press MAGIC once – the LED will blink twice and the volume is now locked.
To unlock the volume and set every device back to controlling its own volume, the procedure is:
- Hold down MAGIC until the LED under the TV key blinks twice. The LED under the current mode key will stay lit.
- Press 993 – the LED will blink twice.
- Press VOLUME UP – the LED will blink twice and Volume is now unlocked.
PRODUCT DISPOSAL (EUROPEAN DIRECTIVE 2012/19/EU)

BATTERY DISPOSAL (EUROPEAN DIRECTIVE 2006/66/EC)Please do not dispose of your batteries with your normal household waste, refer to local regulations for the proper collection or disposal. This will help to prevent potential negative effects on the environment and/or human health.
GUARANTEE TERMS AND CONDITIONS UNIVERSAL ELECTRONICS warrants to the original purchaser that this product will be free from defects in materials and workmanship under normal and correct use for a period of two (2) years from the date of original purchase. This product will be repaired or if necessary, replaced free of
charge if it has been proven to be defective within the two(2) year warranty period. The forwarding costs are on the account of the owner; the costs of returning the product are on the account of UNIVERSAL ELECTRONICS.
This warranty does not cover damage or failures caused by products or services not supplied by UNIVERSAL ELECTRONICS, or which result from not mounting the product according to manual instructions. This also applies when the product has been modified/repaired by others than UNIVERSAL ELECTRONICS or if a fault is the result of an accident, misuse, abuse, neglect, mishandling, misapplication, faulty installation, improper maintenance, alteration, modifications, fire, water, lightning, natural disasters, wrong use or carelessness.
To obtain warranty service during the warranty period contact […], and please note that we need your original purchase receipt so that we may establish your eligibility for service. If you have bought this product for purposes that are not related to your trade, business, or profession, you may have legal rights under your national legislation governing the sale of consumer goods. This guarantee does not affect those rights.
www.oneforall.com
Connect with us


Universal Electronics BV
Europe & International
Colosseum 2, 7521 PT Enschede
The Netherlands

URC7125
711733
RDN-1201120