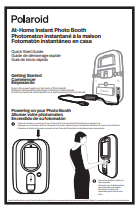
Polaroid 815221021600 At-Home Instant Photo Booth User Manual


This product can expose you to chemicals including Styrene and Benzene, which are known to the State of California to cause birth defects or other reproductive harm.
For more information go to www.P65Warnings.ca.gov
To ensure safe operation of the product, be sure to read this User Manual before use. Keep this User Manual in a safe place for easy reference when needed.
READ BEFORE USING THE PHOTO BOOTH
SAFETY PRECAUTIONS
The following symbols are used in labels on the Photo Booth to draw attention to potentially hazardous situations:

Should only be done by a qualified technician.
- Please read and comprehend all warnings stated in this manual.
- Do not get product wet when cleaning.
- The AC/DC adapter and apparatus shall not be exposed to dripping or splashing and that no object filled with liquids, such as vases, shall be placed on apparatus. The AC/DC adapter is used as disconnect device.The AC/DC adapter of apparatus should not be obstructed OR should be easily accessed during intended used. To completely disconnect the power input, the AC/DC adapter of the apparatus shall be disconnected from the main power outlet.
- If appliance is provided with protective earth terminal, it should be connected to main outlet with a protective earth connection.
- Minimum distances 10 cm / 3.94 inches around the apparatus for sufficient ventilation.
- The ventilation should not be impeded by covering the ventilation openings with items such as newspaper, table-cloths, curtains etc.
- No naked flame sources such as lighted candles should be placed on the apparatus.
- The apparatus should only be used in moderate climates.
FCC STATEMENT
This device complies with Part 15 of the FCC rules. Operation is subject to the following two conditions:
(1) This device may not cause harmful interference, and
(2) this device must accept any interference received, including interference that may cause undesired operation.
Warning: Changes or modifications to this unit not expressly approved by the party responsible for compliance could void the user’s authority to operate the equipment.
This equipment has been tested and found to comply with the limits for a Class B digital device, pursuant to Part 15 of the FCC rules. These limits are designed to provide reasonable protection against harmful interference in a residential installation. This equipment generates, uses, and can radiate radio frequency energy and, if not installed and used in accordance with the instructions, may cause harmful interference to radio communications. However, there is no guarantee that interference will not occur in a particular installation. If this equipment does cause harmful interference to radio or television reception, which can be determined by turning the equipment off and on, the user is encouraged to try to correct the interference by one or more of the following measures:
- Reorient or relocate the receiving antenna.
- Increase the separation between the equipment and the receiver.
- Connect the equipment into an outlet on a circuit different from that to which the receiver is connected.
- Consult the dealer or an experienced radio / TV technician for help.
This device contains licence-exempt transmitter(s)/receiver(s) that comply with Innovation, Science and Economic Development Canada’s licence-exempt RSS(s).
Operation is subject to the following two conditions:
- This device may not cause interference.
- This device must accept any interference, including interference that may cause undesired operation of the device.
WARNING: Tastemakers Asia Limited assumes no liability for improper installation or excessive loads placed on screws or bracket. This wall anchor is not a substitute for proper adult supervision.
IMPORTANT SAFETY INSTRUCTIONS
- Read these Instructions.
- Keep these Instructions.
- Heed all Warnings.
- Follow all Instructions.
- Do not use this apparatus near water.
- Clean only with a dry cloth.
- Do not block any ventilation openings. Install in accordance with the manufacturer’s instructions.
- Do not install near any heat sources such as radiators, heat registers, stoves, or other apparatus (including amplifiers) that produce heat.
- Do not defeat the safety purpose of the polarized or grounding – type plug. A polarized plug has two blades with one wider than the other. A grounding type plug has two blades and a third grounding prong. The wide blade or the third prong are provided for your safety. When the provided plug does not fit into your outlet, consult an electrician for replacement of the obsolete outlet.
- Protect the power cord from being walked on or pinched particularly at plugs, convenience receptacles, and the point where they exit from the apparatus.
- Only use attachments/accessories specified by the manufacturer.
- Unplug this apparatus during lightning storms or when unused for long periods of time.
- Refer all servicing to qualified service personnel. Servicing is required when the apparatus has been damaged in any way, such as power-supply cord or plug is damaged, liquid has been spilled or objects have fallen into the apparatus, the apparatus has been exposed to rain or moisture, does not operate normally, or has been dropped.
- The equipment shall be used at working ambient temperature 32° – 95°F (0° – 35°C).
INSTALLATION
Photo Booth is designed for indoor and personal use only. It must not be installed permanently outdoors. The following conditions must be avoided.
- Direct exposure to sunlight, high humidity, direct water contact, dust, high heat, or extreme cold.
- Vibration. Photo Booth must be installed on a level surface. Do not install in an area such that the Photo Booth would present an obstacle in case of an emergency (i.e., near fire equipment or emergency exits).
Contents Included
- User Manual
- Quick Start Guide
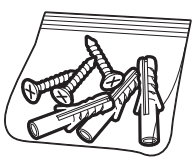
- Mounting Hardware
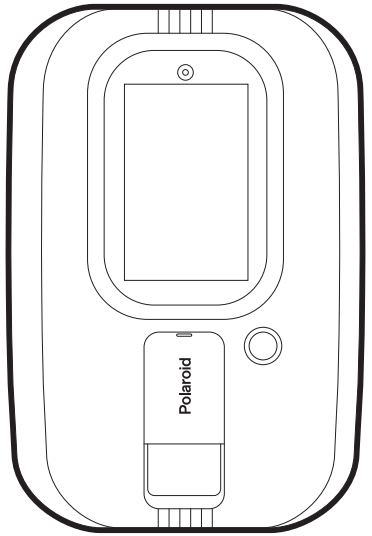
- At-Home Instant Photo Booth
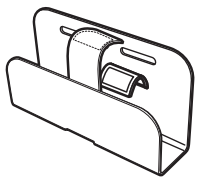
- Wall Bracket
- ZINK® Paper

- Door Mount Set

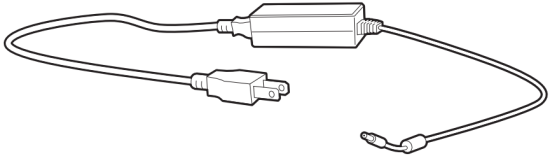
- Power Cord


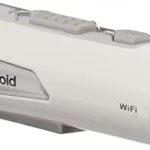
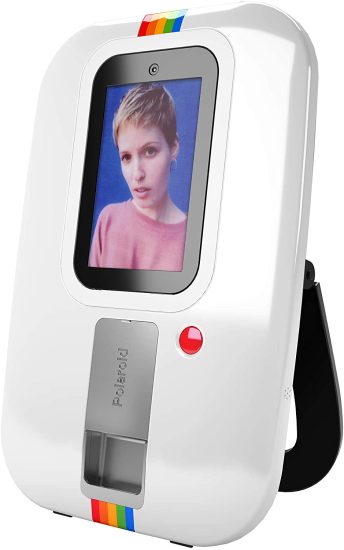
Product Features
Front View

Back View

Mounting Options
Table Top
Always place Photo Booth on level surface to avoid tipping and serious injury or damage

Door Mount
A. Fold Adjustable Stand to the UP position until you hear it lock in place.
B. Attach Adjustable Strap to top of Adjustable Stand and click the buckle closed.
C. Place Door Hook Set over the top of door.

- FAILURE TO FOLLOW THESE INSTRUCTIONS CAN RESULT IN DEATH OR INJURY TO CHILDREN AND ADULTS
- MAKE SURE THE INSERTED BUCKLE CLOSES WITH A “CLICK” SOUND AND THE PRODUCT HANGS FIRMLY ON THE DOOR
- NEVER ALLOW CHILDREN TO CLIMB OR HANG ON PHOTO BOOTH
- NEVER PLACE HEAVY ITEMS ON PHOTO BOOTH
- ADULT ASSEMBLY REQUIRED
Wall Mount
Serious injury can occur if improperly installed

A. Mount Wall Bracket to the wall with included hardware.
B. Fold Adjustable Stand to the UP position until you hear it lock in place.
C. Place Photo Booth on Wall Bracket and secure with the Safety Strap.
ADULT ASSEMBLY REQUIRED

HELPFUL HINT
Use a stud finder to locate stud within the desired area. If stud cannot be found please install other mounting or have installed by a professional.

- READ AND FOLLOW ALL INSTRUCTIONS BEFORE USE SERIOUS INJURY CAN OCCUR IF IMPROPERLY INSTALLED
- INSTALL ONLY IN WOODEN STUD WALLS
- NEVER ALLOW CHILDREN TO HANG OR CLIMB ON PHOTO BOOTH
- ALWAYS INSTALL LOCKING LEVER
WALL MOUNT MUST BE INSTALLED IN A WOODEN STUD; FAILURE TO FOLLOW INSTRUCTIONS COULD RESULT IN SERIOUS INJURY OR DAMAGE TO WALL AND PHOTO BOOTH
Getting Started
Plug in the power supply on the back of Photo Booth.
Manufacturer: Blue Iron Holdings Ltd.
Model: BI65-120400-E2
POWER SUPPLY: AC/DC Adapter
INPUT POWER: AC100-240V, 50/60Hz 2A Max
OUTPUT POWER: DC12.0V — 4.0A
MONITOR: 10” Capacitive Touch Screen
ASSEMBLED DIMENSIONS: 23.75” x 15.75” x 7.5” (60.3 x 40 x 19 cm)
- The AC/DC adapter is used as disconnect device
- The AC/DC adapter of apparatus should not be obstructed OR should be easily accessed during intended used
- To be completely disconnect the power input, the AC/DC adapter of apparatus shall be disconnected from the mains
- For PLUGGABLE EQUIPMENT, the socket-outlet shall be installed near the equipment and shall be easily accessible
- The applied nameplate is located at the back of the product
- Equipment is only suitable for mounting at height ≤ 2 meter

External Battery Pack Holder – Used to hold open market battery packs (sold separately) that support 12 Volt 4.0A.

NOTE: External battery pack minimum requirement is 12 Volt 4.0A
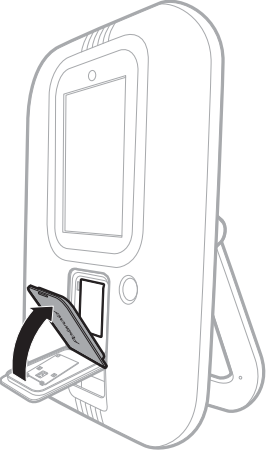
Loading Photo Paper
Load your Polaroid At-Home Photo Booth with 2”x 3” (50 x 76mm) ZINK® Photo paper (included)

NOTE: Polaroid At-Home Instant Photo Booth only holds maximum 10 sheets (one pack) of photo paper at a time.
Excess photo paper could cause your Photo Booth to jam and/or not function properly.
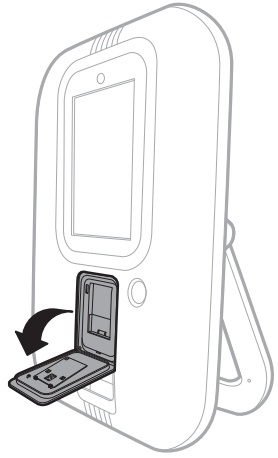
- Lift up on printer door.
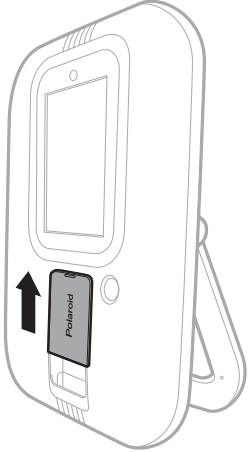
- Pull forward to open.
- Place the photo paper in the printer with the “Blue” barcode calibration paper facing inward.
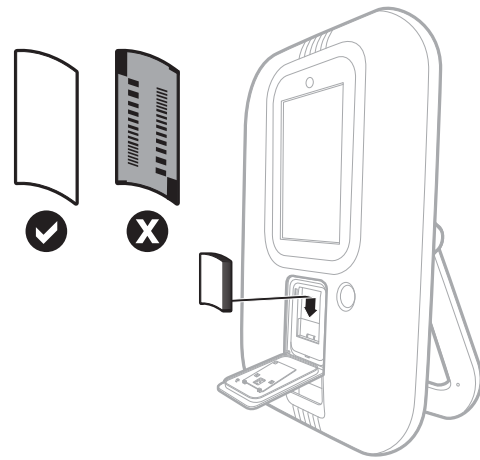
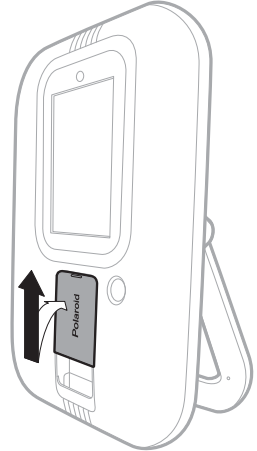
- Hold the photo paper in place and close the printer door
- Slightly lift up on the printer door while pressing inward until the printer door lays flush with the Photo Booth housing.
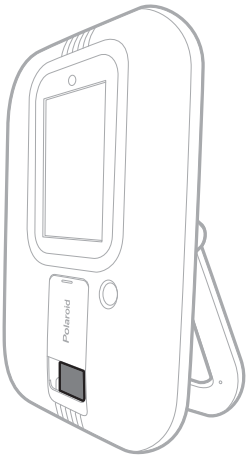
- When printer door is laying flush with the Photo Booth housing, slide downward to lock the door shut.
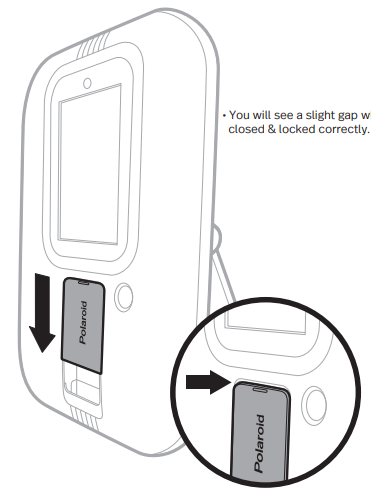
- After the paper is loaded and the door is closed and locked correctly, the “Blue” calibration


NOTE: Failure to lock the door correctly in place will prevent the photos from printing.
Powering on your Photo Booth
- Press the button on the top of your Polaroid At-Home Instant Photo Booth to power it on.
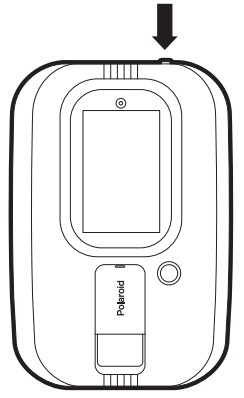
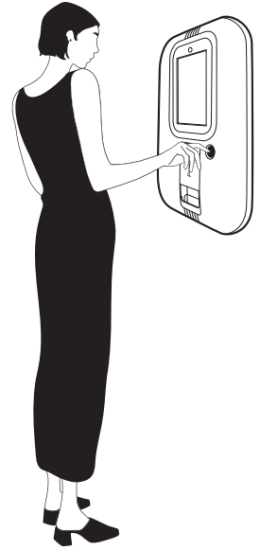
- Press the shutter button to take a photo.


Advanced Setting


When Auto Print is turned ON, Photo Booth will automatically print after several seconds upon taking a picture.
Editing

Quick Share

Share your photo online!

Scan QR code with your smart phone camera to download the photo to your smart phone and share it via your favorite App.
(Older phones may require a QR code reader App.)
Assistance or Service
Before contacting us for assistance or service, please check the “Troubleshooting” section in the User Manual.
If you still have questions regarding your Photo Booth product or require technical support, contact Polaroid At-Home Instant Photo
Booth Customer Service at www.tastemakersllc.com/polaroidsupport
Troubleshooting
| Problem | Possible cause | Solution |
| -Photo Booth will not turn on. | -Power cord is not plugged into wall outlet. -Wires/ Plugs are hooked up incorrectly. -ON/Off button wasn’t pressed on top of unit. |
-Make sure power cord is plugged into the wall outlet and there is power to that outlet. (Plug other electrical equipment into the power outlet to make sure the outlet normally works.) -Make sure all wires/ plugs are properly connected and all the way set in as directed in assembly instructions. -Push ON/OFF button on top of unit to power on. |
| -The Photo Booth screen is frozen. -The screen looks pixelated or there are lines running through the image. |
-The Photo Booth encountered a problem when processing the data. |
-You may need to RESET the Photo Booth. |
| -The printer is not printing. | -The printer may be out of paper. -The printer door may not be closed properly. -The paper was inserted backwards. |
-Check to make sure you have paper in the printer. -Make sure the printer door is closed properly and locked in place by sliding the door downward until you hear a click sound. (Refer to User Manual) |
| -The printer is printing paper, but there is no image on the paper after it has printed. | -The paper may have been placed in backwards. | -Make sure the printing surface is facing forward. The text side of paper should be facing inward. (Refer to User Manual) |
| -The Photo Booth will not connect to the internet. | -The Photo Booth may be located too far away from your wireless router. -Your WIFI on the Photo Booth may be turned off. -You may need to reestablish a new connection to your WIFI router. -You may be entering the wrong password to your WIFI network. |
-Try moving your Photo Booth closer to your WIFI internet router. -Make sure the Photo Booth WIFI is turned on under Network Settings. -Under the Network Settings choose your network name and click “Forget Network” then reestablish a new connection by selecting your network name and entering in your WIFI password again. -Make sure you are using the correct password to your WIFI network. (Always check to make sure your WIFI password works on your other devices.) |
| -The photos that print look too dark. | -You may not have adequate lighting in the environment that you have your Photo Booth set up. -Your photo paper wasn’t calibrated when you loaded the new paper. |
-Try moving the Photo Booth to a well lit room. -Make sure to use the blue calibration paper when loading new paper in your Photo Booth. (See User Manual) |
| -After each photo my Photo Booth automatically prints. | -This is a feature to the Photo Booth that is found under the Settings Menu. | -If you would like to turn this feature OFF, click on the Settings Menu and unselect the Auto Print feature. |
| -The on screen User Interface does not match the instructions in my user manual. | -After a software update some of the icons and features may have changed to enrich the user experience. | -Visit www.tastemakersllc.com/polaroidusermanual for a list of the most recent features and user interface. |
| -My Photo Booth is not functioning correctly. | -Vous devrez peut-être mettre à jour votre logiciel. | -Click on the Settings tab on your Photo Booth to check for software updates. |
| -My photos appear out of focus. | -Your Photo Booth has an auto focus feature and it is picking up surrounding objects. | -Try centering yourself in the middle of the screen to maintain a strong focus on your face/ faces. |
Stay Up To Date
Important note to user:
We are constantly updating our product functionality and features to increase performance for the best possible user experience. Always check for software updates under the Settings tab to download the latest software to get the most from your Polaroid At-Home Instant Photo Booth.
NOTE: Software updates may add, rearrange or update different features and icons to the user interface that you will not find in this printed User Manual. To stay up to date on the most recent features and user interface always view the latest USER MANUAL by visiting our website at www.tastemakersllc.com/polaroidusermanual.
User Manual Quick Link
Scan QR code below with your smart phone camera and follow on screen prompts to view the latest Photo Booth User Manual for a full list of the
most recent features or visit www.tastemakersllc.com/polaroidusermanual

Have questions? We’ve got answers.
Visit us at
tastemakersllc.com/polaroid
If you have questions regarding your product or require technical support, contact Polaroid At-Home Instant Photo Booth Customer Service at www.tastemakersllc.com/polaroidsupport