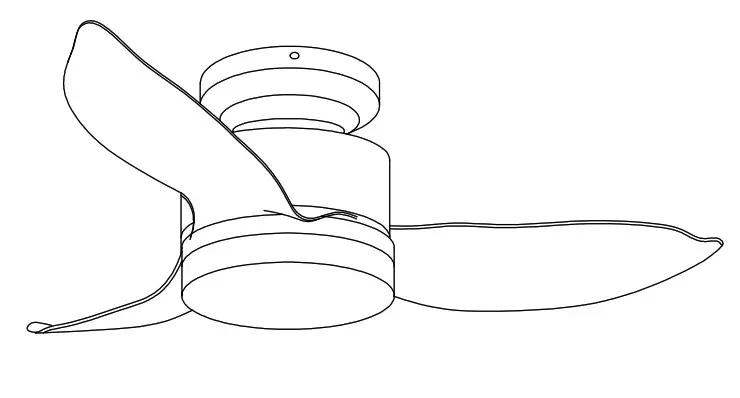
CEILING FAN INSTRUCTION MANUAL


Safety Instructions
- In order to reduce the occurrence of electric shock, the supply line is connected between the fan and must be installed an all-pole Disconnect switch, (switch contacts opening distance requirements played a 3mm). If you lack electrical knowledge, bo sure Please hold “electrician card” professional install it for you.
- To avoid electrical shock hazard, ceiling fan installation, removal before you turn off the power first, will be installed Shall be ground, FireWire, zero line order of installation, disassembly must be disassembled to the zero lines, the line of fire, earth order.
- In order to reduce electric shock or from accidents. do not use non-local governor or switch product requirements
- When a ceiling fan installation, you must determine the various parts of screws securely latched.
- Rotating ceiling fan, the blades should not touch any object to avoid danger.
- Select the appropriate location to install a ceiling fan, ceiling fan blade away from the ground should Above 2.3 meters or more Prevent accidental blade collision accidents.
- To change the fan rotation direction. please turn off and wait for the blades to stop turning after the adjustment reversing switch.
- The power of this machine is 120V/60Hz, maximum motor power of 60W (specifications of different models of ceiling fans, which Motor power will be different), each light source lamp maximum 40w.
- About how to install a ceiling fan and connect the power, please read the fan assembly procedures carefully.
- Do not clean the ceiling fan blades and clean water or detergent directly, use a dry cloth or slightly damp cloth to wipe In addition to dust. Before cleaning the ceiling fans, the ceiling fan must be disconnected from the power switch.
Tools Needed
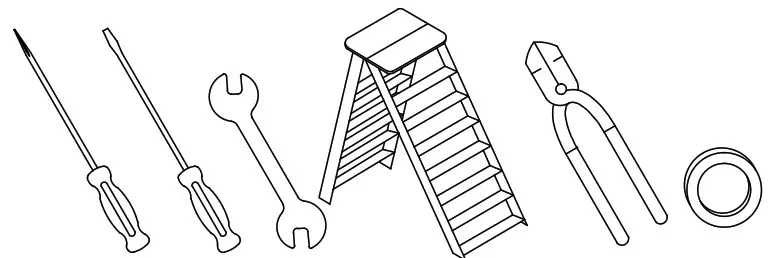
*Phillips Screwdriver
*Blade Screwdriver
*Adjustable Pliers or Wrench
*Step Ladder
*Wire Cutter
*Electrical Tape
1. Tools ready
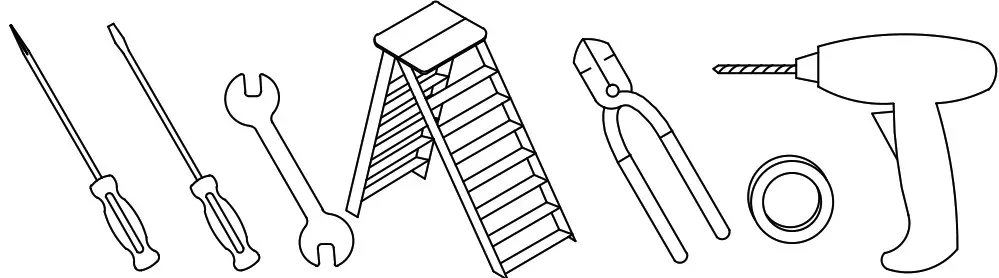
- Phillips screwdriver
- Blade screwdriver
- Adjustable pliers or wrench
- Step ladder
- Wirecutter
- Electrical tape
- Impact drill
2. Parts inspection
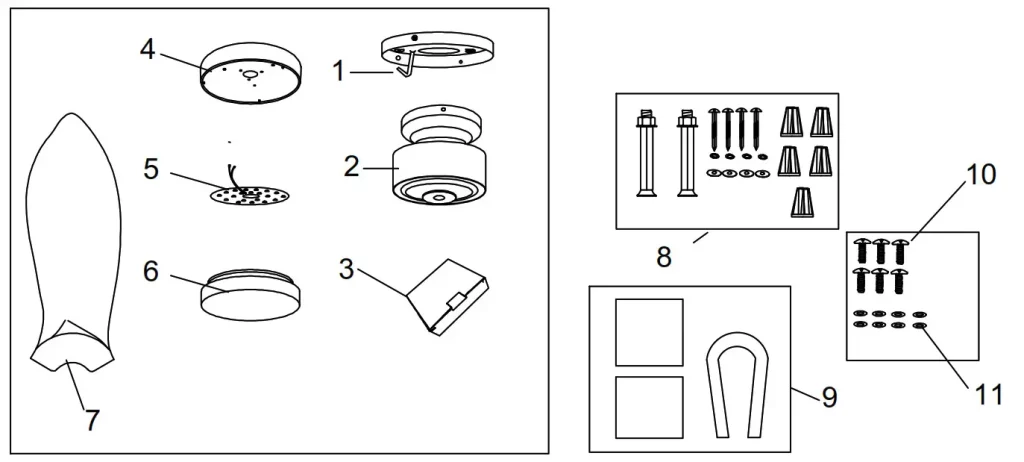
| NO. | Name | Quantity | NO. | Name | Quantity |
| 1 | Hanging board | 1 | 11 | Shim | 6 |
| 2 | Motor body | 1 | |||
| 3 | Remote control | 1 | |||
| 4 | Inner lamp holder | 1 | |||
| 5 | Led light | 1 | |||
| 6 | Lamp cover | 1 | |||
| 7 | Blades | 3 | |||
| 8 | Expansion screws | 1 | |||
| 9 | Balance package | 1 | |||
| 10 | Blade screw | 6 |
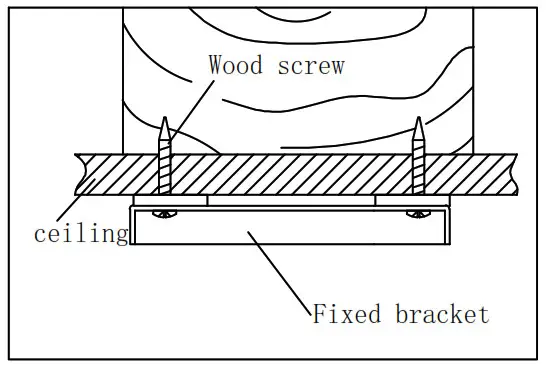
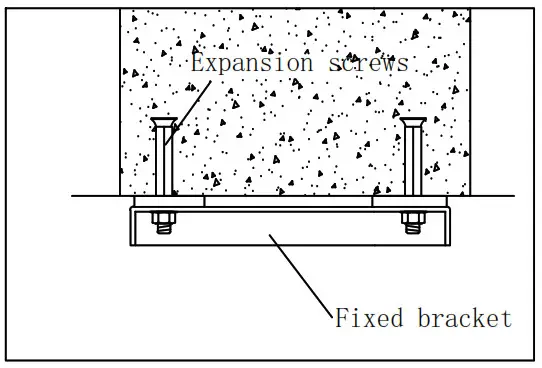
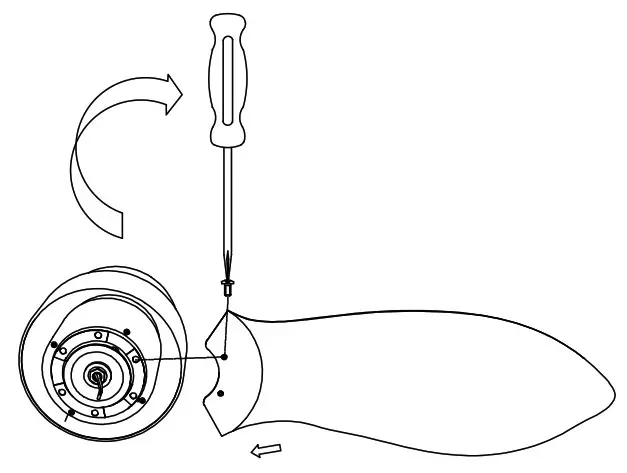
3. Install the hanger
1) Wooden ceiling wood with a wood screwdriver in the wood or “Aberdeen” will be fixed on the lifting tight.
2) In the concrete ceiling, first with a length of the expansion screw, and then use expansion screws with the hanger bracket fixed to the ceiling.
4. Install the lamps
1) The other two blades are also fixed on the blade frame.
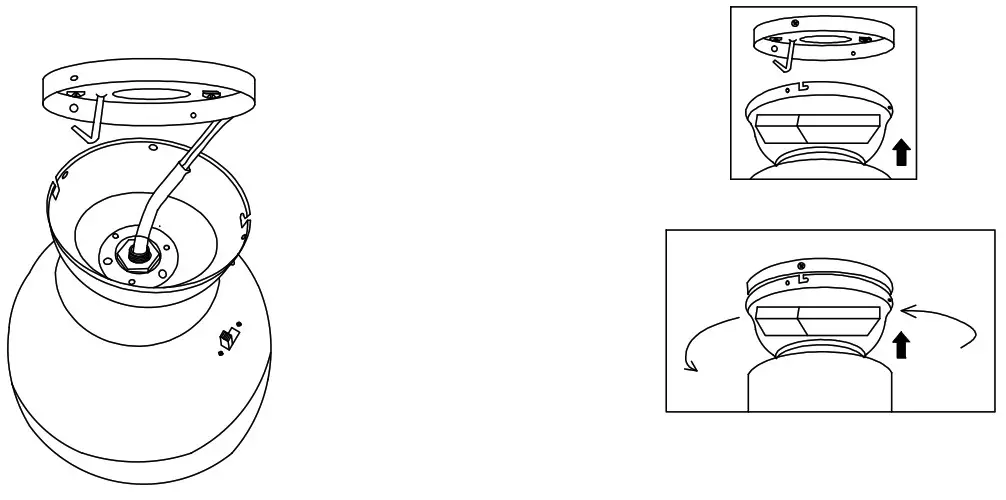
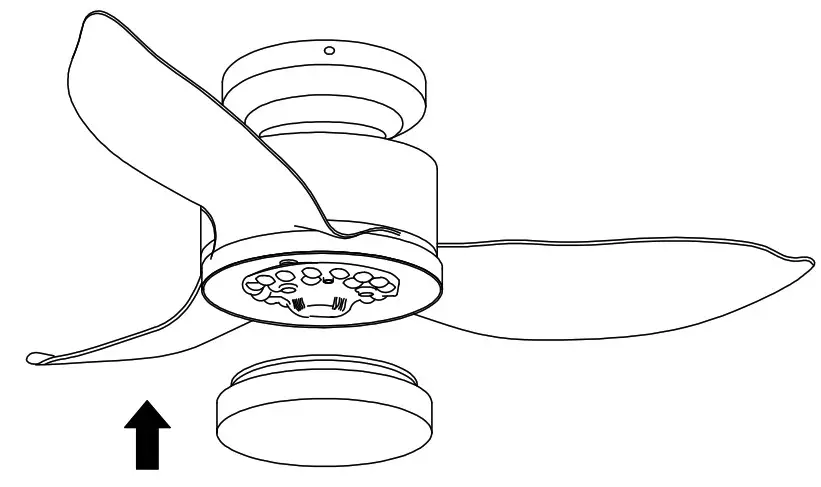
5. Fixed ceiling fan
1) Hang the installed main engine on the pre-locked hanging plate (note. The hook of the hanging disc passes through an oval hole on the bell from the inside to the outside, and then connect the wires of the remote controller according to the wiring mode, take off the main machine, let the L-shaped symmetry of the belt clip into the reserved screws, turn the main body to make the screw holes on the other side right, and then lock the four screws with a screwdriver.
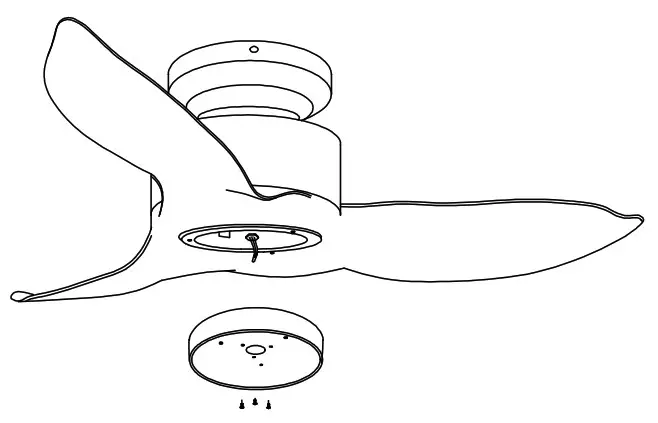
6. Install the lamp panel light source
1) First remove the screws on the junction box of the host machine, and then align the hole position of the lamp panel with the hole position of the screws removed from the junction box, and lock it with screws.
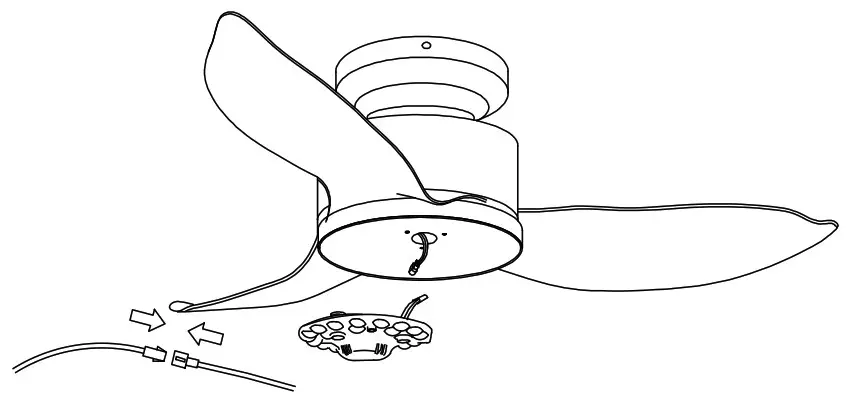
2) Connect the lead of LED light source and the light wire of the host with terminals.
3) Then attach the light source to the lamp panel
4) Turn the glass lampshade into the lamp panel and install the lamp.
7. Installation height
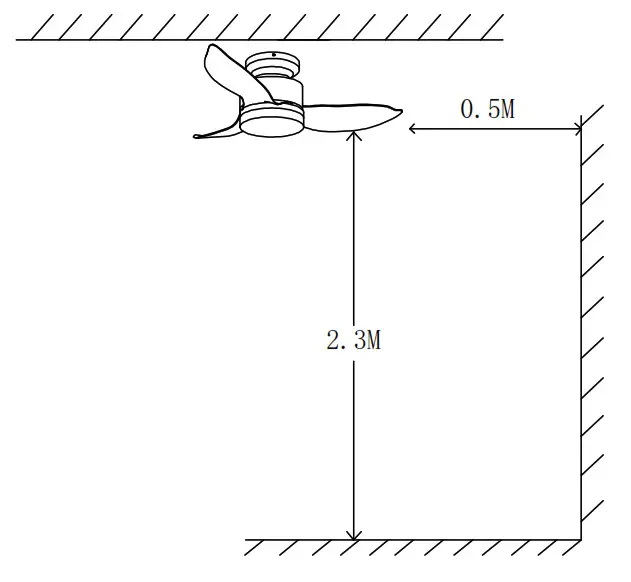
The height of fan leaves from the ground shall not be less than 2.3m Not less than 0.5m away from the wall
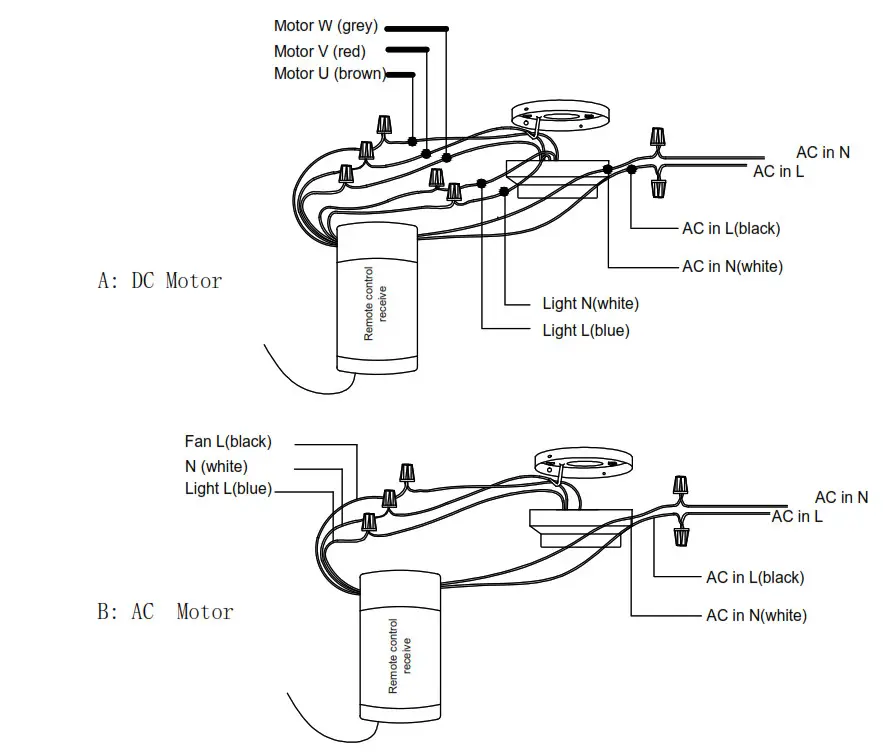
8. Connect the power cord
9. The balance adjustment of the fan Fan is installed, if it shakes up and down, please check the screws in blades, download, and the lamp kit if they are fixed, if not, please fix it with a screwdriver. If it still shakes, please use the balancing kit stools and check the instruction of the balancing kit inside the carton.
Warm Tips: the Maintenance of Ceiling Fans
- Because the ceiling fan always runs, please check regularly whether the hanger, fan blade, leaf rack, and other parts are loose, if not, please fasten it in time to ensure it run safely.
- Keep ceiling fans clean regularly. Only use a soft brush or a lint-free cloth to clean it gently. Do not use a damp cloth or another destructive cleaner.
- Don’t add lubricating oil or lubricant to any part of this product.