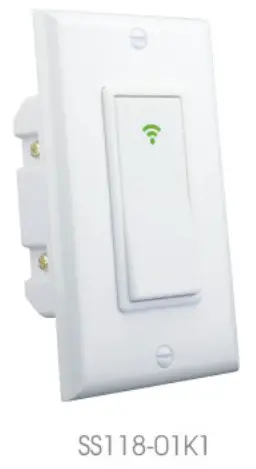
In-Wall Smart Switch
User Manual
Power Supply: AC 100~240V
Rated Frequency: 50/60HZ
Max. Current: 10A/240V/gang
Max. Power: 800W/gang
Wifi: IEEE 802.11 b/g/n
Wireless Standard: WiFi 2.4GHz
App Support: iOS/Android
 Input voltage: AC 100-240V
Maximum current: 10A/ 240V/gang
Transmission power: <2 mw;
Load power: <800W
Since the power consumption: <0.5W
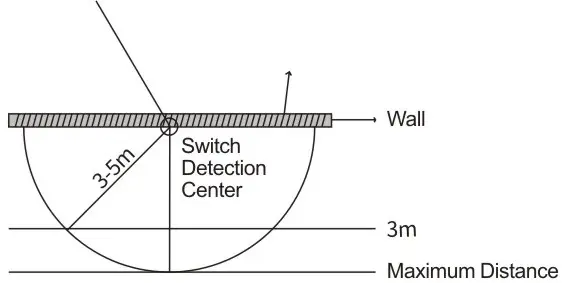
Detection Angle: 180°
Detection range: 3-5 m.
Delay time: 30 seconds
Light induction degree: 8 + 3 LUX
Small night light power: 2W Warm color light
Wifi: IEEE 802.11 b/g/n
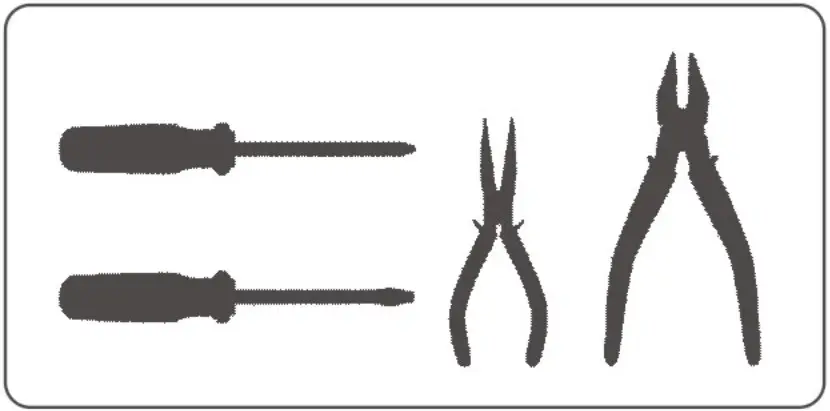
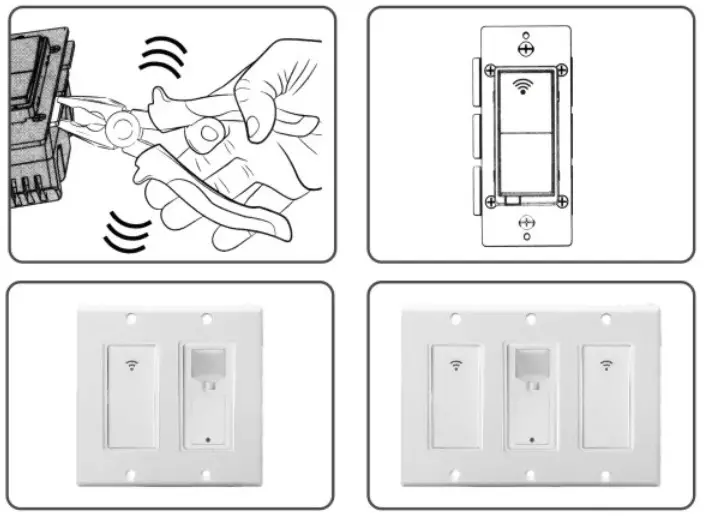
Tools You Will Need
IMPORTANT
The fixture controlled by the wifi in-wall smart switch must not exceed 960 watts (incandescent); 800w (10A) Resistive or hp motor. The switch is designed only for use with permanently installed fixtures.
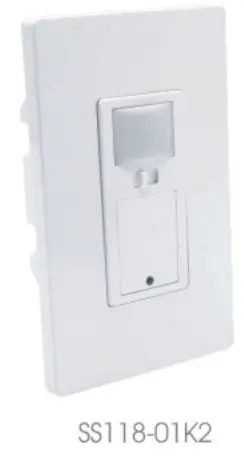
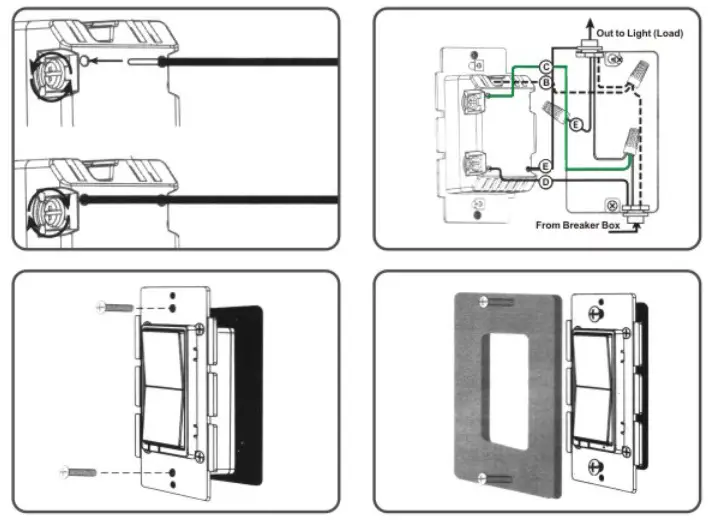
Switch key and wiring position description.
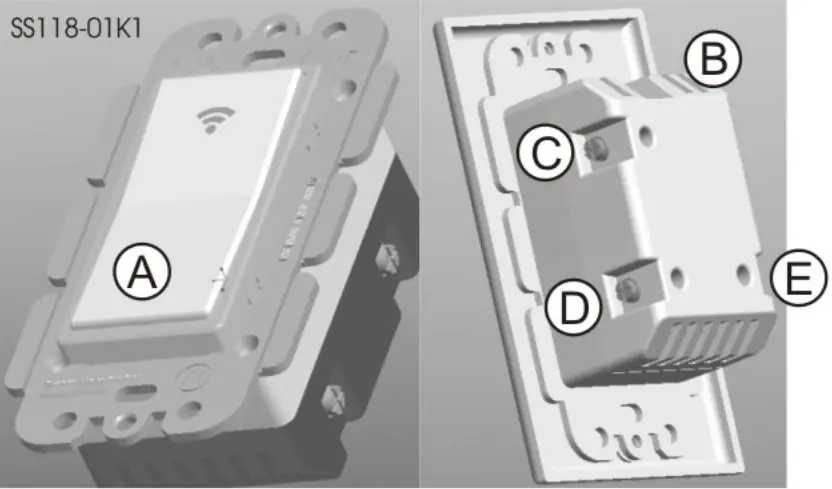
A. Switch button
- Press/release to tum the switch on/off
- Reset the light switch: Press any key of the device for 20
seconds till light flashes, which indicates a successful reset
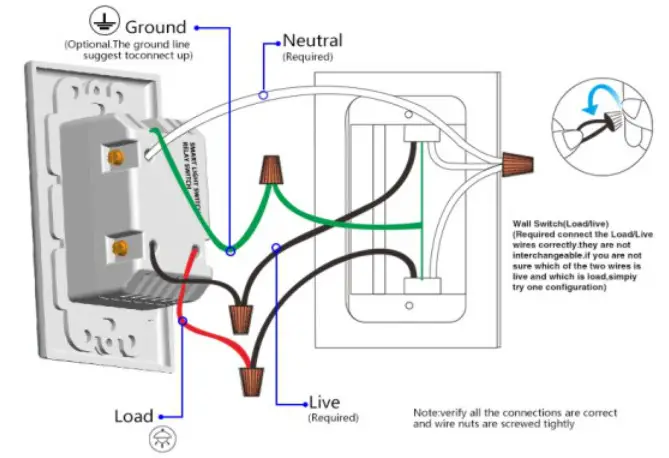
B. Ground wire (green/bare)
C. Neutral wire (white)
D. Live wire (black)
E. Load wire (black)
- US Smart switch indicator description
1. When the wifi signal is in red, it means the switch is on.
2. When the wifi signal is in the blue light, it means the switch is in the off standby state.
3. When the wifi signal light is flashing green, the switch is in the state of fast distribution. Follow the instructions.
4. When the wifi signal light is flashing green slowly, the switch is in the AP distribution network state, and the operation is prompted according to the instructions;
5. When the wifi signal light is steady green, the switch cannot connect to the network. Please check the router network. - Night light sensor smart switch button description
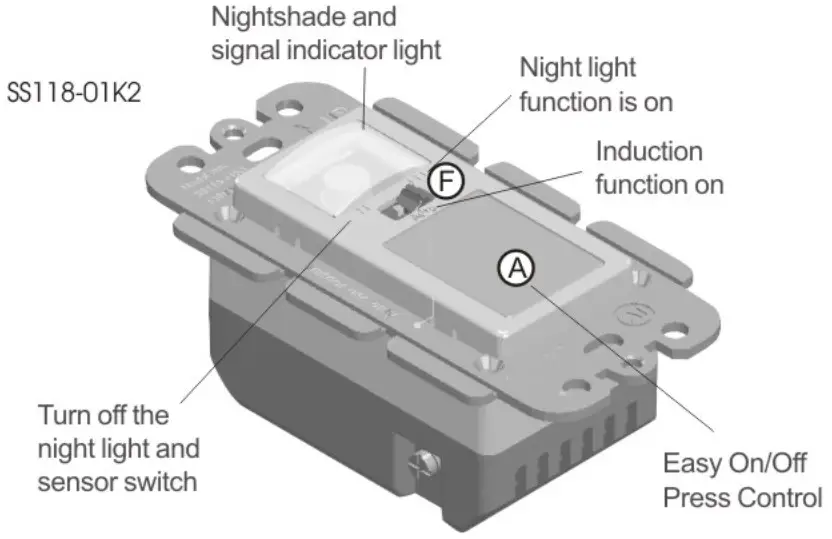 Function button description:
1. Astands for the button switch, press/release to turn the switch on/off
1.1 Rest the light switch :press any key of the device for 20 seconds till light flashes, which indicates a successful reset
2. F stands for the function switch,
2.1 When the F toggle switch is OFF, turn off the sensor switch function and the night light function, and retain the function of the smart button switch.
2.2 When the F toggle switch is in Auto, turn on the sensor switch function, turn off the night light function, and retain the smart button switch function;
(1) When the F toggle switch is in Auto, the light is automatically turned on when the human body passes near the switch about 3 meters, no manual switch is required.
(2) When the F toggle switch is in Auto, the light is automatically turned off when no human movement is detected for 30 seconds.
(3) When the switch is in a bright environment, the luminaire is automatically turned off and the auto-sensing function is turned off.
3. When the F toggle switch is in the LED, turn off the sensor switch function, turn on the night light function, and keep the smart button switch function.
(1) When the F toggle switch is in the LED, the night light will automatically turn on when the room light is dark.
(2) When the F toggle switch is in the LED, the night light will automatically turn off when the room light is bright.
4.Description of the night light sensor Smart switch indicator. See the same above (2.1)
Note:
1. When the switch senses light, the sensing function is automatically turned off.
2. Switch is in standby state, blue light is not bright.
Calculate the actual horizontal detection distance method
Note: The horizontal installation is up to 180°, designed to prevent the detection switch from detecting the space above the ceiling.
- The side angle of the sheet metal can be disassembled, Can be combined 2gang, 3gang.
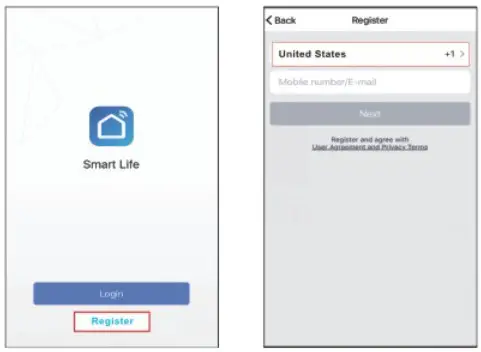
Switch wiring installation
Warning-shock hazard
Turn off the power to the branch circuit for the switch and lighting fixture at the service panel. All wiring connections must be made after power down to avoid personal injury and / or damage to the switch. This device is intended for installation in accordance with the national electric code and local regulations in the United States, or Canadian electrical code and local regulations in Canada. If you are unsure or uncomfortable about performing this installation, consult a qualified electrician.
Multi-switch wiring
For 3-way installation, please refer to add-on manual single switch wiring before you start: you may wish to change the paddle color to match your wall plate or decore. please proceed to section 5.
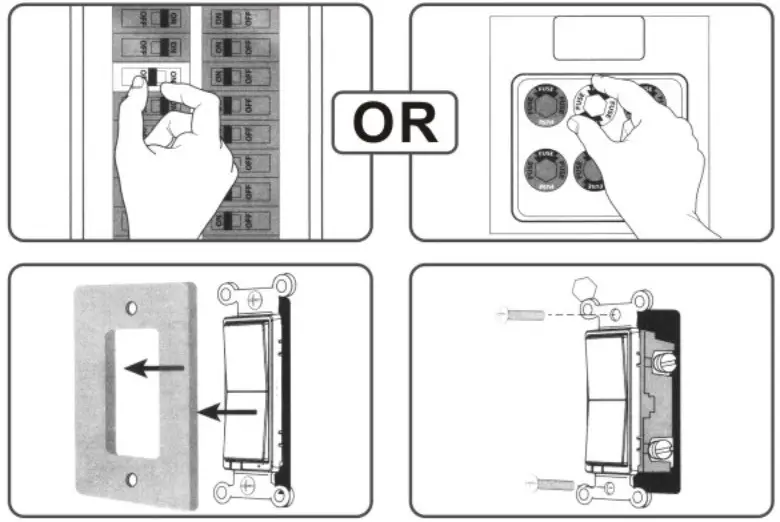
- Shut off the circuit power at circuit breaker or fuse box (IMPORTANT!!! Make sure the power is OFF to switch box before continuing.)
- Remove wall plate
- Remove the switch mounting screws
- Carefully remove the switch from the switch box.
DO NOT disconnect the wires. - There are up to five screw terminals on the switch.
These are marked
A. Switch button
- Press/release to tum the switch on/off
- Reset the light switch : Press any key of the device for 20 seconds till light flashes which indicates a successful reset
B. Ground wire (green/bare)
C. Neutral wire (white)
D. Live wire (black)
E. Load wire (black)
Installation Instruction
Easy to install,better to operate by a licensed electrician
 Simplified steps to install the App on your smart device and pair with Amazon Alexa, Google Assistant and IFTTT using Smart Life App on Apple Store/Google Play Store. Compatible with any smart phone or tablet including both Android and iOS systems.
- Download Smart Life from iOS APP Store or
 .
.
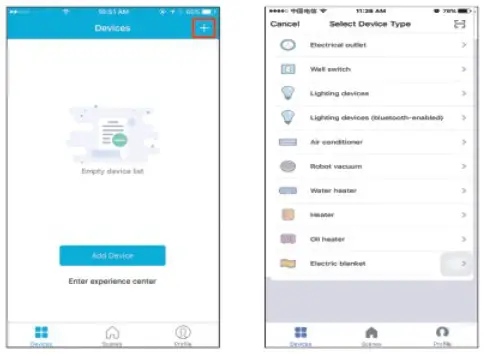
Download or scan the QR code and install the Smart Life App for either iOS or Android.
Once downloaded, the app will ask you to register your device. Enter your phone number or email which ever one makes you feel comfortable and select the country you live in. If phone number selected you will receive a text with If you choose email you will needed if email method then create a password. 6 chosen.

Attention: There’s no a registration code. Registration code
 Attention: there’re two modes for configurabions(Quick Mode/AP Mode) available for you to choose before adding the device to your App. Quick Mode is recommended.
Quick Mode Configuration (Common)
- Make sure quick mode configuration is initiated: the indicator light blinks blue rapidly (twice per second). If it blinks blue slowly (once every 3
seconds), press and hold the power button on your Smart Switch for 20 seconds until the indicator light blinks rapidly. - Tap the icon “+” on the top right corner of choose your device type and enter “Add Device”
- Follow the in-app instructions to connect the Smart Switch to your Wi-Fi network.
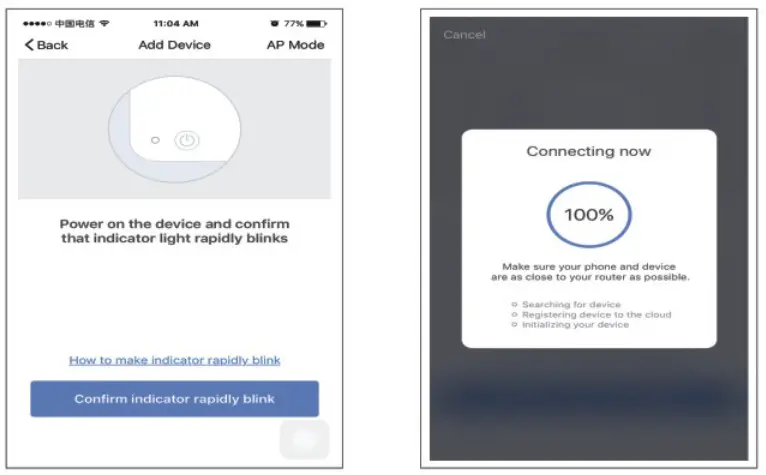
- Once connected, the App will prompt the connection, and click “Done”.
- Now you can control the smart switch through Smart Life App.
- Once the configuration is completed successfully, the indicator light will turn to solid red and the device will be added to the “Device List”.
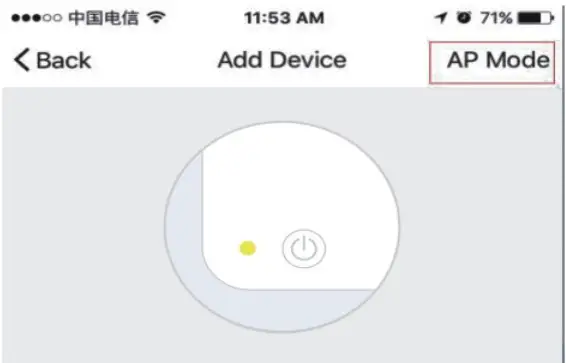
AP Mode Configuration
- Make sure AP mode configuration is initiated: the indicator light blinks blue slowly (once every 3 seconds). If it blinks blue rapidly (twice per second), press and hold the power button on you Smart Switch for 20 seconds until the indicator light blinks slowly.
- Tap the icon “+” at the top right corner of “Start your smart life” tab and then click “AP Mode’ at the top right corner of “Add Device” tab to add device.
 Power on the device and confirm that indicator light slowly blinks How to make indicator slowly blink Confirm indicator slowly blink
Indicator light is in other status - Follow the in-app instructions to connect the Smart Switch to your Wi-Fi network.

- Once connected, the App will prompt the connection, and click “Done”.
- Now you can control your Smart Switch through Smart Life APP.
- Once the configuration is completed successfully, the indicator light will turn to solid red and the device will be added to the “Device List”.
Please note: you can add the Smart Switch to Echo/Google Home following this instructions below, or one on the App (Open Smart Life App, go to “Profile” – > “Integration” ,tap”Amazon Echo”or”Google Home’and install).
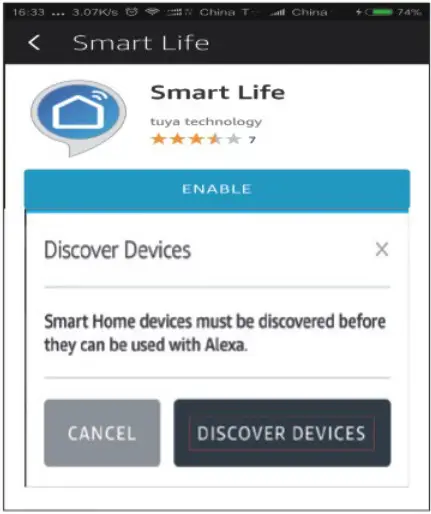
How to connect your Smart Switch to Amazon Alexa
- Launch Smart Life App, sign in your account and make sure your Smart Switch is in your device list.
- Name each device, such as living room light or bedroom light, so that Alexa can easily recognize them.
- Minimize Smart Life App, then launch the Alexa App and sign in your Alexa account and make sure you have at least one Alexa voice-controlled device installed like Echo, Echo dot, etc.
- In the upper left corner of Home page, click
 button to show App menu. Then clicks
  in the menu.
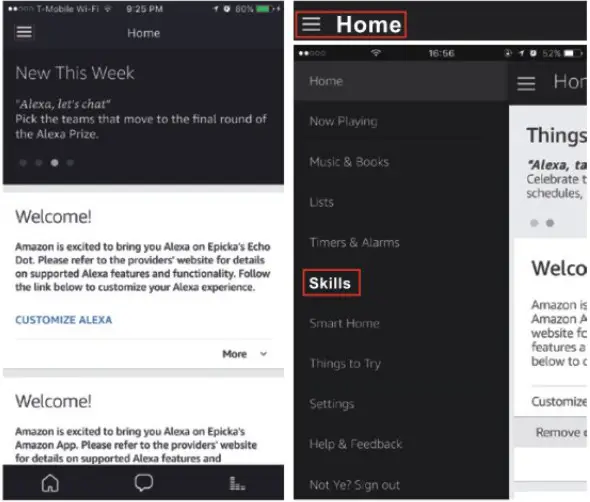
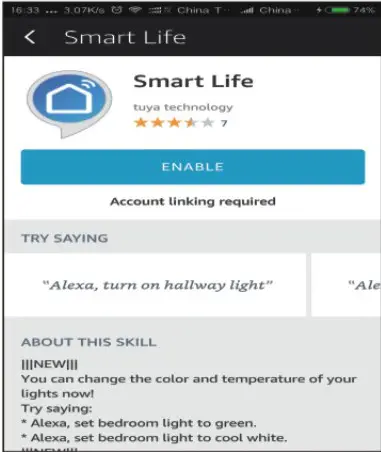
- Type in “Smart Life” in the search and click the search button.

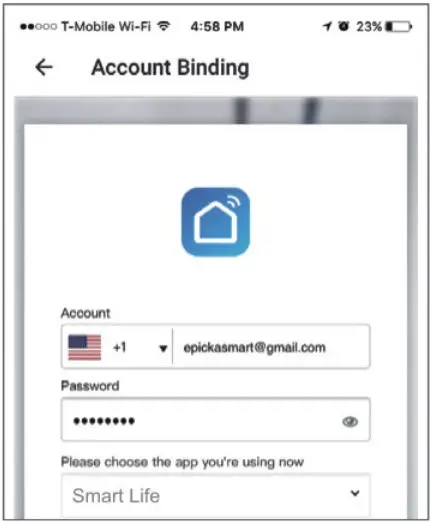
- Enable Smart Life, then sign in your Smart Life account to complete the account linking.
- After successful account linking, ask Alexa to discover devices. After a 20-second device discovery, Alexa will show all the discovered devices.
- Back to Menu by clicking
 button, and then click
  button.
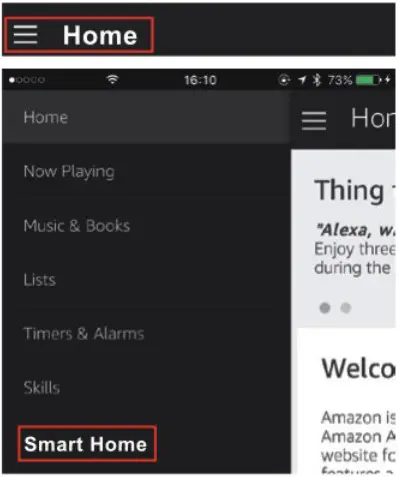
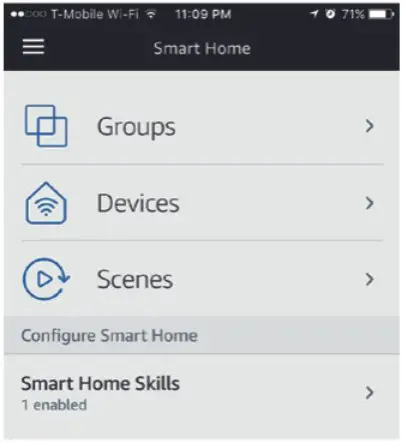
- In Smart Home page, you can group your devices for different categories. Your Smart Life APP has been skilled with Alexa. Now you can control your Smart Switch via Alexa.
How to connect you Smart Switch to Google Home
- Launch the Google Home App and make sure Google Home speaker is installed. If not,please follow the Google Home Speaker installation to install it first.
- Once Google Home is installed, in the upper left corner of App Home page, click
 button to show App menu. Then clicks “Home Control” in the menu.
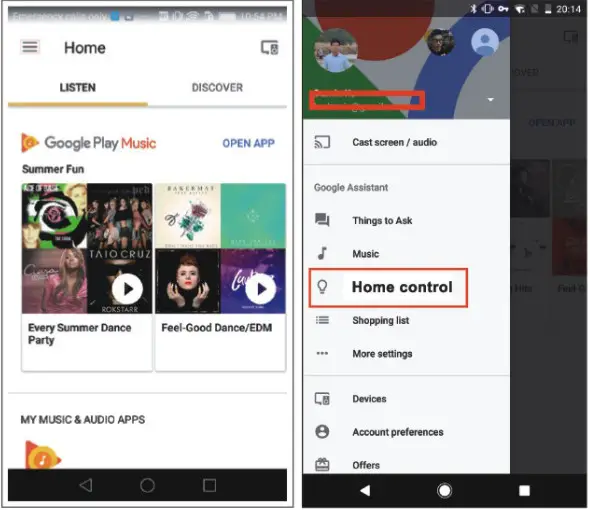
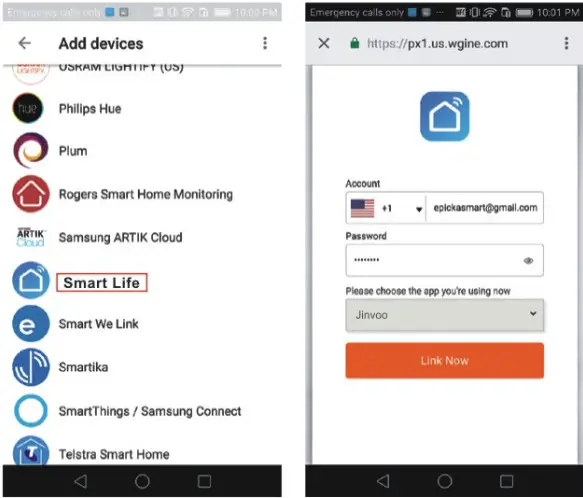
- On “Add devices” page, scroll down to find “Smart Life” and then click it. Sign in Smart Life App with your Smart Life App account and password choose Smart Life App in the dropdown menu to complete the account linking.
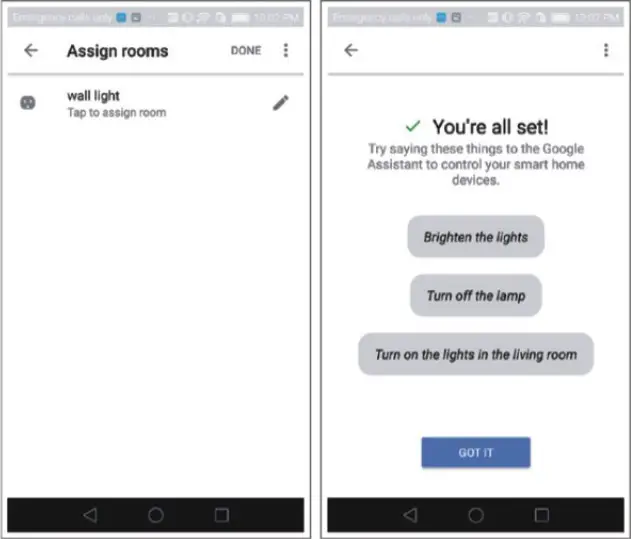
- After successful account linking, in Google Home App you can see all the smart devices from your Smart Life App account. You can assign rooms for each device.
- Now you can use Google Home to control your smart devices, you can Say like:
Ok Google, turn on/off wall light
Ok Google, set bedroom light to red
 5.1 Command the Device through Your Voice
After complete the above operations, you can control the device via Google Home.
Firstly, you need to say “Ok Google, talk to Smart Life” to wake up theSmart Life. Then you can control devices by instructions like these:
 Turn on Smart Switch
Turn off Smart Switch
Attention: after Smart Life has been waken up. you can say “Cancel” or “Stop” to exit Smart Life or say “nothing” when you hear “What can | do for you”. Then says again “Ok Google, tale to Smart Life’to start voice control.
IF TTT – Setup and Usage
Get Started: How to connect Smart product to IFTTT?
Step 1.
Visit the IF TTT official website on your PC and sign in with your IFTTT account.
Note: You can also use IFTTT app and follow similar steps to connect your device to the IFTTT. In this FAO we take the website setting methed for example.
Step 2.
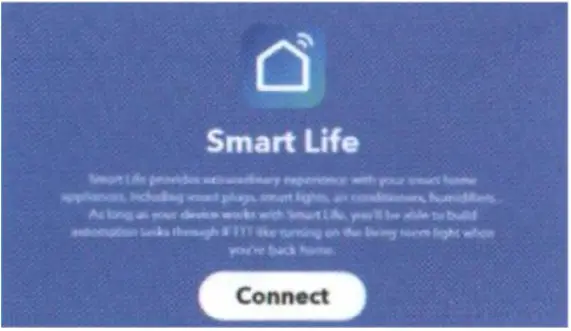
“Search” for “Smart Life’, and then click “Smart Life” service.
Step 3.
Click “Connect”, then login your Smart Life ID and then tap
“Link Now”.
 Step 4.
Successfully connect your IFTTT account to your Smart Life ID. You are ready to enjoy the IFTTT service of products now.
Instructions: 2 methods to use IFTTT with Smart products.
Method 1: On Smart Life swrvice page. choose an existing Applet you need, turn on it and then finish the configuration.
Method 2: Create a new Applet on your own.
Click “My Applets” at the top and then click “New Applet” at theright top corner of the webpage to create a new Applet.
Step 1. Create a Trigger.
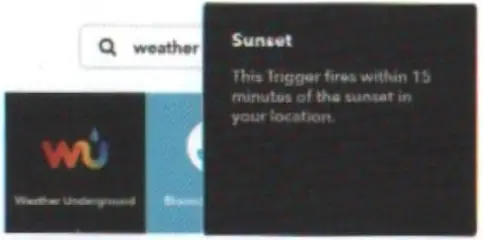
Tap “this” to choose a Trigger, You can search for “Weather Underground” to choose a Trigger.
We select “Sunset” Q weather as the Trigger.
 Step 2. Create an Action.
Tap “this” to choose a Action, You can search for”smart life” to choose a Smart Life Action.
We select “Turn on”
Light Switch as the Action in this case. 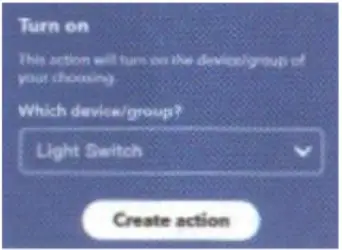 Step 3.
New Applet “If sunset, then turn on Light Switch” is created as a resuit.
Note: The Smart Life service can only works when create an action. You can’t use the “Smart Life” as a Trigger.
Troubleshooting and FAQ
- What devices can I control with the Smart Switch?
You can control lights, in accordance with the Smart Switch specifications. - What should I do when I cannot turn Smart Switch on or off ?
• Make sure your mobile devices and the Smart Switch are connected to the same Wi-Fi network.
• Make sure the devices connected to the Smart Switch are turned on. - What should I do when device configuration process has failed?
You could:
• Check whether the Smart Switch is powered on or not.
• Check whether your mobile device is connected to
2.4GHz Wi-Fi network.
• Check your network connectivity. Make sure the router is working properly:
* If the router is dual-band router, select 2.4G network and then add Smart Switch.
* Enable the router’s broadcasting function.
* Configure the encryption method as WPA2-PSK and authorization type as AES, or set both as auto.
* Wireless mode cannot be 11n only.
* Check for Wi-Fi interference or relocate the Smart Switch to another location within the signal range.
* Check whether the router’s connected devices reach the amount limit. Please try to turn off some devices’ Wi-Fi function and configure Smart Switch again.
* Check if router’s wireless MAC filtering function is enabled. Remove the device from filter list and make sure the router is not prohibiting Mini Smart Switch from connection.• Make sure the password of your Wi-Fi network entered in App is correct when adding Smart Switch.
• Make sure the Smart Switch is ready for App-Config: the indicator light is quickly blinking blue (twice per second) for Quick mode configuration, slow blinking blue (once every 3 seconds) for AP mode configuration.
• Repeat the App-Config process.
• Factory reset the Smart Switch and try to add it again.Sensing function common problems and solutionsMalfunction The reason Solution Proximity sensor light is not bright 1.Light sense control chip is on
2.Bad bulb
3.Dial power is off1.Keep the device in the dark
2.Change bulb
3.Dial the power supply to the AUTO positionInduction lamp does not go out Continuous sensing signal in the detection area Stop moving in front of the switch Induction light is on when there is no signal There is a positional movement signal (moving behind the wall, moving small objects. etc.) Check the surrounding environment There is a moving signal but the sensor light is not lit The detection area is too mall or the light sensitivity is weak Check the detection area and photosensitivity environment