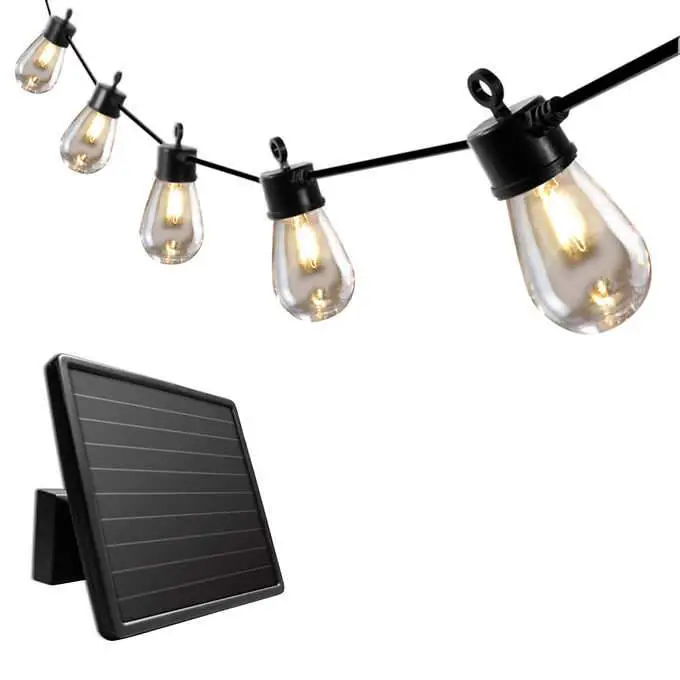
SUNFORCE 80033 Solar String Lights with Remote Control

SUNFORCE 80033 Solar String Lights with Remote Control
WARNING
Prior to hanging the bulbs, make sure they do not rest upon any hot surface or where they could become damaged. If you are charging the batteries without attaching the bulbs, keep the bulbs in the retail box or safely store them indoors to prevent any potential damage.
CAUTIONS: SAFETY INFORMATION
- Your solar string lights are not a toy. Keep them out of reach of small children.
- Your solar string lights and solar panel are both fully weather-resistant.
- The solar panel must be mounted outdoors to maximize sun exposure.
- Prior to installation, lay out all components and check against the parts list section of this manual.
- Never look directly into the solar string lights.
- Do not hang any other objects on the solar string lights.
- Do not cut the wire or make any wiring changes to the solar string lights.
CAUTIONS: BATTERY INSTRUCTIONS
- WARNING – KEEP BATTERIES OUT OF REACH OF CHILDREN.
- Always purchase the correct size and grade of battery most suitable for the intended use.
- Always replace the whole set of batteries at one time, taking care not to mix old and new ones, or batteries of different types.
- Clean the battery contacts and also those of the device prior to the battery installation.
- Ensure the batteries are installed correctly with regard to polarity(+ and -).
- Remove batteries from equipment which are not to be used for an extended period of time.
- Remove any defective or ‘dead’ batteries immediately and replace.
For recycling and disposal of batteries to protect the environment, please check the internet or your local phone directory for local recycling centers and/or follow local government regulations.
PROOUCT FEATURES
- Vintage looking Edison LED light bulbs (E26 base)
- Integrated mounting loops
- Solar battery charging
- Remote control included
- 10.67 m / 35 ft total cable length
- 3V, 0.3W LED replaceable bulbs
PRE-INSTALLATION
- The solar string lights are shipped with the batteries pre-installed. Before starting any installation, test the bulbs for illumination.
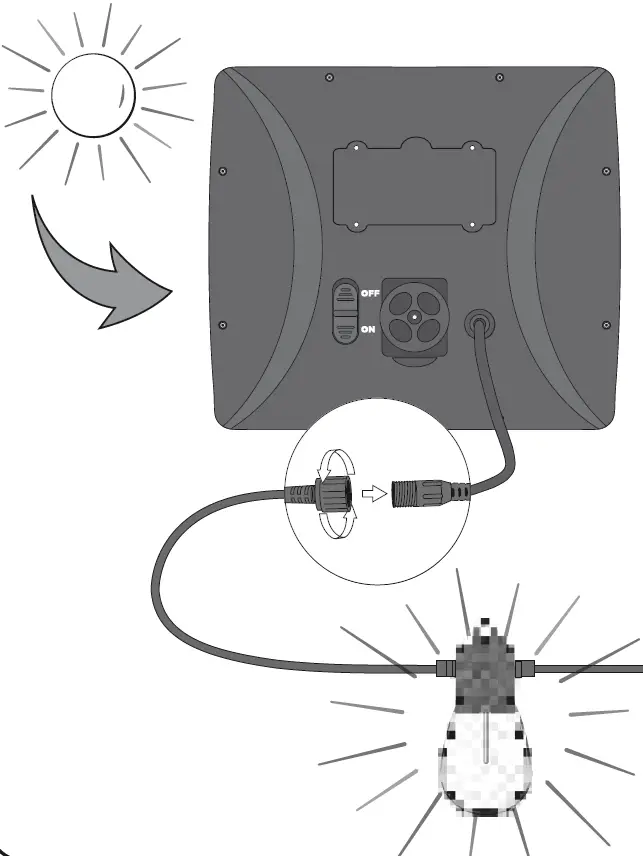
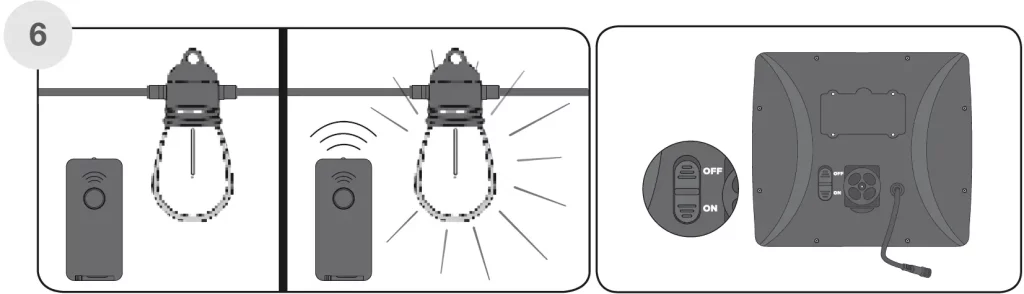
- Connect the solar panel to the connector on the string lights.
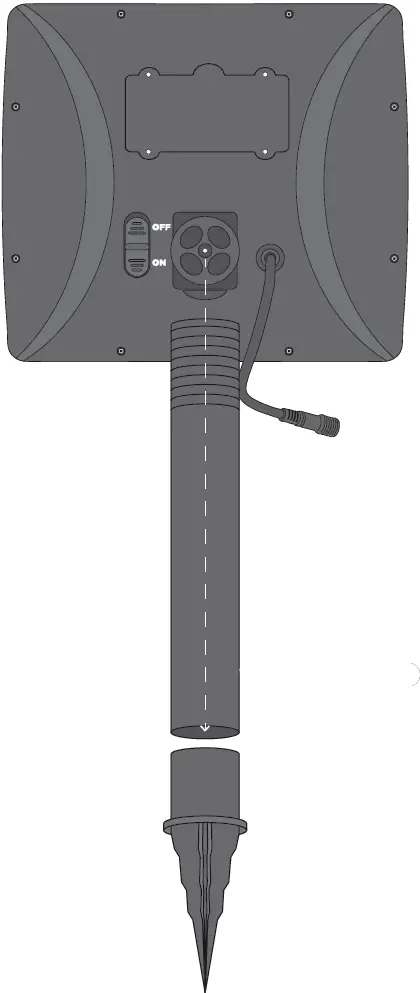
- Select ON on the back of the solar panel.
- The bulbs should now illuminate.
Once the bulbs are all illuminated, turn the switch to OFF and continue with the installation.
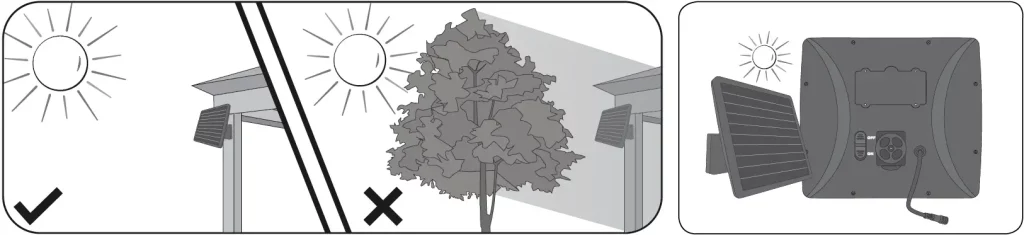
- Ensure your solar panel is placed so that its exposure to sunlight is optimized. Be aware of objects such as trees or property overhangs that may impede the panel’s ability to generate a charge.
- Prior to using your solar string lights, the solar panel needs sunlight for a period of three days. This initial charge should be done without the string lights connected or with the solar panel in the OFF position. After the third day, your included batteries will be fully charged.
Note: The solar panel should be mounted in a place where the ON/OFF switch is easily accessible.
MOUNTING THE SOLAR PANEL: THE SOLAR PANEL HAS TWO MOUNTING OPTIONS
MOUNTING BRACKET
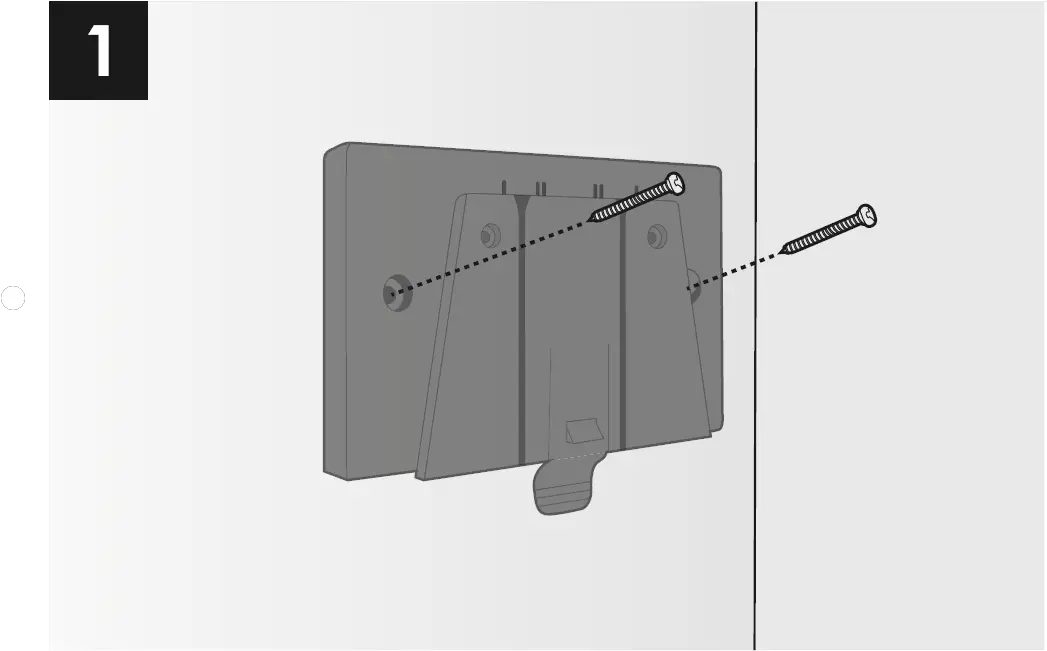
- If required use the two wall plugs (H) along with the two large screws (G). Install the screws utilizing the two outer holes of the mounting bracket to secure the bracket to the chosen surface.
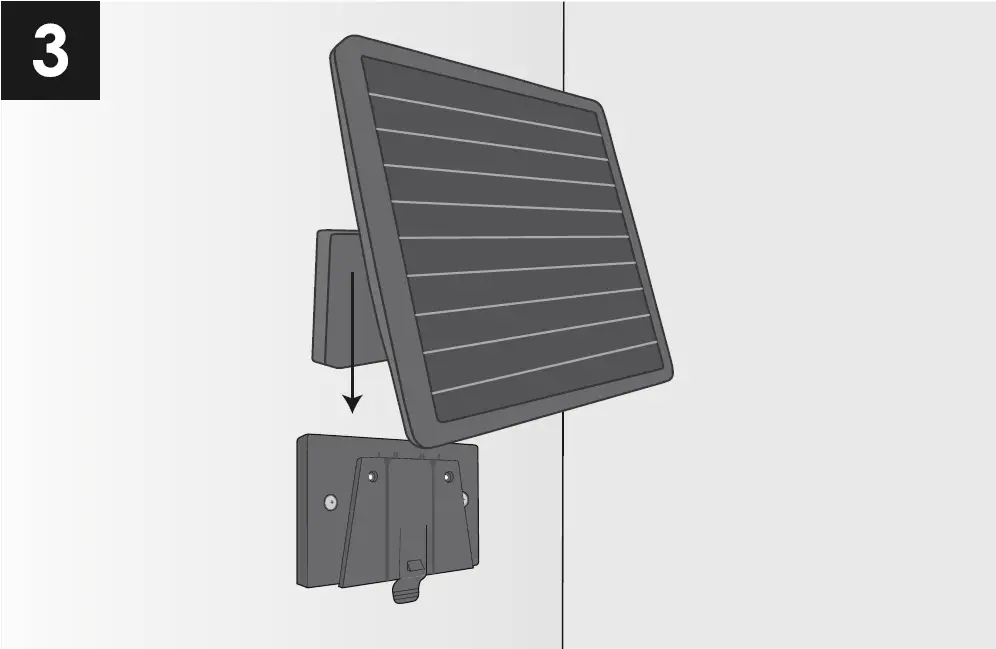
- Insert the mounting base (D) onto the back of the solar panel (B). Use the included small screw (F) to tighten the connection.

- Slide the solar panel down onto the mounting bracket (E) until you feel and hear the connection click into place.
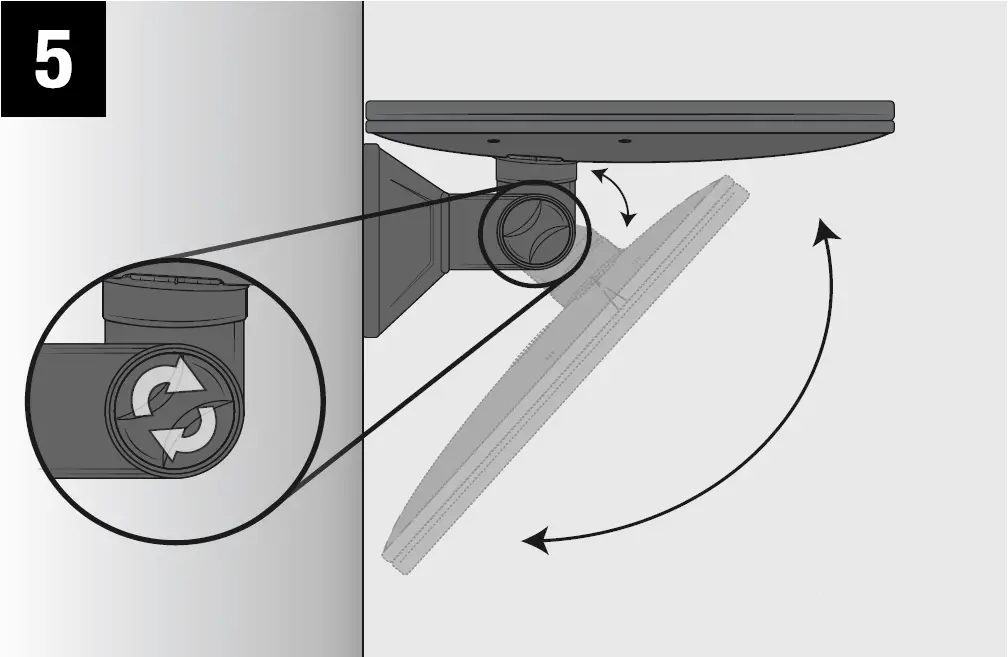
- Adjust the solar panel to the desired angle to optimize sun exposure.

- The angle of the solar panel can be adjusted to maximize sun exposure by loosening, adjusting and then re-tightening the side screw located on the solar panel’s protruding arm.
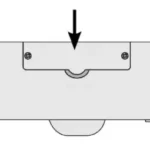
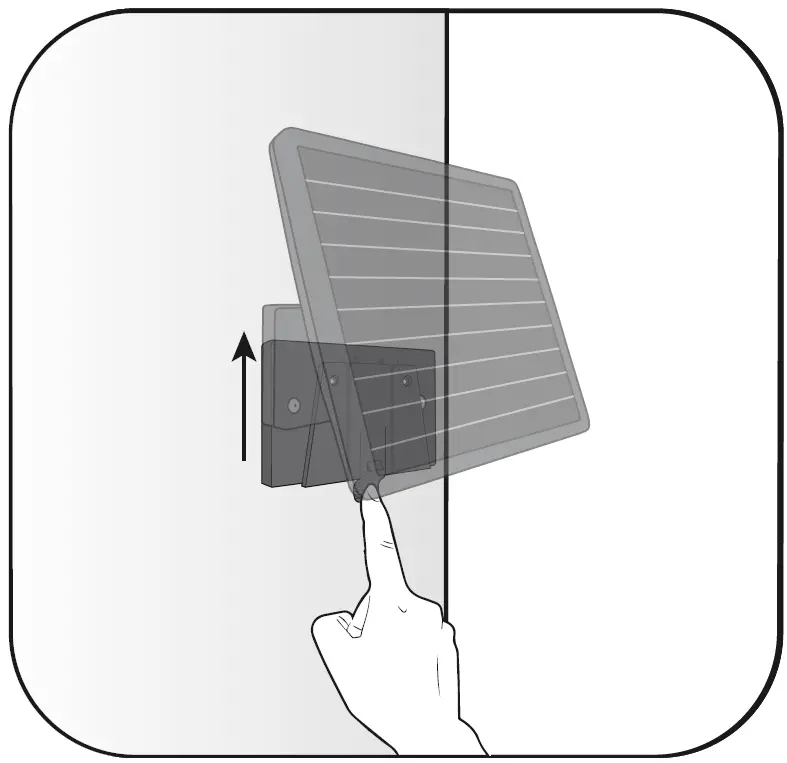
Note: To disconnect the solar panel from the mounting bracket, press down on the release tab on the bottom of the mounting bracket. With the tab firmly pressed, slide the solar panel upwards and free of the bracket. Some force may be required to remove the panel from the bracket.
GROUND STAKE
To utilize the ground stake (C), connect the two parts of the stake together.
The grooved section then fits into the protruding arm of the solar panel.
The stake can then be used to mount the panel into the ground.
INSTALLATION OF THE SOLAR STRING LIGHTS
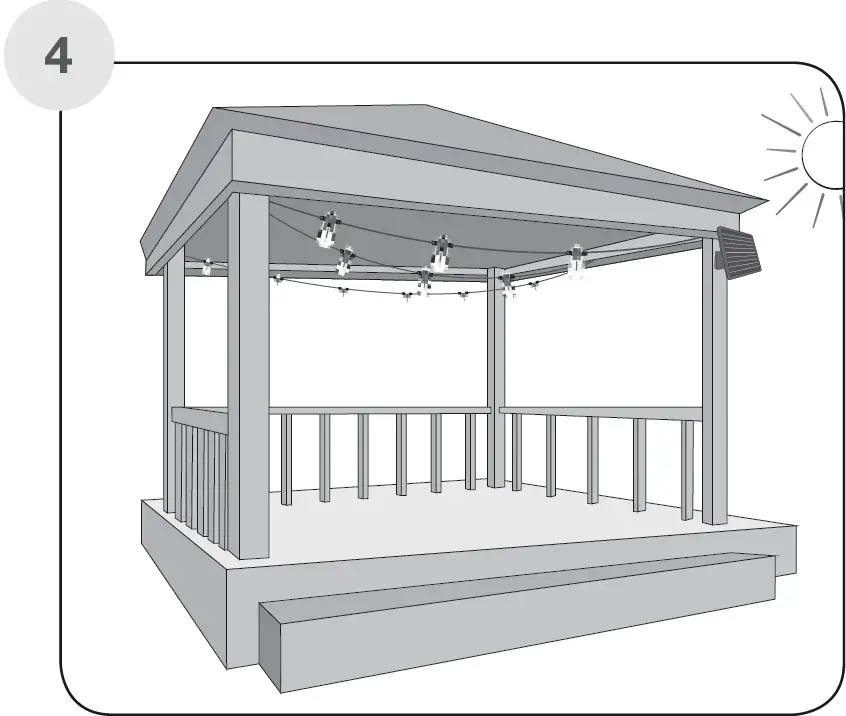
The solar string lights have a variety of possible ways to be mounted. The following are examples of the most common ways:
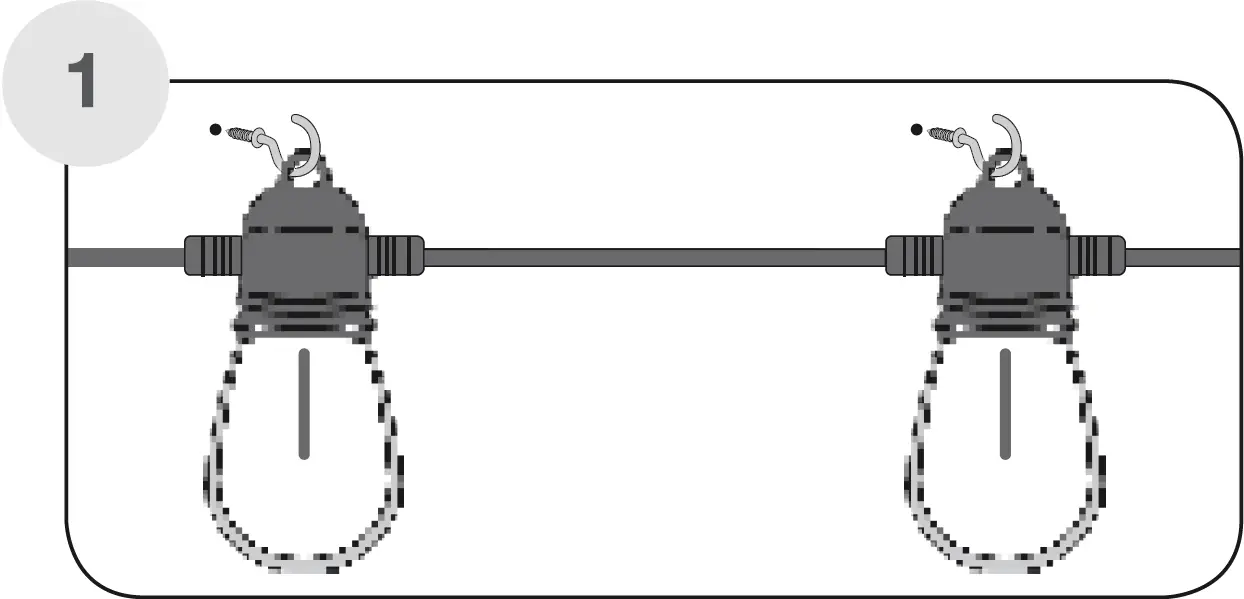
- Temporary mounting: Using standard S hooks (not included) or screw hooks (not included) the solar string lights can be mounted utilizing the integrated mounting loops.
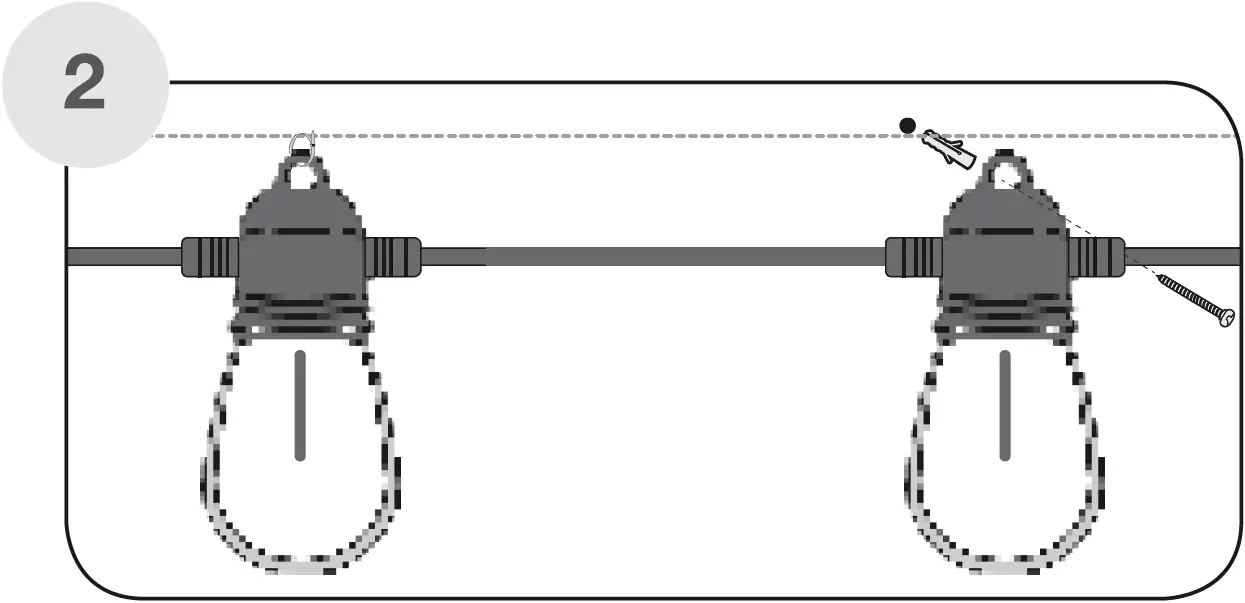
- Permanent mounting: Using cable tie wraps or ‘zip ties’ (not included) or using nails or screws into a surface, the solar string lights can be mounted more permanently.
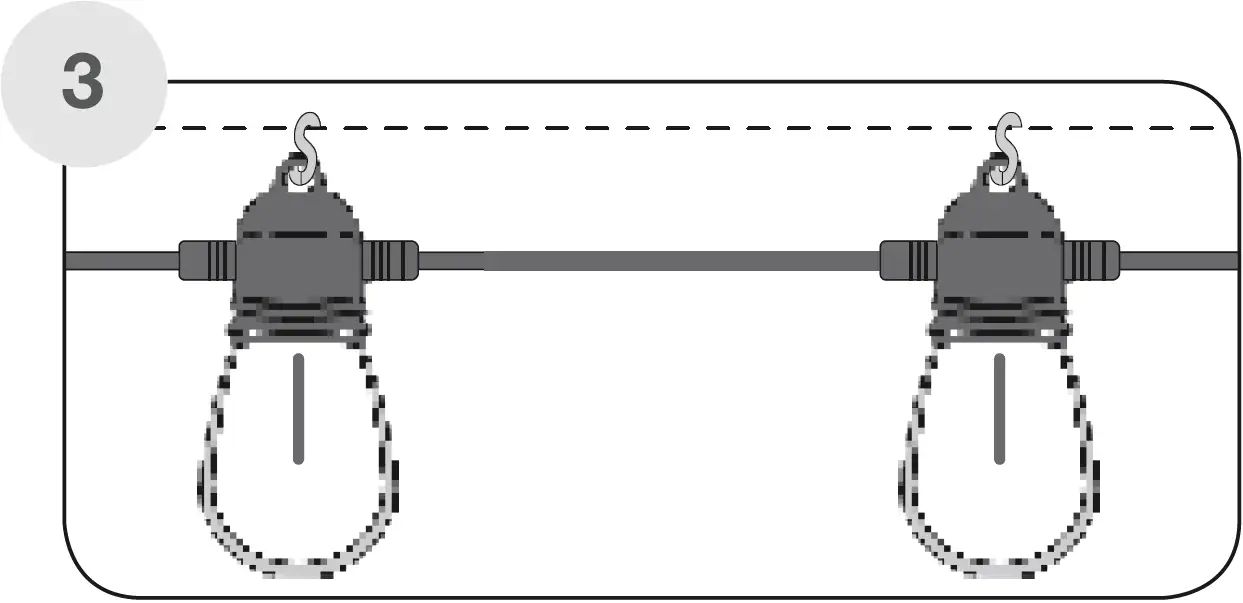
- Guide wire installation: Using S hooks (not included) attach the string lights to a pre-installed guide wire (not included).
- Structural installation: To create a draping effect for the solar string lights attach the first bulb to a structure, then only mount every 3-4th bulb to create the desired effect. Complete the effect by mounting the last bulb to a structure.
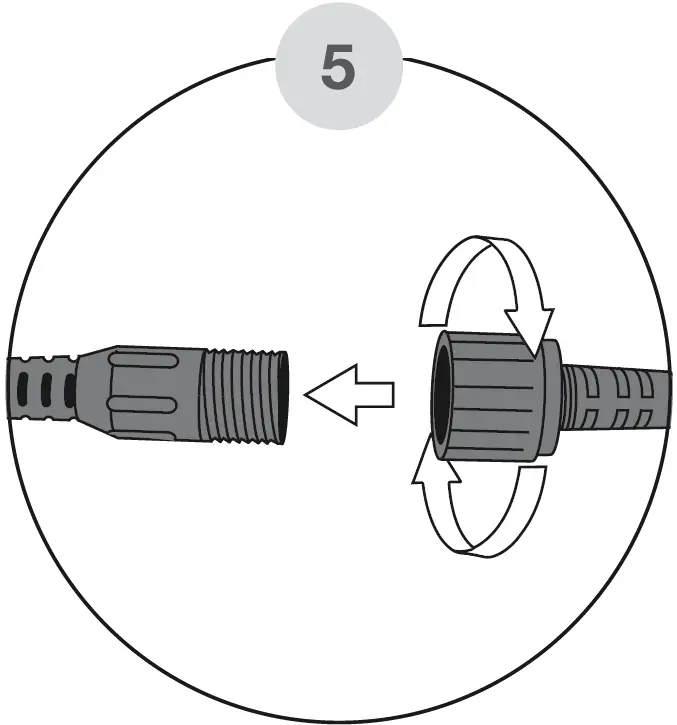
- The final step of installation is to connect the solar panel to the string lights. Simply insert the plug located after the final bulb into the wire coming from the solar panel. Tighten the plug by screwing the seal over the connection point.
Note: The solar string lights will illuminate for 4-5 hours depending on the charge level of the batteries.
OPERATION
After an initial 3 day charge in the OFF position the solar string lights are ready to use.
Pull out the included plastic tab to activate the remote control’s (J) battery.
When the solar panel is in the ON position the bulbs should illuminate. Simply press the button on the remote control to turn the bulbs off. Likewise when the bulbs are off press the button on the remote control to illuminate the bulbs. It is advisable to leave the solar panel in the ON position for regular usage. Turning the solar panel to the OFF position disengages the remote control and can be used when storing or for long periods of intended inactivity.
NOTE: Using the solar string light during daylight hours will have a negative effect on the length of time the lights will illuminate in the evening. When not required always use the remote control to turn the bulbs off to help conserve the battery charge.

The solar string light’s batteries (I) are installed on the rear of the solar panel. Always open the battery compartment with the ON/OFF switch in the OFF position. Unscrew the back of the battery compartment and remove the backing piece. Inside you will see the batteries.
When replacing the batteries, observe the correct polarity and match the battery specifications with the batteries you have removed.
Use rechargeable batteries only.
For this product use two rechargeable 18650 3.7V lithium-ion batteries.
Replace the back of the battery compartment and continue to use the solar string lights as required.
FCC STATEMENT
THIS DEVICE COMPLIES WITH PART 15 OF THE FCC RULES.
Operation is subject to the following two conditions:
- this device may not cause harmful interference.
- this device must accept any interference received, including interference that may cause undesired operation.
Changes or modifications not expressly approved by the party responsible for compliance could void the user’s authority to operate the equipment.
NOTE: This equipment has been tested and found to comply with the limits for a Class 8 digital device, pursuant to part 15 of the FCC Rules. These limits are designed to provide reasonable protection against harmful interference in a residential installation. This equipment generates, uses and can radiate radio frequency energy and, if not installed and used in accordance with the instructions, may cause harmful interference to radio communications. However, there is no guarantee that interference will not occur in a particular installation. If this equipment does cause harmful interference to radio or television reception, which can be determined by turning the equipment off and on, the user is encouraged to try to correct the interference by one or more of the following measures:
- Reorient or relocate the receiving antenna.
- Increase the separation between the equipment and receiver.
- Connect the equipment into an outlet on a circuit different from that to which the receiver is connected.
- Consult the dealer or an experienced radio/TV technician for help.
The device has been evaluated to meet general RF exposure requirement. The device can be used in portable exposure condition without restriction.
WARNING: This product contains a button battery. If swallowed, it could cause severe injury or death in just 2 hours. Seek medical attention immediately.
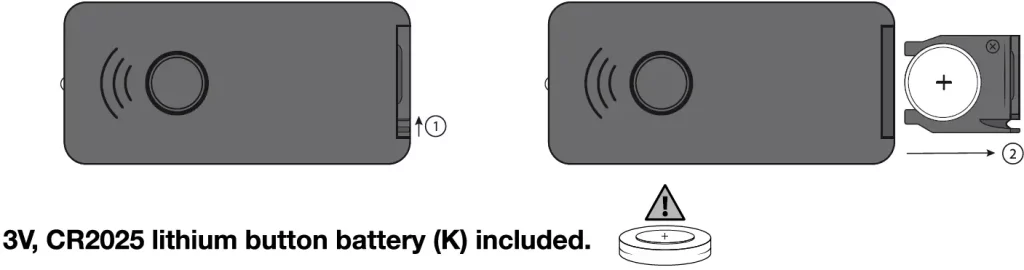
Should you need to replace the included battery in the remote control, locate the battery compartment on the edge of the remote control.
Push the tab to the right (1) and slide out the battery compartment (2).
Replace the battery ensuring the right polarity is observed and ensure the replacement battery has the same characteristics as the one that has been removed.
- WARNING : KEEP BATTERIES OUT OF REACH OF CHILDREN
- Swallowing may lead to serious injury in as little as 2 hours or death, due to chemical burns and potential perforation of the oesophagus.
- If you suspect your child has swallowed or inserted a button battery, immediately seek urgent medical assistance.
- Examine devices and make sure the battery compartment is correctly secured, e.g. that the screw or other mechanical fastener is tightened. Do not use if compartment is not secure.
- Dispose of used button batteries immediately and safely. Flat batteries can still be dangerous.
- Tell others about the risk associated with button batteries and how to keep their children safe.
THIS DEVICE COMPLIES WITH INDUSTRY CANADA LICENSE-EXEMPT RSS STANDARD(S).
Operation is subject to the following two conditions:
- This device may not cause interference.
- This device must accept any interference, including interference that may cause undesired operation of the device.
The digital apparatus complies with Canadian CAN ICES-005 (8) / NM8-005 (8).
This radio transmitter (ISED certification number: 26663-101015) has been approved by Industry Canada to operate with the antenna types listed with the maximum permissible gain indicated. Antenna types not included in this list, having a gain greater than the maximum gain indicated for that type, are strictly prohibited for use with this device.
DOWNLOAD RESOURCES
- SUNFORCE 80033 Solar String Lights with Remote Control [pdf] Instruction Manual 80033, Solar String Lights with Remote Control, Remote Control Lights, Solar String Lights
- Read more: https://manuals.plus/sunforce/80033-solar-string-lights-with-remote-control-manual#ixzz7czraVbMn
FAQ’S
How long does it take to charge the batteries?
It takes about 6-8 hours to fully charge the batteries.
How long do the batteries last?
The batteries will last for a period of 8 hours.
How many sets of batteries do I need to purchase?
You will need to purchase 2 sets of batteries.
What is the difference between the 80033 and 80034?
The only difference is that the 80034 has a remote control.
Why is there an on off switch on solar lights?
Most solar lights have an on off switch because they need to have a manual way to be turned off when you don’t want them to be used. You’ll want to turn them off when you are not using them for a long time. Another good reason to switch them off is when performing maintenance on the lights.
How do I know when my solar battery is fully charged?
If the battery has reached the float level, it will be full. Many charge controllers without a screen will have a light display that will indicate whether it is in bulk, absorption, or float phase and, thus, it will also indicate when the battery is full.
Why are my string solar lights not working?
A possible reason for your solar lights not working properly is the batteries that you’re using. The solar batteries may not be receiving enough charge or they are not holding it. If the solar lights work with regular batteries then the problem is either with the rechargeable batteries or the solar panel.
Can you leave solar lights out in the rain?
Yes, most well-manufactured solar lights can be left out in the rain and maintain their functionality. Although some units are not completely waterproof, most sealed solar lights with a weatherproof resting of IP65 can withstand extended rainy conditions.
Can solar lights work without batteries?
At night, in the absence of light, the batteries release this energy, which allows solar lights to turn on automatically. Without batteries, the solar lights wouldn’t be able to store the energy absorbed from the sun, which means they would only work when there is sunlight, during the day.
Do solar lights turn on automatically?
Voltage Sensor: a sensor built into the light circuit reads the voltage being generated by the solar panel. During the day, when the solar panel is generating power, the light remains off (and charging), but at night, when the solar panel is not generating power, the circuitry turns on the flood light automatically.
How do you fix solar lights that stopped working?
To fix outdoor solar lights that stop working for this reason, trim back any overgrowth, or simply move the light so its panel receives direct sunlight much of the day. Animals or even freezing and thawing soil can also cause the light or its panel to sit at an angle instead of directly facing the sun.
Can you leave solar lights out in the rain?
Yes, most well-manufactured solar lights can be left out in the rain and maintain their functionality. Although some units are not completely waterproof, most sealed solar lights with a weatherproof resting of IP65 can withstand extended rainy conditions.
SUNFORCE 80033 Solar String Lights wit Remote Control
www://sunforceproducts.com/