![]()
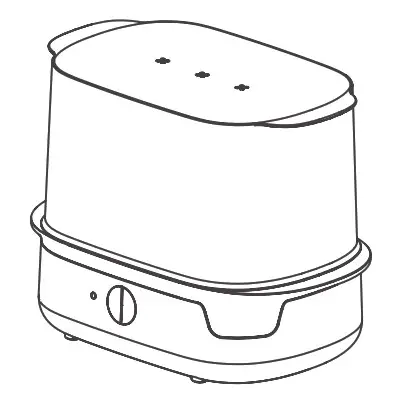
electric steam steriliser
INSTRUCTIONS FOR USE
Please read and keep these instructions
0423221/423222
IMPORTANT WARNINGS!
These instructions can also be found at www.tommeetippee.com
Keep this instruction sheet for future reference as it includes important information.
This appliance is intended for household use only. Do not use the outdoors. Before plugging in the steriliser for the first time ensure that the voltage is compatible with your electricity supply by checking the label on the base of the unit. Ensure water has been added to the unit before switching the unit on. Do not immerse in water. To protect against fire, electric shock, and injury to persons do not immerse cord, plugs, or other parts of the unit in water or other liquid. Misuse of the product may result in the risk of fire, electric shock, and/or personal injury. Do not put the base with a plug into the dishwasher. This appliance shall not be used by children. Keep the appliance and its cord out of reach of children. This appliance is not intended for use by persons (including children) with reduced physical, sensory or mental capabilities, or lack of experience and knowledge unless they have been given supervision or instruction concerning the use of the appliance by a person responsible for their safety. Children do not understand the dangers associated with operating electrical appliances. Never allow children to use this appliance. User maintenance other than cleaning and descaling is not required for this product. Cleaning and user maintenance shall not be made by children.
The surfaces will get hot during use. Do not touch hot surfaces, use handles, and be careful not to touch the sidewalls of the lid. Do not place anything on top of the sterilizer. The heating plate surface is subject to residual heat after use. Allow cooling before cleaning. When in use the steriliser contains hot water and steam. Keep hands and arms away from steam vents as it can cause burns and scalds. Use in a well-ventilated area. Do not operate any appliance with a damaged cord or plug or after the appliance malfunctions or has been damaged in any manner. If the supply cord is damaged it must be changed by a qualified person in order to avoid a hazard. Always use on a flat, dry heat resistant kitchen worktop surface. Do not move appliance when in use. Do not let the cord hang over the edge of the kitchen work surface or touch hot surfaces. The product has been fitted with a cord wind on the base of the unit to allow you to adjust the length of the cord safely. It is recommended that the cord be kept as short as possible. Do not use any accessories other than those supplied with this appliance. The cord must exit the cable tidy using the exit recess. If the cord is correctly placed in the tidy the product will sit level. Do not start using the product if it is not sitting level. Regularly check the cord and plug for signs of damage, if visible remove from use immediately. This appliance is intended to be used in household and similar applications such as: staff kitchen areas in shops, offices, and other working environments; farm houses; by clients in hotels, motels, and other residential type environments; bed and breakfast type environments.
SET UP
CLEAN YOUR STERILISER BEFORE FIRST USE – Refer to parts guide and diagram
- Do not connect to power at this stage.
- Remove all items from inside the steriliser base.
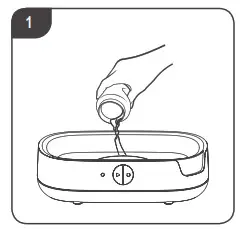
- Pour exactly 80ml of water into the steriliser base.
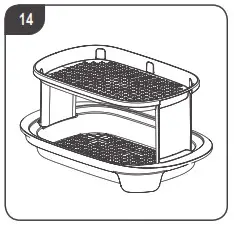
- Assemble the lower tray (A) with logo front-facing and upper tray (B) and place in the steriliser base.
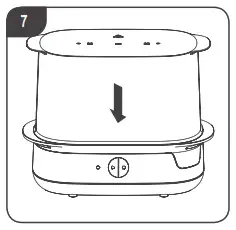
- Add the lid.
- Connect the lead and plug it into the mains supply. Switch on at mains supply.
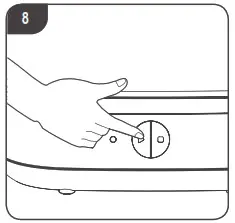
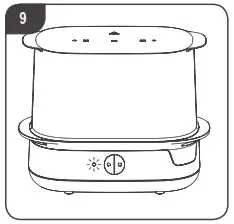
- Press the play switch and it will light up amber to show the sterilising has begun.
- The light will switch off when sterilising has finished.
- Allow cooling for 5 minutes before turning off at the mains, removing the plug and steriliser lid.
- Remove upper tray and lower tray, pour away any remaining water, and wipe dry. Your steriliser is now ready to use.
This steriliser is designed for use with Tommee Tippee bottles and feeding accessories (except bottle brush).
The steriliser will hold a maximum of 6 Tommee Tippee bottles or a combination of fewer bottles plus soothers and breast pump parts.
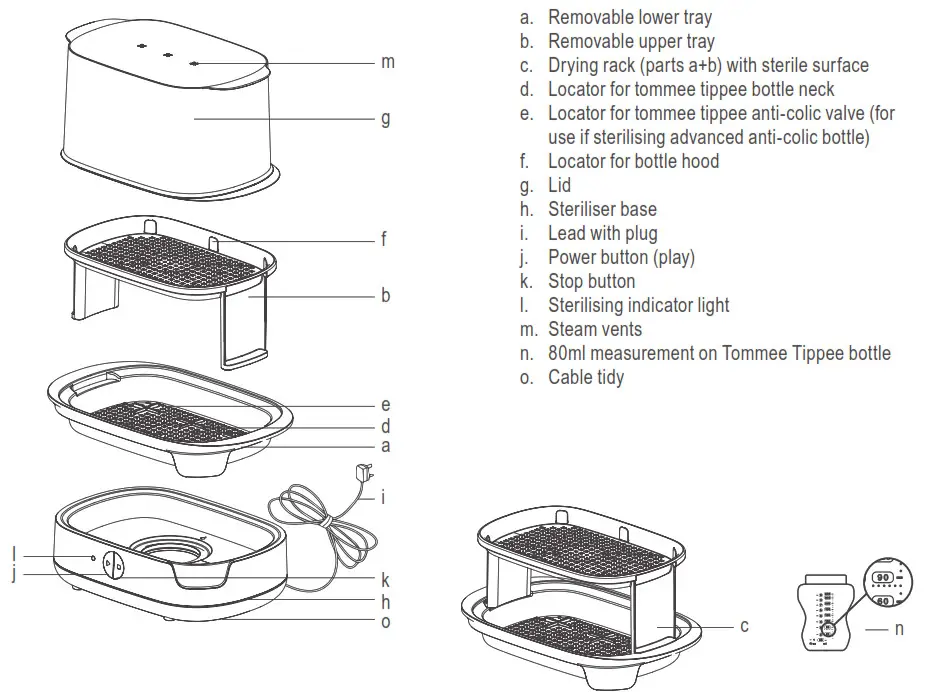
PARTS GUIDE
CLEANING
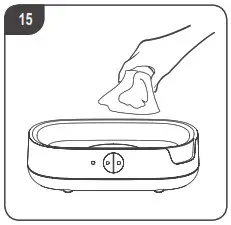
Unplug and allow to cool before cleaning. After each use pour away remaining water from the steriliser base by tipping the steriliser sideways over a sink and wipe clean with a damp cloth only. Do not clean with abrasive cleaners or allow to come into contact with solvents or harsh chemicals, damage could result.
USAGE
Before sterilisation, wash all bottles and feeding accessories in warm soapy water or in a dishwasher (top rack only) to remove any milk residues. Separate all components for washing and reassemble teat and screw ring for sterilising.
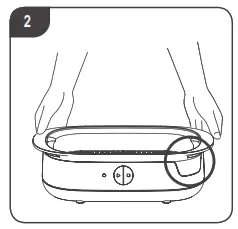
- Place on a flat, heat-resistant work surface. Pour exactly 80ml of water into the steriliser base. Your Tommee Tippee bottles have a handy 80ml measure.
- Assemble lower tray into the steriliser base with logo facing forwards on the right-hand side.
- Place the bottle’s neck downwards into the locators of the removable tray. This includes locators for advanced anti-colic valves.
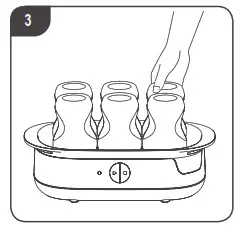
- Place the upper tray onto the lower tray.
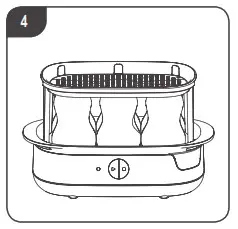
- Place the assembled teat and screw ring onto the upper tray. It is important not to have the hoods fitted onto the teat and screw ring.
- Slot the hoods into the hood locators of the removable upper tray so that they hang over the teat and screw ring but are not fully assembled.
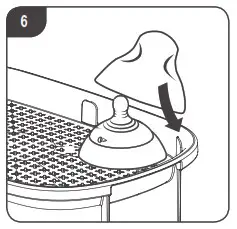
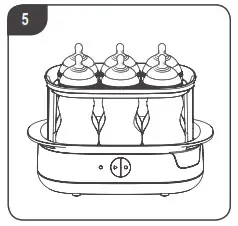
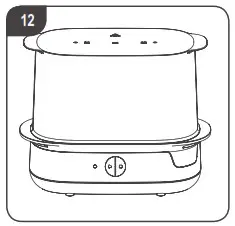
- Place the lid onto the steriliser base and plug the lead into the mains power.
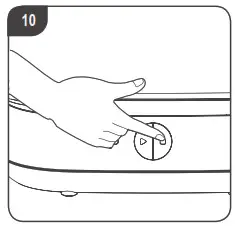
- Press the play button to start the machine. An amber light will come on. This shows that the steriliser is in its warm up phase and will automatically begin the sterilising phase when the appropriate temperature is reached.
- The light will automatically switch off when the sterilising phase has finished.
- The stop button is there in case you need to manually stop your steriliser mid-cycle. If you do this you will have to restart the sterilising process from the beginning as the contents will not be sterilised.
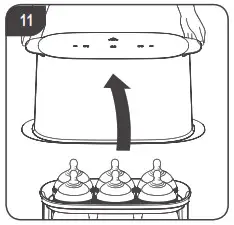
- After the cycle has finished allow to cool for at least 5 minutes before opening the steriliser. We recommend that you hold the lid by the two side handles, lift vertically until you have cleared the upper tray then tilt the lid to an angle away from you to allow the water to drain.
- The contents will remain sterile for 24 hours if the steriliser is unopened.
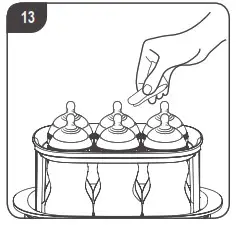
- Wash your hands thoroughly before handling sterilised items. Take care as the items may be hot. Remove the sterilised items. The teat tongs can be used to remove the small items.
- The trays can be used separately as a drying rack or sterile surface.
- 15. To help in the reduction of limescale, ensure that the unit is drained and wiped after use once fully cooled.
WARNINGS
MORE THAN 80ML OF WATER IN THE STERILISER BASE WILL PROLONG THE CYCLE TIME. LESS THAN 80ML MAY NOT STERILISE ITEMS PROPERLY. DURING STERILISATION HOT STEAM PASSES THROUGH THE VENTS AT THE TOP OF THE UNIT. POSITION THIS UNIT AWAY FROM WALLS AND MAKE SURE IT IS NOT UNDERNEATH ANY OVERHANGING SHELVES OR CABINETS. DO NOT OPEN THE STERILISER UNTIL THE LIGHT HAS SWITCHED OFF, OR YOU HAVE PRESSED THE STOP BUTTON AND WAITED 5 MINUTES TO ALLOW FOR COOLING.
DE-SCALING
The frequency of de-scaling should be as follows:
Hard water: 14 days
Medium: 21
Soft: 28
You can find out your water quality via your water provider. FAQs and a picture of limescale can be found on our website. After each use pour away remaining water from the unit base by tipping the unit sideways over a sink and wipe with a damp cloth only. Unplug the unit and allow to cool before cleaning. A build-up of limescale can negatively affect the performance of the unit. We recommend carrying out the descaling process as per above frequency guidelines to ensure the unit continues to work efficiently. Living in a hard water area can produce limescale quicker than other areas therefore descaling is required sooner. Use a descaler that is suitable for use with stainless steel and use as per the manufacturer’s guidelines. Alternatively you can use white vinegar or a descaling sachet to descale your unit, please use as per manufacturer’s guidelines. Where no method is stated, 1 sachet to 200ml of hot water ratio can be applied. See our website for detailed descaling method. Once you have descaled then follow instructions under set up to perform a final cleaning cycle. DO NOT use metal objects or scourers to clean your unit. DO NOT use bleach or sterilising fluid to clean the unit. DO NOT use abrasive or anti-bacterial materials. DO NOT scrub the heat plate.
INFORMATION ON THE DISPOSAL FOR WASTE ELECTRICAL & ELECTRONIC EQUIPMENT (WEEE)
This symbol on the products and accompanying documents means that used electrical and electronic products should not be mixed with general household waste. For proper disposal for treatment, recovery and recycling, please take these products to designated collection points where they will be accepted on a free of charge basis. In some countries you may be able to return your products to your local retailer upon the purchase of a new product. Disposing of this product correctly will help you save valuable resources and prevent any possible effects on human health and the environment, which could otherwise arise from inappropriate waste handling. Please contact your local authority for further details of your nearest collection point for WEEE. Penalties may be applicable for the incorrect disposal of this product in accordance with national legislation. The product is fitted with a BS 1363 mains plug containing a fuse. If it ever becomes necessary to replace the fuse, only use fuses that are marked BS 1362, and rated at 5A. In the unlikely event that this plug is not suitable for the sockets in your home, it should be removed and a suitable plug fitted as follows: The wires of the mains lead are coloured in accordance with the following code:
GREEN AND YELLOW – EARTH
BLUE – NEUTRAL
BROWN – LIVE
 As these colours may not correspond with the coloured markings sometimes used to identify the terminals in the plug, connect as follows.
The wire coloured GREEN AND YELLOW must be connected to the terminal marked E or by the earth symbol or coloured GREEN or GREEN AND YELLOW. The wire coloured BLUE must be connected to the terminal marked N or coloured BLACK. The wire coloured BROWN must be connected to the terminal marked L or coloured RED.
If you are in any doubt about how to wire a plug or replace a fuse safely, consult a qualified electrician.
Mayborn (UK) Limited,
Balliol Business Park,
Newcastle upon Tyne,
NE12 8EW, UK
Copyright © Mayborn (UK) Limited 2018.
Made in China.
Model number: 1151. Voltage: 220-240V~ 50-60Hz 550-650 W.
Any questions?
Visit our website
tommeetippee.com