VORTEX RGB POK3R Keyboard
The new RGB POK3R is the perfect solution for limited desk space. Choose between 3 different keyboard layouts, with additional features such as individually programmable keys with 3 different customizable layer options, changed to USB-C connect which is more friendly to plug-in when you use it. All easily set through what you want.
Features
- ANSI layout with 61 keys
- Chery MX switches
- On-board macro ( 3 layers ) and RGB lighting effect setting
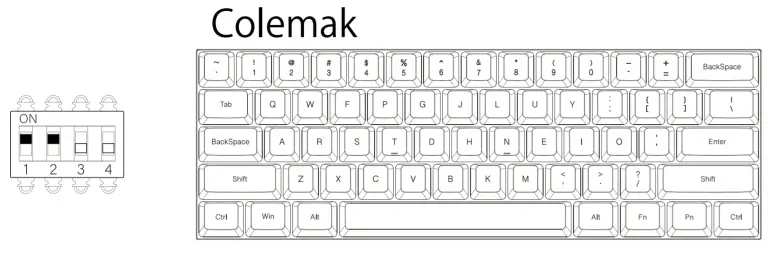
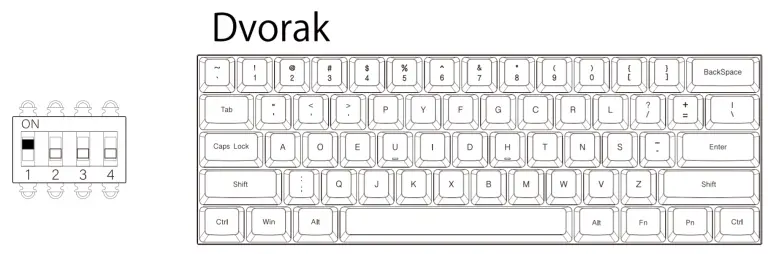
- Build-in 3 layouts (Qwerty, Dvoark, Colemak)
- Metal case
- USB-C
- Support firmware update on Mac O.S
Packing contect
- Keyboard x 1
- USB-C able x 1
- Manual x 1
Product specification
| Model name | RGB POK3R |
| Number of keys | 61 or 62 |
| Switch type | Cherry MX |
| Cable | Detachable with USB-C |
| Cable length | 1.5m |
| Backlit | RGB |
| Weight | 770 10g |
| Dimensions (LxWxH) | 291 x 103 x 37 5 mm |
| Warranty | 1 year |
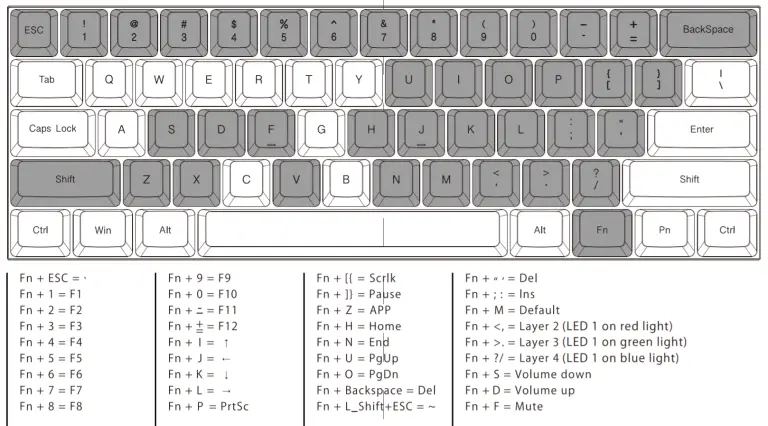
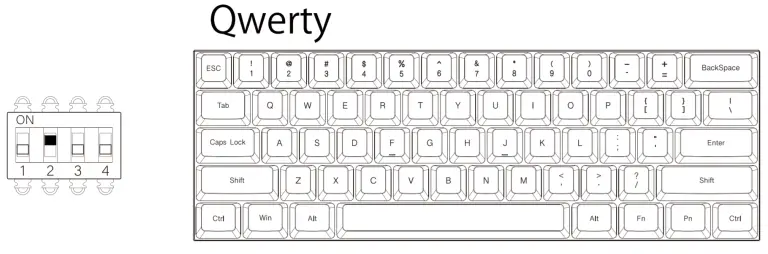
Fn function description table
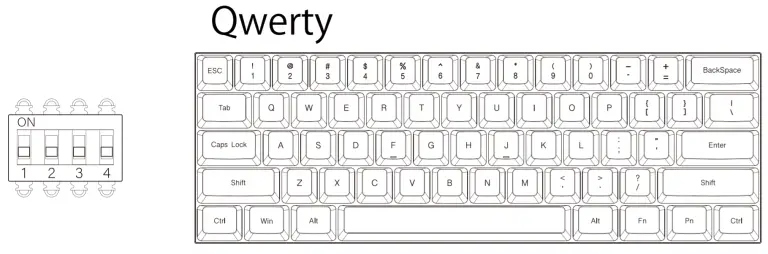
Keyboard Default layout
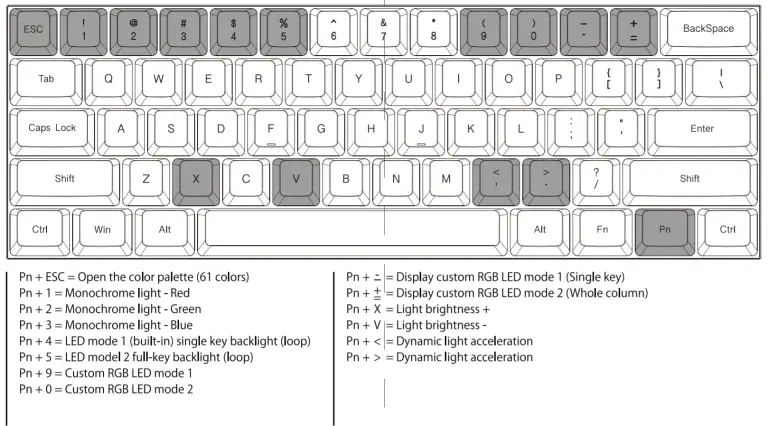
Pn function description table
Macro instruction
Step 1: Select a layer (Fn + “<“, “>” or “?” key).
Step 2: Press Fn + right Ctrl to enter the programming mode (the LED 2 is steady light)
Step 3: Hit the key you want to program (the LED 2 flashes)
Step 4: Type the content then hit Pn key (the LED 2 light on constantly)
Step 5: Repeat Step 3 and Step 4 to program other keys.
Step 6: Press Fn + right Ctrl key to exit the programming mode (the LED on the right side of spacebar goes out)
Note:
The keyboard has 4 built-in layers. The default layer cannot be programmed.
Fn + right Ctrl / M / < / > and ? disable.
Remarks:
- Support Fn layer programming, Fn compound key (for example Fn + A) can be programmed in key selection state.
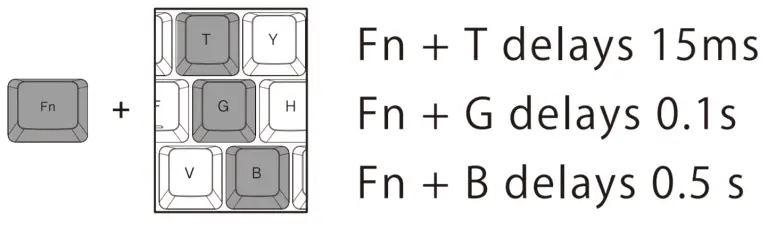
- Support delay output. In the state of key selection (step 3), Fn + T, Fn + G, Fn + B, the continuous delay only counts one time but the time accumulates.

Example:
Program to enter “OK” when Q is pressed. Insert an interval of 1.2 seconds between O and K.
Press “O” and hit Fn+B 2 times (0.5s x 2 = 1s) and Fn+Gx2 time (0.1s x2=0.2s)
- Each key can input up to 31 key-code.
- In programming mode, if you do not press any keys within 15 seconds, it will automatically exit.
Remarks:
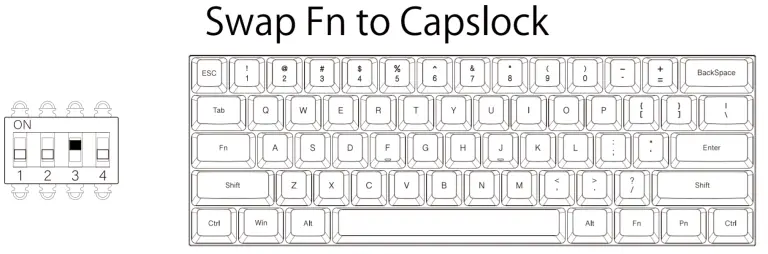
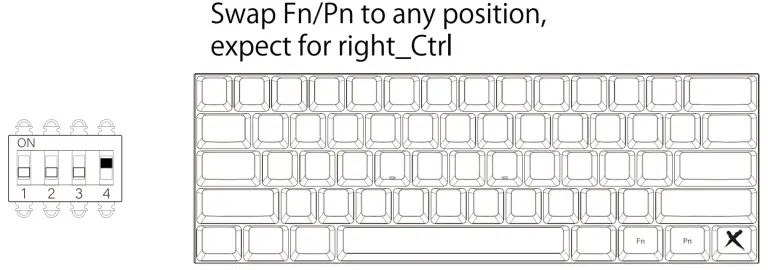
How to change the position of Fn or Pn. Fn as an example:
Step 1: Turn on the DIP switch 4
Step 2: Select a Layer
Step 3: Press Fn and then select the new location you want
Step 4: Close the DIP switch 4 complete the change
Change Pn position as above steps
RGB LED editing instructions:
3 layers can edit RGB lighting effects and each layer
can edit single-key backlight or entire column backlight.
Step 1. Select a layer whose color you want to edit (Fn + <,> or? Key)
Step 2. Press Pn + 9 or 0 to enter the edit mode.
Step 3. Press Pn + 1, 2, 3 to mix colors by yourself or press Pn + ESC to open the color palette, and select a color to change directly
Note:
If you choose to mix the color yourself, the color will be displayed on the Pn key
Step 4. Press Pn + 9 or 0 again to exit the edit mode
Step 5. Press Pn + “-” or “=” to display the set custom color.
Dip switch description table

Other functions description
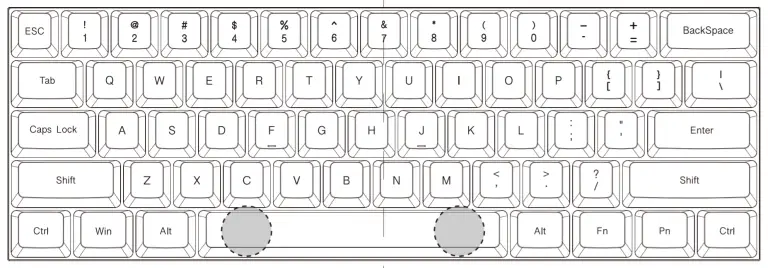
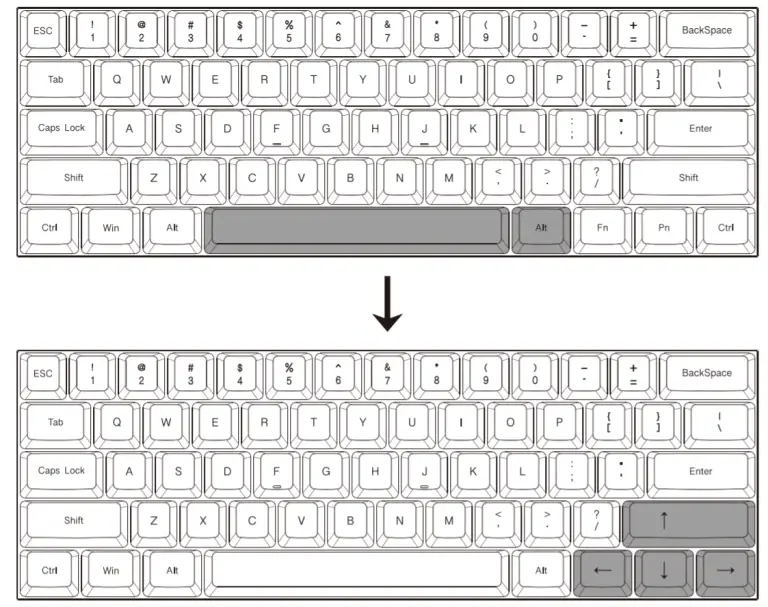
- Independent arrow keys
Pressing the right Alt and the spacebar one time, it will change the right Shift, Fn, Pn and right Ctrl into arrow keys.
Back to default function, please hit it again.
* Please refer to the illustration below.
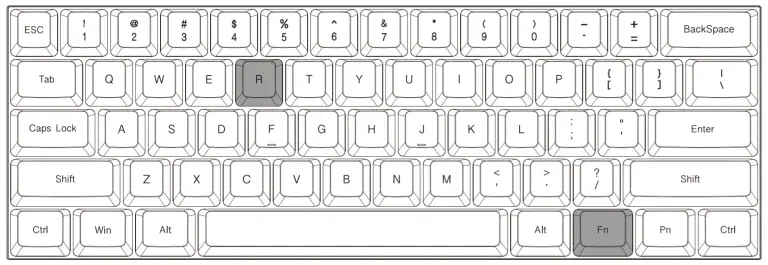
- Return to factory default:
a. Clearing individual layers:
Please hold down Fn and R key at the same time until the LED 1 stops flashing.

b. Clearing all layers:
Please hold down two Alt keys at the same time until the LED 1 stops flashing.
Remarks:
If you have changed the Fn position and forgot where it was.
You can still press the original Fn and R key to restore the current layer.