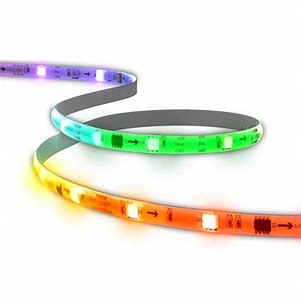
Light Strip Pro 10M
User Guide
WELCOME TO WYZE
Well, hello there! If this is your first Wyze product, welcome to the Wyze family! Whether you bought Wyze Light Strip Pro to add accent lighting behind your TV, step up your TikTok game, or have a full on rave in your living room, you have made a great choice. Now let’s get started!
IN THE BOX
- Wyze Light Strip Pro × 2
- Adhesive Clips × 20
- Power Adapter × 1
- Alcohol Wipe × 4
- Quick Start Guide × 1
SETUP
1. Download the Wyze app and sign in or create an account.
2. Open the Wyze app and tap the + sign on the top left corner of the Home tab. Tap Add Device and then select Wyze Light Strip Pro.
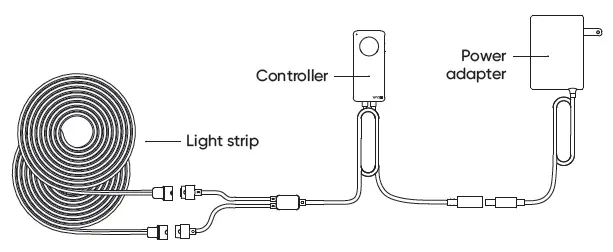
3. Select and clean the controller’s mounting location using an included alcohol wipe. Make sure the controller can reach both an outlet and the desired location of the strips. Note: the controller will go in the middle and connect to each of the two strips. Do not try to connect the two strips together with the controller at one end, it must be in the middle.

4. Uncover the controller’s adhesive backing and firmly press the controller into place. Make sure the front and side buttons are accessible after mounting.
5. Clean the desired strip mounting location with the included alcohol wipe and allow to dry.
6. Connect the strips to the controller and begin mounting them one at a time by exposing the adhesive back and pressing the strip into place. Repeat for the second strip.
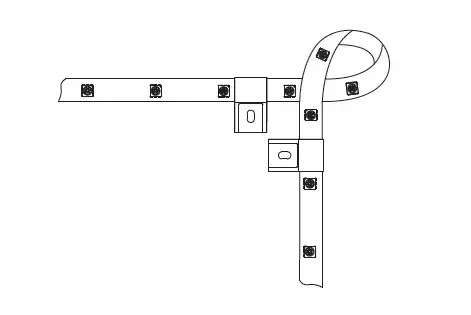
Corner Installation: If installing at a 90° angle (e.g, around the back of a TV) make a loop with the strip and reinforce each side with the included clips. Try to avoid bending the strip where the LED is located.
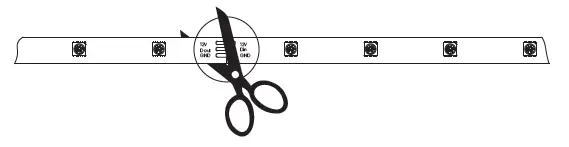
Trimming the Strip: The strip can be cut to a desired length at the designated marks. Make sure the power adapter is unplugged before cutting.
7. Use the included clips to reinforce the strip. Use extras around corners or where the strip bends.
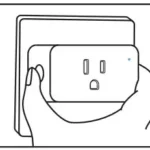
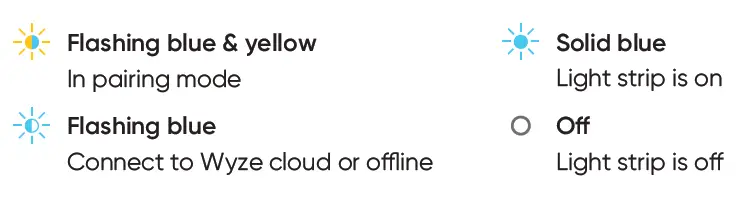
8. Plug the power adapter into the wall and confirm the strip is pulsing blue. If it is not, press and hold the side button for 7 seconds until the LED on the controller begins flashing blue and yellow. If the strip doesn’t turn on, make sure all the connections are secure.
9. Follow the instructions in the Wyze app to finish pairing the device to your Wyze account.
CAUTION
- Do not leave the device on while coiled as it may overheat.
- Avoid bending the strip where an LED is located as it may damage the product.
- Do not cut the device while it is plugged into power.
- Only mount the device onto dry, clean, and smooth surfaces.
- For indoor use only.
- Do not use if the power cord is damaged.
BASIC OPERATIONS
CONTROLLER STATUS LIGHT GUIDE

CONNECTING TO YOUR VOICE ASSISTANT
To control your device with your voice, connect your Wyze account to Alexa or Google Assistant.
Alexa
- Open up the Wyze app, go into your Account settings, then tap on Smart Integrations to link Alexa to your Wyze account.
- You can also link your Wyze account by asking Alexa to “Enable Wyze skill.” If you have not downloaded the Alexa app you can download it from the App Store or Google Play store or go to alexa.amazon.com to search for and enable the Wyze skill.
- Once enabled, follow the on-screen instructions to link your Wyze account to Alexa. You will be prompted to enter your Wyze username and password to authorize Alexa to access your camera.
- Select Add Device so that Alexa can find your device. You can also say, “Discover my devices.” After Alexa finds your device, it’s listed under Devices in the Smart Home section of the Alexa app.
Google Assistant
- Download and configure the Home app by Google.
- Launch the Home app.
- Tap Add.
- Tap Set up device.
- Tap Works with Google.
- Find the Wyze Home listing and log in with your Wyze account.
- Google Assistant will automatically sync and populate a list of the devices from your Wyze account.
FCC WARNING
Any changes or modifications not expressly approved by the party responsible for compliance could void the user’ s authority to operate the equipment. This device complies with Part 15 of the FCC Rules. Operation is subject to the following two conditions: (1) This device may not cause harmful interference, and (2) This device must accept any interference received, including interfer-ence that may cause undesired operation. This equipment has been tested and found to comply with the limits for a Class B digital device, pursuant to Part 15 of the FCC Rules. These limits are designed to provide reasonable protection against harmful interference in a residential installation. This equipment generates uses and can radiate radio frequency energy and, if not installed and used in accordance with the instructions, may cause harmful interference to radio communications. However, there is no guarantee that interference will not occur in a particular installation. If this equipment does cause harmful interference to radio or television reception, which can be determined by turning the equipment off and on, the user is encouraged to try to correct the interference by one of the following measures:
- Reorient or relocate the receiving antenna.
- Increase the separation between the equipment and receiver.
- Connect the equipment into an outlet on a circuit different from that to which receiver is connected.
- Consult the dealer or an experienced radio/TV technician for help.
RF RADIATION EXPOSURE STATEMENT
This equipment complies with FCC radiation exposure limits set forth for an uncontrolled environment. This equipment should be installed and operated with minimum distance of 20 cm between the radiator and your body.
ISEDC RSS WARNING
This device complies with Industry Canada licence-exempt RSS standard(s). Operation is subject to the following two conditions: (1) this device may not cause harmful interference, and (2) this device must accept any interference received, including interference that may cause undesired operation.
The manufacturer is not responsible for any radio or TV interference caused by unauthorized modifications or change to this equipment. Such modifications or change could void the user’s authority to operate the equipment. This radio transmitter (identify the device by certification number or model number if Category II) has been approved by Industry Canada to operate with the antenna types listed below with the maximum permissible gain indicated. Antenna types not included in this list, having a gain greater than the maximum gain indicated for that type, are strictly prohibited for use with this device.
ISEDC RADIATION EXPOSURE STATEMENT
This equipment complies with ISED RF radiation exposure limits set forth for an uncontrolled environment. This equipment should be installed and operated with minimum distance of 20 cm between the radiator and your body.
NEED HELP?
Contact our Support Team at: https://support.wyze.com
Join our Community: https://wyze.com/community
Scan the QR code to learn more