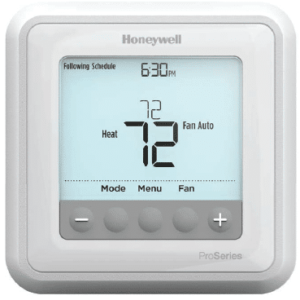
The Honeywell Pro Series is a programmable thermostat that features an easy-to-read display and energy-saving modes. The thermostat can be programmed to set up heating and cooling schedules for the day, week, or year. It also has a backlit keypad that makes it easy to see in low light conditions. This manual will walk you through setting up your new Honeywell Pro Series Thermostat so that you can enjoy all the benefits of this great product. It contains important instructions such as how to program the module and wiring diagrams for installation.
Sections in this Manual
- Package Includes
- Optional Cover Plate installation
- UWP Mounting System installation
- Power options
- Setting Slider Tabs
- Wiring terminal designations
- Thermostat mounting
- System operation settings
- Fan operation settings
- Installer setup (ISU)
- Advanced setup options (ISU)
- Installer system test
- Specifications
Package Includes
- T6 Pro Thermostat
- UWP Mounting System
- Honeywell Standard Installation Adapter (J-box adapter)
- Honeywell Decorative Cover Plate –Small; size 4-49/64 in x 4-49/64 in x11/32 in (121 mm x 121 mm x 9 mm)
- Screws and anchors
- 2 AA Batteries
- Installation Instructions and User Guide
Optional Cover Plate installation
NOTE: If an Optional cover plate is not required, see “UWP Mounting System installation” on the next page.
Use the Optional Cover Plate when:
- Mounting the thermostat to an electrical junction box
- Or when you need to cover the paint gap from the old thermostat.
- Separate the Junction Box Adapter from the Cover Plate. See Figure 1.

2. Mount the Junction Box Adapter to the wall or an electrical box using any of the eight screw holes. Insert and tighten mounting screws supplied with Cover Plate Kit. Do not overtighten. See Figure 2. Make sure the Adapter Plate is level.
3. Attach the UWP by hanging it on the top hook of the Junction Box Adapter and then snapping the bottom of the UWP in place. See Figure 3.

4. Snap the Cover Plate onto the Junction Box Adapter. See Figure 4.

