anko Blender User Manual
IMPORTANT SAFEGUARDS
When using the electrical appliance, the below basic safety precautions should be followed:
- Read all instructions.
- Before using check that the voltage power corresponds to the one shown on the appliance nameplate.
- Do not let cord hang over edge of table or counter
- Do not place on or near a hot gas or electric burner, or in a heated oven.
- If the supply cord is damaged, it must be replaced by qualified electrical person in order to avoid a hazard or the product must be disposed.
- Avoid contacting moving parts.
- Do not leave foreign objects, such as spoons, forks, knives or the measuring cup, inside the jar as this will damage the blades and other components when starting the machine and may cause injury.
- Blades are sharp, handle carefully.
- The use of attachments, including jar, jar lid, not recommended or sold by manufacturer may cause fire, electric shock or injury.
- The jar should not be more than 2/3 full when the tamper is used when blending.
IMPORTANT! To avoid damage to the blender do not exceed 30 seconds of continuous blending when using the ‘tamper’. - When making nut butters or oil-based foods, do not process for more than one minute after the mixture starts circulating. Over-processing can cause dangerous overheating.
CAUTION: When blending hot liquids or ingredients, use caution: spray or escaping steam may cause scalding and burns. DO NOT FILL THE CONTAINER TO MAXIMUM CAPACITY. Always begin processing on the lowest speed setting. Keep hands and other exposed skin away from the lid opening to prevent possible burns. - Turn all controls to OFF/STOP and unplug the blender when it is not in use, before putting on or taking off parts, and before cleaning.
IMPORTANT! Never leave the appliance unattended during use. - To protect against risk of electrical shock do not put motor unit or power cord in water or other liquid.
- Keep hands and utensils out of jar while blending to reduce the risk of severe injury to persons or damage to the blender.
- If scraping is necessary, turn the power OFF, disconnect from electrical power outlet, and use a rubber spatula only.
IMPORTANT! Never operate the blender without the jar lid in place. - Never use non-food items in the jar when blending.
- To avoid possible injury, do not open the lid until the blade has come to a complete stop.
- Do not put hands or other objects into the jar during use.
- This product is not intended for used by persons (including children) with reduced physical, sensory or mental capabilities, or lack of experience and knowledge, unless they have been given supervision or instructions concerning use of the products by a person responsible for their safety.
IMPORTANT! Children should be supervised to ensure that they do not play with the appliance. - Misuse may cause injury.
- Care is needed when handling cutting blades, especially when removing the blade from the jug, emptying and during cleaning.
CAUTION: Be careful if hot liquid is poured into the food blender. Hot food can eject out of the appliance due to sudden steaming.
CAUTION: Be careful when opening the jar lid after blending hot liquids. Hot liquid may eject out of the appliance due to sudden steaming and cause scalding. - Switch OFF the appliance and disconnect from mains power supply before changing accessories or approaching parts that move in use.
- This product is for household use only, not designed for commercial use.
HOUSEHOLD USE ONLY
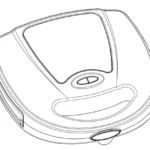
KNOW YOUR BLENDER


Function switch: With “Soup” and “Pulse” for selection.
Speed dial: Turn the dial to choose from manual speed settings from “Low” to “High”. Once you select a speed, the blender will run until you turn it back to “STOP”.
Tamper: The tamper allows you to accelerate the process of very thick and/or frozen mixtures that cannot be processed in a regular blender. If food is not circulating the machine may be overloaded or may have a trapped air bubble. Using the tamper helps to maintain circulation by preventing air pockets from forming. While the machine is running, remove the measuring cup, and through the hole in the lid insert the tamper and use it to press ingredients into the blades as you make frozen ice creams, nut butters, etc.
Resettable fuse button: Incorporated to protect the motor from overheating. If the motor shuts off while in use: turn Power Switch to “OFF” and unplug from mains power outlet. Remove the jar from the motor unit and free the blade of any obstructions. Wait 30-45 minutes for the unit to cool down. Press external resettable fuse button on the bottom of the motor unit.
NOTE:
- “Function switch” is interlocked with “Speed dial”. When operating “Function switch”, “Speed dial” is invalid; and when operating “Speed dial”,“Function switch” is invalid.
- The jar must not be more than 2/3 full when the tamper is used during blending.
- Do not use tamper for more than 30 consecutive seconds (to avoid overloading the motor).
- You may need to move the tamper not only up and down, but also side to side.
FOR THE INITIAL USE
- Unpack the appliance and place all parts on a horizontal surface.
- Immerse the jar, jar lid, measuring cup and tamper in warm soapy water and rinse them and dry. Never immerse motor unit in water for cleaning to prevent the risk of electric shock.
CAUTION: The blade is very sharp, please handle carefully. - For attaching jar, firstly place the jar lid and measuring cup into the jar. Ensure the jar lid and measuring cup are placed tightly and properly with the jar. Then place the jar onto the jar support pad and fix it onto the motor unit tightly. The blender is now ready for uus.
NOTE:
- Before assembling the jar, be sure the power cord is disconnected from mains power outlet, and the power switch and the speed dial are both on the “OFF”and “STOP” positions.
- The appliance will not operate if the jar is not assembled onto the motor unit properly.
- Make sure all the parts are assembled properly.
OPERATION
IMPORTANT! Never leave the appliance unattended during use.
BLENDING
- Place the appliance on the flat horizontal surface and make sure it is not connected to mains power.
- Prepare the ingredients for blending, i.e. carrots, cut them into cubes with a size of 15mm*15mm*15mm. Then remove the measuring cup and jar lid, and put the carrot cubes into the jar. Usually certain amount of purified water has to be added to facilitate the smooth running of the appliance. The proportion of the carrot and water is 2:3. The amount of mixture should not exceed the max level mark as indicated on the jar. And then close the jar lid by pushing down firmly on to the jug and fit the measuring cup.
- Connect the appliance to mains power, and then push the power switch to “ON” position.
- Turn the speed dial to the “HI” speed setting and the appliance will start to blend.
- After blending for about 30 seconds, turn the speed dial to “STOP” position.
- You may add ingredients into the jar through the center opening of jar cover during operation. First, turn OFF the appliance to make it stop working, and then remove the measuring cup and add the ingredients into the jar through the center opening on the jar. Replace the measuring cup into position. Then turn ON the appliance.
NOTE:
- During operation, if the mixture is too thick to be blended, use the tamper (refer to “Tamper” description mentioned above)
- DO NOT remove the jar from the motor unit during use. If it is necessary to remove the jar, first turn OFF the appliance and make sure the blender blade has stopped rotating. Then removethe jar.
- The maximum operating time per cycle must not exceed 3 minutes. Allow minimum 10minutes rest time between two consecutive cycles to prevent damage to the electric motor. The appliance must rest for at least 30 minutes after 10 cycles.
- After finish blending, move the jar out of the jar support pad, and then carefully remove the measuring cup and jar lid, then pour and serve.
CAUTION: The speed dial and power switch must be at “STOP” and “OFF” positions and the power supply cord must be disconnected from mains power outlet before removing the jar.
CRUSHING ICE
- Place the appliance on the flat horizontal surface and make sure it is not connected to mains power.
- Use ice cubes approximately 15mm*15mm*15mm in size. Remove the measuring cup and jar lid and place the ice cubes in the jar. It is recommended to add water to facilitate the smooth running of the appliance. Use 2:3 proportion of ice and water. The amount of mixture should not exceed the max level mark as indicated on the jar. And then close the jar lid and measuring cup properly.
- Connect the appliance to mains power, and then push the power switch to “ON” position.
- Turn the speed dial to the “HI” speed setting or push the function switch to “Pulse” setting and the appliance starts to crush ice.
- After crushing ice (maximum 3 minutes), turn the speed dial to “STOP” position.
- You may add ingredients into the jar through the center opening of jar cover during operation. First, turn OFF the appliance to make it stop working, and then remove the measuring cup and add the ingredients into the jar through the center opening on the jar. Replace the measuring cup into position. Then turn ON the appliance.
NOTE:
- During operation, if the mixture is too thick to be blended, use the tamper (refer to “Tamper” description mentioned above).
- DO NOT remove the jar from the motor unit during use. If it is necessary to remove the jar, first turn OFF the appliance and make sure the blender blade has stopped rotating. Then remove the jar.
- The maximum operating time per cycle must not exceed 3 minutes. Allow minimum 10 minutes rest time between two consecutive cycles to prevent damage to the electric motor. The appliance must rest for at least 30 minutes after 10 cycles.
- After finish blending, move the jar out of the jar support pad, and then carefully remove the measuring cup and jar lid, then pour and serve.
CAUTION: The speed dial and power switch must be at “STOP” and “OFF” positions and the power supply cord must be disconnected from mains power outlet before removing the jar.
SOUP (HEATING) FUNCTION
IMPORTANT! Never operate the blender without the jar lid in place.
IMPORTANT! Never leave the appliance unattended during use.
IMPORTANT! The soup function is for heating only and does not cook raw food. Food must be pre-cooked prior to using it in the blender.
- Place the appliance on the flat horizontal surface and make sure it is not connected to mains power.
- Remove the measuring cup and jar lid, and then put the required ingredients into the jar and fill the jar with appropriate amount of warm water. The amount of mixture must not exceed 1000ml. And then fit the jar lid and measuring cup properly.
- Connect the appliance to mains power, and then push the power switch to“ON” position.
- Push the function switch to “Soup” setting and the appliance will start the soup blending and heating process.
- After cooking for approximately 6 minutes, turn the speed dial to “STOP” position.
NOTE: The blender can heat soup to approximately 750C after 6 minutes.
Recipe for Bacon cheedar cheese and potato soup
Ingredients:
- 2 1/3 cup(560ml)milk
- 2 medium potatoes, 12oz (340g), baked 30 minutes, cut into half
- 2/3 cup(80g)cheese, sliced
- 1/4 cup(40g)chopped onion, cook (and stir) for 10 minutes or until onions are golden
- 1/2 tsp dry fennel
- 1/2 tsp salt
- 1oz(28g)Bacon, cooked well, chopped
Operation:
- Put all the ingredients into the blender jug and fit the jug lid properly.
- Select the “Soup” setting.
- Turn ON the appliance. The blender speed will increase gradually to a higher speed.
- The blender will function until it stops automatically after approximately 6 minutes of operation.
NOTE:
- During operation, if the mixture is too thick to be blended, use the tamper (refer to “Tamper” description mentioned above).
- DO NOT remove the jar from the motor unit during use. If it is necessary to remove the jar, first turn OFF the appliance and make sure the blender blade has stopped rotating. Then remove the jar.
- The maximum operating time per cycle must not exceed 6 minutes. Allow minimum 10 minutes rest time between two consecutive cycles to prevent damage to the electric motor. The appliance must rest for at least 30 minutes after 10 cycles.
- After finish blending, move the jar out of the jar support pad, and then carefully remove the measuring cup and jar lid, then pour and serve.
CAUTION: The food will be hot after soup blending process. Take extreme care when removing the jar lid as hot ingredients may eject out of the appliance due to a sudden steaming and cause scalding.
CLEANING AND MAINTENANCE
The Auto-Clean feature can help to clean the blender and blade assembly easily and rapidly in complete safety.
- After use, reassemble the jar and pour about 400-500ml warm water into the jar and connect the appliance into a mains power outlet socket. Turn the speed dial to “HI” speed or push the function switch to “Pulse” position for few seconds to remove food residue on the blade and jar.
- Disconnect the blender from mains power.
- Remove the jar from the motor unit and rinse the jar under running water.
- Wipe the outer surface of motor unit with a damp cloth, do not use abrasive cleansers. Never immerse in water or other solution for cleaning.
- All parts except the motor unit are dishwasher-safe. You can also wash the parts, except the motor unit, in warm, soapy water.
- Dry all parts and then reassemble them again for storage. But do not fit the jar lid completely, this will allow air to circulate and prevent odors in the jar.
- If any problem has been encountered during use, never disassemble the Motor Unit by yourself, as there are no user serviceable parts inside. Any repairs to the product must be carried out by qualified electrical person only or the product must be disposed.
WARNING:
- The blade is very sharp, handle carefully when cleaning.
- Do not use abrasive cleaners. Never immerse the Motor Unit in water for cleaning.
TECHNICAL SPECIFICATION
- Voltage: 220-240V~ 50-60Hz
- Power: 1500W
- Jar Max. Capacity: 2000ml
12 MONTH WARRANTY
(Thank you for your purchase from Kmart.)
Kmart Australia Ltd warrants your new product to be free from defects in materials and workmanship for the period stated above, from the date of purchase, provided that the product is used in accordance with accompanying recommendations or instructions where provided. This warranty is in addition to your rights under the Australian Consumer Law.
Kmart will provide you with your choice of a refund, repair or exchange (where possible) for this product if it becomes defective within the warranty period. Kmart will bear the reasonable expense of claiming the warranty. This warranty will no longer apply where the defect is a result of alteration, accident, misuse, abuse or neglect.
Please retain your receipt as proof of purchase and contact our Customer Service Centre on 1800 124 125 (Australia) or 0800 945 995 (New Zealand) or alternatively, via Customer Help at Kmart.com.au for any difficulties with your product. Warranty claims and claims for expense incurred in returning this product can be addressed to our Customer Service Centre at 690 Springvale Rd, Mulgrave Vic 3170.
Our goods come with guarantees that cannot be excluded under the Australian Consumer Law. You are entitled to a replacement or refund for a major failure and compensation for any other reasonably foreseeable loss or damage. You are also entitled to have the goods repaired or replaced if the goods fail to be of acceptable quality and the failure does not amount to a major failure.
For New Zealand customers, this warranty is in addition to statutory rights observed under New Zealand legislation.