![]()
Congratulations on the purchase of your new HD Dash Camera. This manual contains important safety and operating information. Please read all the information carefully before you use the device and keep this information in a safe plate for future reference. Follow these important safety and operation instructions to avoid accidents.
SAFETY INSTRUCTIONS
- Do not leave the camera in high-temperature environments (over 35°C), especially in a parked car with the windows closed II summer. High temperatures may shorten the life span of the electronic device, damage the battery or melt plastic parts
- To reduce the risk of damaging components, do not expose this product to dusty, dirty, or sandy areas
- Do not operate in or expose the HD Dash Camera to the following conditions: direct sunlight, air conditioners, heaters or any other extreme temperatures. Avoid violent vibration.
- Never store next to a heat source or in dirty, humid or wet places
- Exposing the dash camera to open flames can cause an explosion
- Do not expose the HD Dash Camera to water or other fluids. Use in dry locations only
- Do not operate the product with wet hands. Doing so may cause an electric shock
- Keep the camera clean. To maintain, regularly wipe with a clean, dry, lint free cloth.
- Make sure that the product is installed coined,/
- Only used the supplied power adaptor. gang trey plug in the power cord adaptor so that ft cannot easily be disconnected. Do not cover the product or power cord
- Press the buttons gently. Pressing too hard can damage the product
- Do not subject the HD Dash Camera to harsh impacts. Do not drop the HD Dash Camera
- Do not attempt to dismantle, modify or repair the unit yourself. Doing so may cause fire, electric shock, or malfunction. Send the camera or any other accessories to a professional service centre for maintenance if and when required
- If any foreign matter gets inside the product, detach the power cord immediately. Contact a professional service centre for repair
- Use the supplied authorised charger only
- Do not use a damaged or modified power cord. Only use the cords provided by the manufacturer. Damaged or modified power cords may cause an explosion, fire, or malfunction
- Never shod-circuit the battery
- Set up time and date accurately before you use the HD Dash Camera
- Due to local laws and vehicles safety considerations, do not manually operate the HD Dash Camera while ddiAng. Doing so may cause an accident. Stop cr park your car in a safe place before installing and setting up the product
- Do not install the product in a location where the product can interfere with the driver’s field of vision. Doing so may cause an accident
- If smoke or an unusual smell is emitted from the HD Dash Camera or power cord, detach the power cord immediately
- Disconnect the camera from the power source before cleaning. Use a dry, soft cloth to clean the camera. Do not clean the camera with chemicals, cleaning solution, or high concentration detergent
- This product is intended for household use only and is not intended for commercial use.
- Keep out of reach of infants, children, or pets. There is a risk of them swallowing small components, and/or their saliva may get into the product, causing an explosion or malfunction
- No responsibility will be taken for damages suffered by the user or third parties as a result of inappropriate handling or use of the product, its accessories or by operational failure. We reserve the right to make changes to this product and its accessories without prior notice
- The illustrations included in this user manual are for reference only
- The supplier is NOT responsible for the loss of any data/content during operation.
Before you start using the HD Dash Camera it is assumed that you agree to the above statements
QUICK START GUIDE
- Remove the HD Dash Camera from its packaging.
- Insert a MicroSD card. (Sold separately)
- Mach the HD Dash Camera to the Suction Cup Mount.
- Attach the In Car Charging Adaptor to the HD Dash Camera.
- Attach the Suction Cup Mount to the inside of your windscreen and adjust position aocorcing to your needs
- Plug the In-Car Charging Adaptor into your cigarette lighter
- The HD Dash Camera will power on and start recording automatically, provided the car ignition is on.

PRODUCT OVERVIEW
| 1. Power button | 6. Right |
11. Micro SD card slot |
| 2. Left |
7. Reset button | 12. Microphone |
| 3. Menu button | 8. Emergency button | 13. Speaker |
| 4. OK button | 9. Bracket slot | 14. Lens |
| 5. Mode select button | 10. Mini USB charging port 5V DC 500mA | 15. Night LED lights |
Description of function of keys:
- Power button
A short press turns the HD Dash Camera on. A longer press turns the HD Dash Camera off In recording mode, short press to turn on/off the IR LED lights - Left
 (Up) button
In the menu, selecting this moves the selection choice one position - Menu button
Pressing this brings up the menu. - OK button
In video mode, press to start recording, press again to stop recording; In camera mode, press to take a picture. In menu mode, press the OK button to confirm your selection - Mode button
Switches between video/camera/playback modes - Right
 (Down) button
In the menu, selecting this moves the selection choice one position In standby or recording mode, selecting this toggles the microphone between on / off - Reset button
Resets the HD Dash Camera to factory default setting.
Note: The display language may be affected when the dash camera is first powered on after a factory reset. - Emergency button
Pressing the red emergency button will lock and protect the footage from being overwritten. The footage recorded will be saved as a special file.
PARTS LIST
Your HD Dash Camera has the following accessories
Suction Cup Mount
Suction cup mount to securely attach your camera to your car windscreen
- Suction Cup
- Lever
- lightening Nut
- Suction Cup Mount
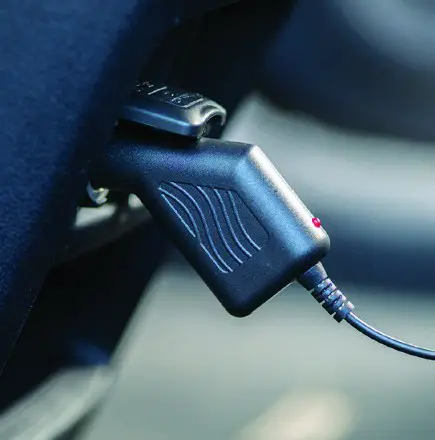
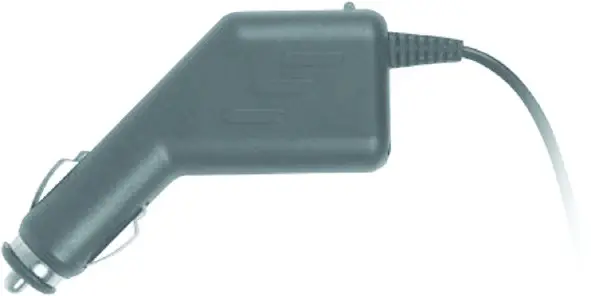
In-Car Charging Adaptor
When plugged into your cigarette lighter, the in-car charging adaptor keeps your camera powered and battery charged
PRODUCT FEATURES
Product Specifications
- Up to 1920 x 1080 recording at 30 fps (frames per second)
- 2.4″ LCD Display
- 120° wide-angle lens
- Rechargeable 150mAH Li-ion battery
- Accommodates MicroSD cards up to 32GB, minimum Class 6 Class 10 recommended (MicroSD cards sold separately)
- Auto ON/OFF
- Loop video recording
- Motion detection
- Built-in microphone & speaker
- Footage compatible with Windows 10, Windows XP, Windows Vista, Windows 7, Windows 8 Mac 10.2 and above
SETUP and OPERATION
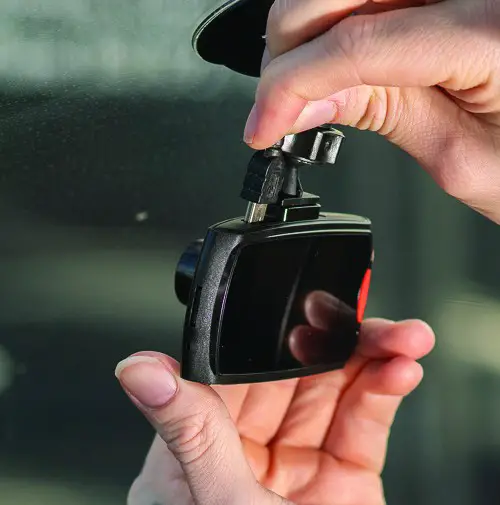
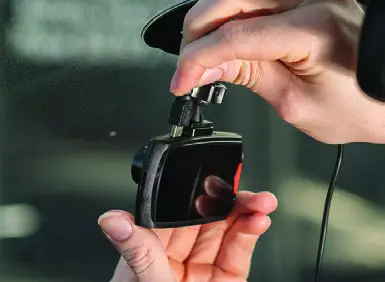
Attach the HD Dash Camera to the Suction Cup Mount
- Ensure your HD Camera is off
- Face the suction cup down in your hand or on a flat surface, ensuring the side lever is in the up position
- Slide the HD Dash Camera’s bracket over the suction cup mount bracket and click into place
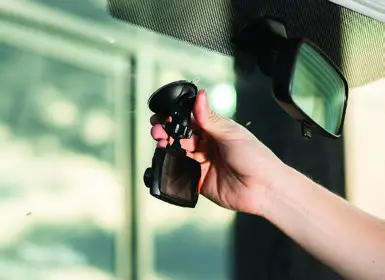
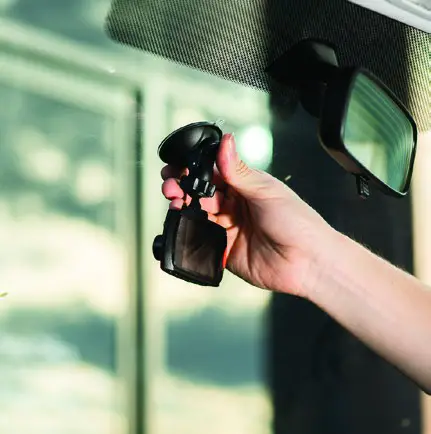
Mount the HD Dash Camera to the Windscreen
- With the suction cup lever in the up position (shown in image), hold the suction cup mount to the windscreen in the desired location.
- Once in the correct position, move the suction cup lever towards the windscreen to create suction and attach the HD Dash Camera in place
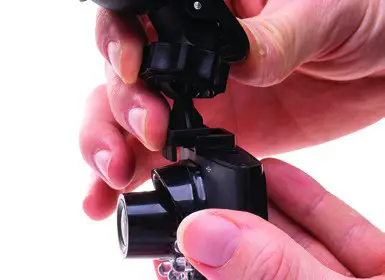
- To change the direction of the camera (up, down or sideways), loosen the tightening nut and adjust the camera’s position. Re-tighten to hold in place.
Powering the HD Dash Camera
- Connect the in-car charging adaptor to the HD Dash Camera’s mini USB Charging Port
- Plug the other end of the in-car charging adaptor into your cigarette lighter. The HD Dash Camera will power on and start recording automatically, provided the car ignition is on.
CHARGING THE BUILT-IN BATTERY
- To charge the internal battery, connect the in-car charging adaptor to the mini USB charging port on the camera. The indicator LED will light up red when charging.
- The battery will become fully charged after 3 hours. Once fully charged, the indicator LED will turn to blue.
INSERTING A MEMORY CARD (MicroSD CARD)
This HD Dash Camera does not have any internal memory. A MicroSD card (sold separately) must be inserted for this HD Dash Camera to record footage and operate.
- While the HD Dash Camera is off, insert a MicroSD card into the port on the side of HD Dash Camera marked (11) and push the card all the way into the port. When correctly positioned and fully inside the body of the HD Dash Camera, you will feel a small click.
- Your HD Dash Camera is ready to record. 3. To remove the MicroSD card, push the card in slightly until you hear a click and the card will then pop out from its housing for removal
SWITCHING YOUR DEVICE ON/OFF
- To switch on your HD Dash Camera press the power button . The screen will turn on and the device is ready to use. The HD Dash Camera will automatically turn on if it is connected to the in-car charging adaptor and your car is on.
- To switch off your HD Dash Camera press and hold the power button . The screen will turn off. You can also set the automatic power off time in the camera setup to ensure the device will automatically turn off.
ADJUST SETTINGS
- To access the general camera settings press the MENU button on the bottom of the camera until you reach the general Setup Screen. Press the Left (Up) and Right (Down) buttons on the bottom of the camera to scroll through the general setting options
- To access a desired setting, scroll to it and press the OK button on the bottom of the camera to select the sub-menu.
- Press the Left and Right buttons on the bottom of the camera to move up and down through the sub-menu, then press the OK button to select your chosen option
- To return to the main screen, press the MENU button.
- See below for all menu options and their associated function:
SETUP MENU
| CAMERA SETUP | FUNCTION |
| Resolution | Select the desired video resolution quality [1080P ] / [ 720P ] |
| Image Quality | Select the desired photo resolution quality [12M]/[10M]/[8M]/[5M]/[3M]/[2M]/[1.3M]/[1M] NOTE: the higher the number selected, the better the image quality, however more storage used |
| Loop Recording | Set the file length time of each video. Files will be overwritten once the card reaches full capacity — unless locked. |
| Motion Detection | [ 1 Min. ] / [ 2 Min. ] / [ 3 Min ] / [ Off ] |
| White Balance | This setting will change the colour balance in your pictures, making them warmer or cooler. To use the camera’s default white balance settings, select Auto. [ Auto ] / [ Sunlight ] / [ Cloudy ] / [ Tungsten Lamp ] / [ Fluorescent ] |
| Sharpness | Adjust the colour contrast adjustment between bright and dark areas to produce a clearer image [Q]/[1]/[2]/[3]/[4]/[5] |
| Exposure | Set the exposure value manually to compensate for unusual lighting conditions [+2]/[+1]/[Q]/[-1]/[-2] |
| Auto rec. | [ On ] When powered, the dash camera will automatically start recording |
| [ Off ] When powered, you need to manually start recording by pressing the OK Button | |
| Screen Saver | Saves battery power by automatically turning off your LCD screen after a selected period of time [ Off ] / [10 Sec ] / [ 30 Sec ] / [ 1 Min ] |
| Audio | Allows you to turn ON/OFF video sound recording [On]/[Off] |
| Parking Wake | If the parked vehicle experiences an impact the camera will awaken and commence recording footage. [On]/[Off] NOTE: To operate parking wake, the dash camera’s internal battery needs residual charge (power). |
| G Sensor | Detects a sudden change in the gravitational forc e (g-force) of the vehicle. When a vehicle experiences an impact from a crash, the camera is designed to secure the last set of video data files captured on the memory card, protecting them for review purposes. This feature safeguards the footage from being damaged and arms you with the proof you need following an accident or incident. Set sensitivity: [ Off ] / [ Low ] / [ tvd ] / [ High ] |
| NOTE: Selecting [Off] means the dash camera will no longer protect impact footage and will continue recording. | |
| Auto Power – Off | Saves battery power by automatically turning off your HD Dash Camera after a selected period of time [ Off ] / [ 3 Min ] / [ 5 Min ] |
| Time Setting | Set the date and time for your HD Dash Camera. Press mode to advance each setting. Press the Left |
| Language | Set the on-screen language |
| Date Tag | Add the time to your photos/ videos as you take them [Off]/[011] |
| Format | This function erases all data from your MicroSD card [ Cancel ] / [ Ok ] NOTE: Removing the MicroSD card during formatting may damage the card |
| Reset System | Returns menu settings to the default camera settings [ Cancel ] / [ Ok ] |
| Version | Information screen to show you the software and system version you have |
NOTE: Bold options are default
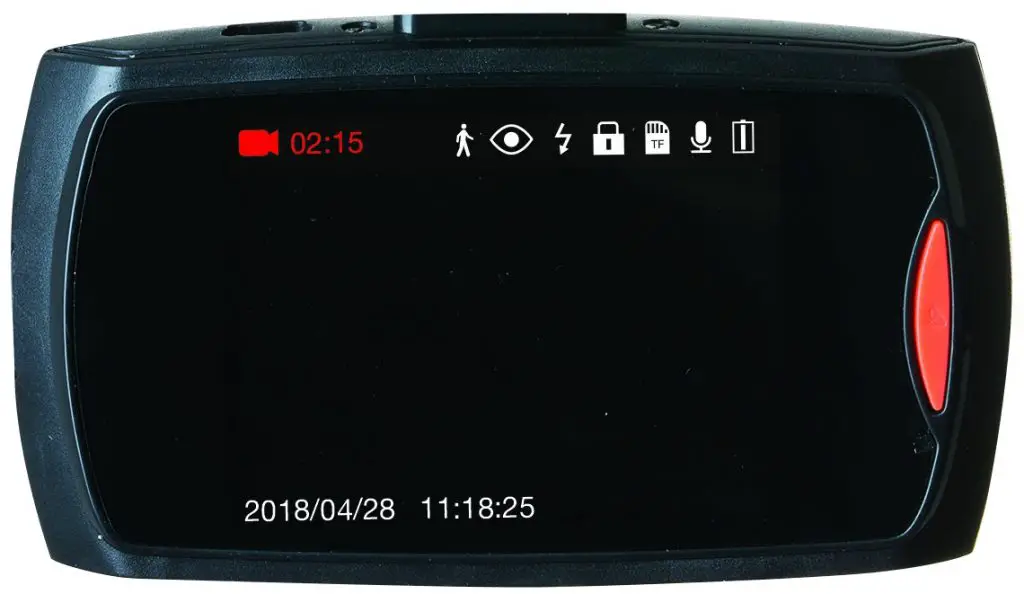
SCREEN DISPLAY
CONTROLS
| 1. Video / Photo / Playback Mode. (In video mode – red colour indicates actively recording) | 5. LED Lights on | 9. Battery Power Level |
| 2. Video Clip length | 6. Locked footage. Unable to overwrite | 10. Date |
| 3. Motion Detection | 7. SD Card detected | 11. Time |
| 4. Parking Wake | 8. Microphone on |
MODE SELECTION
There are three different modes available for your HD Dash Camera
Video Mode: Records video clips
Photo Mode: Takes still photos
Playback Mode: Plays your recorded files
Video Mode
- Turn on your HD Dash Camera
- Your camera will start up in video mode and begin recording automatically.
- Use the LCD screen to view your subject. Recording time (clip length) will be displayed in the left corner
- Use the right button to turn the recording sound (microphone) on and off. The microphone icon in the top right corner will change accordingly
Photo Mode
- Turn on your HD Dash Camera. Note: if your camera is already powered on and recording, press the OK button to stop recording.
- Press the MODE button until you see the Camera icon in the top left corner of your screen
 . You are now ready to take photos on your camera.
 - Press the OK button to take still photos.
Playback Mode
- Press the MODE button until you see the Playback icon in the top left comer of your screen
 .
. - Press the Left and Right buttons on the camera to scroll through both video and photo files. They will be listed in the order in which they were taken. Video files are titled .avi and photo files are titled .jpg.
- To play a video file, press the OK button. A progress bar with start and end times appear on the screen as you view the file
- When a video is playing, press the OK button to pause and resume the video or press the MODE button to stop playing the video file and exit playback mode.
- To delete files, use the left and right buttons to go to the desired image or video, press the menu button to delete and follow the prompts.
Transfer / Save Footage To Other Devices
To transfer footage files to other devices (E.g.: your PC), eject the MicroSD card from (11) per instructions under the heading “Inserting a Memory Card”.
Re-insert the MicroSD into the device you wish to save the data to. Save or transfer footage files from the SD card to your device. If your device does not have a MicroSD card port, insert into an adaptor, reader or hub appropriate for your specific device (sold separately).
When ready to use the HD Dash Camera again, reinsert the MicroSD card back into the MicroSD card slot (11).
TROUBLESHOOTING
Q: I press the OK button to take an image but there is no response
A: Wait for the data process to complete and then take your next photo OR delete some photos/videos from your MicroSD Card, if the memory is full.
Q: Automatically stops when recording. The message “Card Error” appears on the screen when a MicroSD Card is inserted A: Copy and save all footage you want to retain to another device. Then, format your MicroSD Card using the format option (see Adjust Settings table for details) and try again OR use a high-speed MicroSD Card (minimum class 6). The HD Dash Camera is not compatible with MicroSD XC cards.
Q: Can’t take photos or record video
A: Check if the MicroSD card has enough space or is locked or format your MicroSD card.
Q: Unclear video footage
A: Check if there is any dirt or fingerprints on the lens. Use a clean, dry, lint-free cloth to clear the camera lens.
Q: Black image when recording sky or water scene
A: Scenes with a lot of contrast may influence the automatic exposure function of camera. Adjust the exposure settings to compensate.