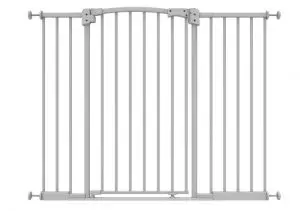
anko Tall Wide Metal Gate Instruction Manual
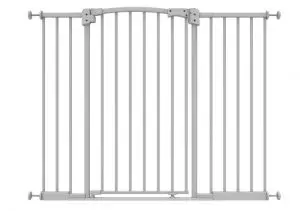
- gate with no extensions fits: 71.5cm – 79cm
- gate with 1x 12.7cm extension fits: 84.5cm – 92cm
- gate with 1x 25.4cm extension fits: 96.5cm – 104cm
- gate with 1x 12.7cm and 1x 25.4cm extensions fits: 109.5cm – 117cm
IMPORTANT! READ AND FOLLOW THESE INSTRUCTIONS CAREFULLY AND KEEP FOR FUTURE REFERENCE.
This product conforms to EN1930:2011.
PARTS LIST
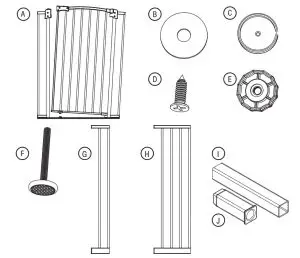
A. 1x Safety Gate
B. 4x Adhesive Pads
C. 4x Wall Cups
D. 4x Screws
E. 4x Adjuster Screws
F. 4x Mounting Bolts
G. 1x 12.7cm Gate Extension
H. 1x 25.4cm Gate Extension
I. 4x Extension Pins
J. 4x Rotary Bolt Inserts
If any parts are missing, do not attempt to use your Tall & Wide Metal Gate. Please contact Kmart Australia Ltd. to obtain additional or replacement parts. Only use parts supplied by the manufacturer with your Tall & Wide Metal Gate.
SAFETY INFORMATION

WARNING – To prevent serious injury or death, securely install gate or enclosure and use according to manufacturer’s instructions.
WARNING – Never leave child unattended when using this product.
WARNING – Incorrect installation can be dangerous.
WARNING – Do not use the safety barrier if any components are damaged or missing.
WARNING – The safety barrier must not be fitted across windows.
WARNING – Never use with a child able to climb over or dislodge/open the safety
barrier, which may cause danger.
WARNING – Never install this product on glass doors. Install this product against
reliable doors or walls.
WARNING – To prevent falls, never use this product at the top of stairs. WARNING – If the safety barrier is used at the bottom of the stairs, it should be
positioned at the front of the lowest tread possible.

WARNING – To prevent injury, do not put any goods which can be grabbed by children or pets near this product.
WARNING – Before using this product, carefully inspect for any loose parts and whether any parts need to be tightened.
WARNING – Make sure the product to be installed is horizontal and flat on the floor.
WARNING – This product is intended for use with children from 6 to 24 months or small to medium pets.
WARNING – Regularly check that the safety barrier is properly installed and secure.
WARNING – Any additional or replacement parts should be obtained from Kmart Australia Ltd.
WARNING – Barrier must be fitted between rigid surfaces such as plaster board,
timber or hardwall.
WARNING – Always check that the safety barrier is correctly closed.
WARNING – Use only with the locking/latching mechanism securely engaged.
WARNING – This safety barrier is for domestic use only.
WARNING – Never use without wall cups.
WARNING – This safety barrier has a manual closing system.
WARNING – This safety barrier must be fitted between a rigid surface such as
doorways or walls along with wall cups secured with screws.
INSTALLATION
Important: Gate must be installed in a structurally sound opening. Ensure mounting surface (wall, door frame, stair posts, etc.) is strong, rigid and has an even surface.

If using gate on a stairway, it must be placed on the lowest step at the bottom.
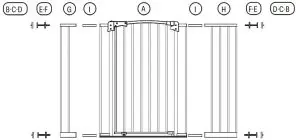
- Measure the space to be enclosed, you may need to use extensions.
Gate with no extensions fits: 71.5cm – 79cm
Gate with 1x 12.7cm extension fits: 84.5cm – 92cm
Gate with 1x 25.4cm extension fits: 96.5cm – 104cm
Gate with 1x 12.7cm and 1x 25.4cm extensions fits: 109.5cm – 117cm
Note: Only use one extension on each side of gate. If no extensions are required, substitute part I with part J.
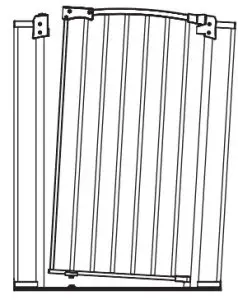
- When you unpack the gate, you may notice a gap at the gate opening – this is normal with pressure mounted gates and the gap will disappear when it is installed correctly.
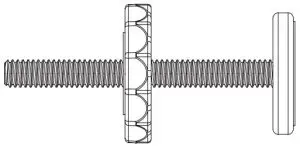
- Screw mounting bolts and adjuster screws together and then place into mounting holes in each corner of gate.
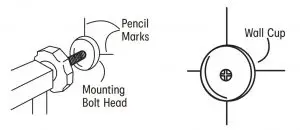
- Place the gate in opening and ensure the bottom rail is completely flat on the floor and the wall cups are directly above each other. Then mark the position of each wall cup, stick the cups in position using the adhesive pads. For added security, fix each cup to the wall using a small Phillips head screwdriver (not included) and screws provided.
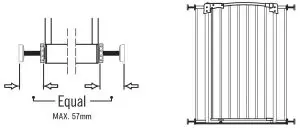
- Align gate with wall cups and tighten adjuster screws by turning clockwise, starting with the bottom and then the top. Tighten equally until there is only a 1mm gap in the locking mechanism. Regularly check tension of all mounting bolts and adjust if required.
Note: DO NOT EXTEND MOUNTING BOLTS FURTHER THAN 57mm.
OPERATION
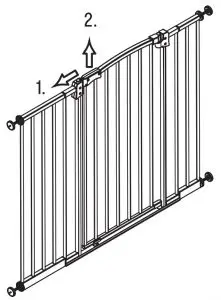
To Open Gate
- Using one hand, place thumb on the button and grip gate with fingers.
- Slide button and lift gate, then open gate in either direction. When released, gate will swing closed. Always check gate is properly closed.
NOTE: IF GATE IS OPEN AND EXCESSIVE PRESSURE IS APPLIED, (SUCH AS STANDING OR SWINGING ON GATE) STRUCTURAL DAMAGE MAY OCCUR.
CLEANING INSTRUCTIONS
Use a soft damp cloth to simply wipe gate. Dry gate after cleaning. Do not use chemical or abrasive cleaners.
IMAGES/ DRAWINGS IN THE MANUAL ARE FOR VISUAL PURPOSES ONLY. ACTUAL PRODUCT MAY VARY SLIGHTLY. THE MANUFACTURER RESERVES THE RIGHT TO CHANGE ANY SPECIFICATION OR FEATURE WITHOUT PRIOR NOTICE.
Keycode : 42584155
