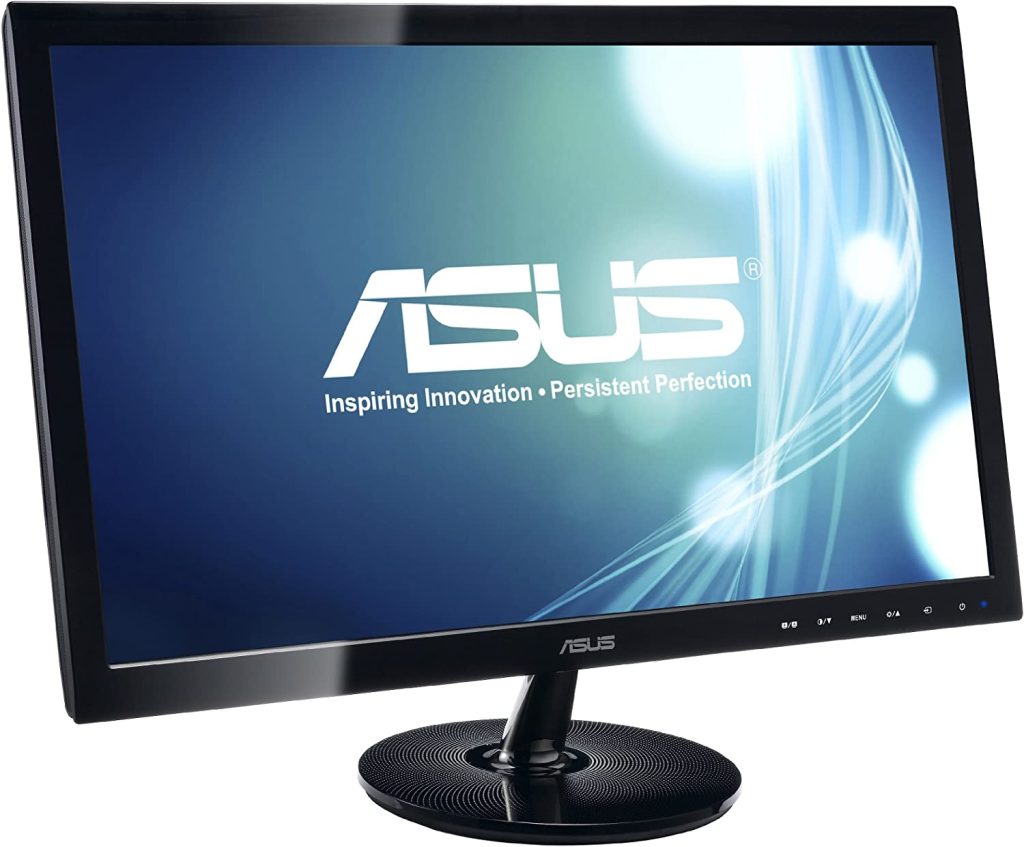

Asus VS248 Series Monitor Manual
Welcome!
Thank you for purchasing the ASUS® LED monitor!
The latest widescreen LED monitor from ASUS provides a crisper, broader, and
brighter display, plus a host of features that enhance your viewing experience.
With these features, you can enjoy the convenience and delightful visual
experience that the monitor brings to you!
Package contents
Check your package for the following items:
LED monitor
Monitor base
Quick start guide
Warranty card
Power cord
VGA cable
DVI cable
1.3 Monitor introduction
1.3.1 Front view

1. 
• Selects a desired preset mode.
• Exits the OSD menu or goes back to the previous menu when the OSD menu is active.
• Automatically adjusts the image to its optimized position, clock, and phase
by pressing this button for 2-4 seconds (for VGA mode only).
2. 
• Decreases values or moves your selection left/down.
• Contrast hotkey
3. MENU button:
• Turns on the OSD menu. Enacts the selected OSD menu item.
4. 
• Increases values or moves your selection right/up.
• Brightness hotkey
5.
• Selects an available input source.
6. 
• Turns the monitor on/off.
• The color definition of the power indicator is as the below table.

1.3.2 Back view


Rear connectors
1. AC-IN port. This port connects the power cord.
2. HDMI port. This port is for connection with an HDMI compatible device.
3. DVI port. This 24-pin port is for PC (Personal Computer) DVI-D digital signal
connection.
4. VGA port. This 15-pin port is for PC VGA connection.
5. Earphone jack. This port is only available when an HDMI cable is
connected.
6. Kensington lock slot.
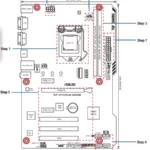
2.1 Assembling the monitor arm/base
To assemble the monitor base:
1. Have the front of the monitor face down on a table.
2. Attach the base into the arm, making sure the tab on the arm fi ts into the groove on the base.
3. Fix the base to the arm by fastening the bundled screw.
Note: We recommend that you cover the table surface with soft cloth to prevent
damage to the monitor.

2.2 Adjusting the monitor
• For optimal viewing, we recommend that you look at the full face of the
monitor, then adjust the monitor to the angle that is most comfortable for you.
• Hold the stand to prevent the monitor from falling when you change its angle.
• The recommended adjusting angle is +20° to -5°.

2.3 Detaching the arm/base (for VESA wall mount)
The detachable arm/base of this monitor is specially designed for VESA wall mount.
To detach the arm/base:
1. Have the front of the monitor face down on a table.
2. Remove the rubbers in the four screw holes. (Figure 1)
3. Remove the base (Figure 2).
4. Pry the rear hinge cover (Figure 3).
5. Use a screwdriver to remove the four screws on the hinge (Figure 4), then remove the hinge.

2.4 Connecting the cables


• To connect the power cord: connect one end of the power cord securely to
the monitor’s AC input, the other end to a power outlet.
• To connect the VGA/HDMI/DVI cable:
a. Plug one end of the VGA/DVI/HDMI cable to the monitor’s VGA/DVI/HDMI port.
b. Connect the other end of the VGA/DVI/HDMI cable to your computer’s VGA/DVI/HDMI port.
c. Tighten the two screws to secure the VGA/DVI connector.
• To use the earphone (only when an HDMI cable is connected): connect the end with plug type to the monitor’s earphone jack.
2.5 Turning on the monitor
Press the power button
power indicator
3.1 OSD (On-Screen Display) menu
3.1.1 How to reconfigure
1. Press the MENU button to activate the OSD menu.
2. Press

3.1.2 OSD function introduction
1. Splendid This function contains six subfunctions you can select for your preference. Each mode has the Reset selection allowing you to maintain your setting or return to the preset mode.

• Scenery Mode: best choice for scenery photo display with SPLENDID™ Video Enhancement.
•• Standard Mode: best choice for document editing with SPLENDID™ Video Enhancement.
•• Theater Mode: best choice for movies with SPLENDID™ Video Enhancement.
•• Game Mode: best choice for games playing with SPLENDID™ Video Enhancement.
•• Night View Mode: best choice for dark-scene games or movies with SPLENDID™ Video Enhancement.
• sRGB: best choice for viewing photos and graphics from PCs.
2. Color
You can adjust Brightness, Contrast, Saturation, Color Temp., and Skin Tone from this menu.
• Brightness: the adjusting range is from 0 to 100.
• Contrast: the adjusting range is from 0 to 100.
• Saturation: the adjusting range is from 0 to 100.
• Color Temp.: contains four modes including Cool, Normal, Warm, and User Mode.
•• Skin Tone: contains three color modes including Reddish, Natural, and Yellowish.
•• Smart View: provides better display quality under big viewing angle.

3. Image
You can adjust Sharpness, Trace Free, Aspect Control, ASCR,Position (VGA only), and Focus (VGA only) from this menu.
• Sharpness: the adjusting range is from 0 to 100.
• Trace Free: adjusts the response time of the monitor.
• Aspect Control: adjusts the aspect ratio to “Full”, “4:3”, or “OverScan”
(only available for the HDMI input).
• ASCR: turns on/off the ASCR (ASUS Smart Contrast Ratio) function.
• Position: adjusts the horizontal position (H-Position) and the vertical
position (V-Position) of the image. The adjusting range is from 0 to 100.
•• Focus: reduces Horizonal-line noise and Vertical-line noise of the image
by adjusting (Phase) and (Clock) separately. The adjusting range is from
0 to 100.

Input Select
In this function, you can select your desired input source.

System Setup
Allows you to adjust the system.

• Splendid Demo Mode: splits the screen into two for Splendid modes comparison.
• Volume: the adjusting range is from 0 to 100 (only available for the HDMI
input).
• ECO Mode: reduces power consumption.
• OSD Setup:
* Adjusts the horizontal position (H-Position)/the vertical position
(V-Position) of the OSD from 0 to 100.
* Adjusts the OSD timeout from 10 to 120 seconds.
* Enables or disables the DDC/CI function.
* Adjusts the OSD background from opaque to transparent.
• Information: shows the monitor information.
• Language: there are 10 languages for your selection, including English,
German, Italian, French, Dutch, Spanish, Russian, Traditional Chinese, Simplified Chinese, and Japanese.
•• All Reset: “Yes” allows you to restore the default settings.
3.2 Specifi cations summary (VS248)

3.3 Troubleshooting (FAQ)

3.4 Supported operating modes

* Modes not listed in the table may not be supported. For optimal resolution, we recommend that you choose a mode listed in the table above.
* This monitor supports full HD (480p, 576p, 720p, 1080i/p) video content from game consoles, DVD players and other consumer video devices via HDMI.