
Page 4 of 6
« Previous Next »
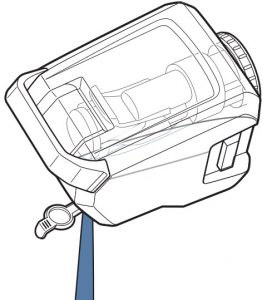
Emptying the Dirty Water Tank
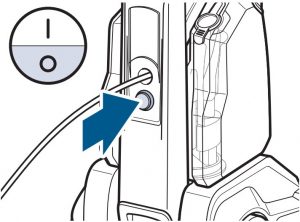
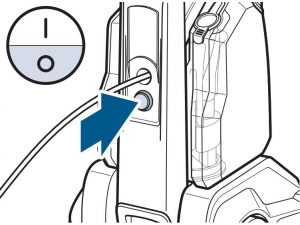
- Turn OFF and unplug your machine.
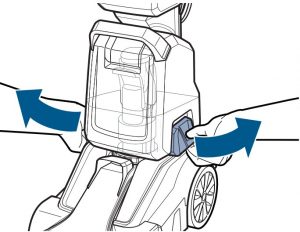
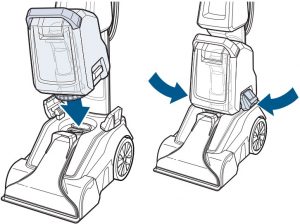
- Release Dirty Water Tank by pulling out and up on the latches on the side.
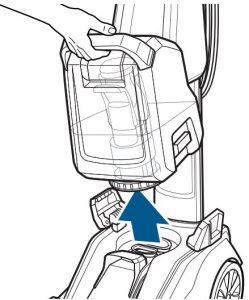
- Carefully remove tank by lifting up on the Dirty Water Tank Handle
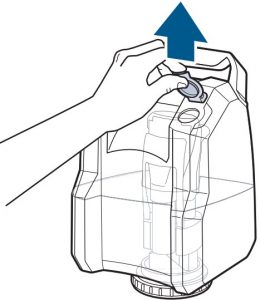
- Lift tab on the top of the tank.
- To empty, pour out dirty water using opening at back of tank. Rinse the tank thoroughly. Reinsert tab into tank.
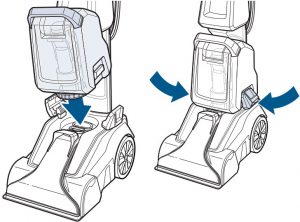
- To continue cleaning, align the bottom of the tank to the base and secure into place with latches.


IMPORTANT
- Please check manufacturer’s tag before cleaning area rugs for any specialized cleaning instructions. We do not recommend deep cleaning delicate, silk, wool, antique, or area rugs without a manufacturer’s tag.
- Do not overwet carpet. Be careful not to run over loose objects or edges of area rugs. Stalling the brush may result in premature belt failure
After-Cleaning Care
- Turn OFF and unplug your machine. Follow steps 2 & 3 in the section above to remove the Dirty Water Tank.
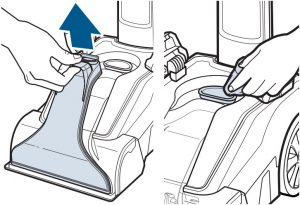
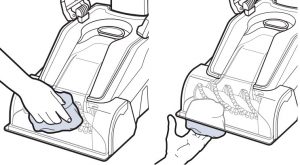
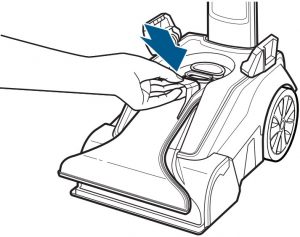
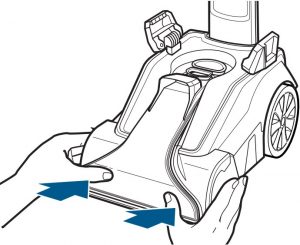
- Grab the top of the Nozzle and pull it up and away from the machine. Rinse or wipe it clean. Use a cloth to wipe debris from the red filter.
- Use cloth to wipe brush roll cover clean.
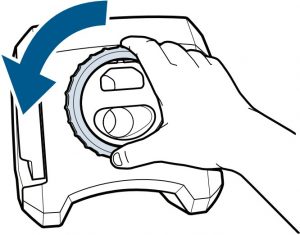
- Ensure the Dirty Water Tank is empty by gently removing the float stack and unscrewing the ring at the bottom of the tank.
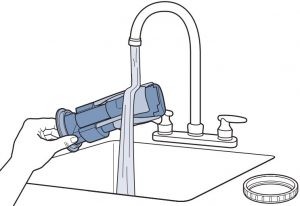
- Clean and rinse debris from the float. Keeping the float clean prevents your Dirty Water Tank from overflowing and ensures the seal stays intact.
- Once clean, assemble by aligning the arrow on the float with the notch on the tank. Then, return the ring and twist to lock. Make sure it’s fully aligned, so water doesn’t leak

- To replace the Nozzle, align top into channel in front of red filter and press in place.
- Use both hands to push the bottom portion of Nozzle into place.
- Once Dirty Water Tank is dry align the bottom of the tank to the base and secure into place with latches.


ATTENTION If you experience no suction, remove the Dirty Water Tank and ensure the Nozzle is secured and latched appropriately. Return Dirty Water Tank to the machine and try cleaning again.

WARNING: To reduce the risk of fire, electric shock or injury, turn power OFF and disconnect plug from electrical outlet before performing maintenance or troubleshooting.
Page 4 of 6
« Previous Next »
[View Manual Contents]