CPS Wireless Charging Scale Compute-A-Charge Instruction Manual
GENERAL INFORMATION
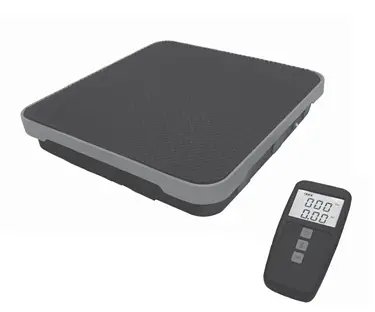
The CC240RF is an advanced, battery operated, WIRELESS weighing and charging scale. It has been designed to be accurate, rugged and reliable over a large weighing span (240 lbs / 110 kg). It incorporates a wireless display and control unit with 3 keys and an extra large LCD display for easy viewing. The scale platform incorporates a corner adjusted, heavy-duty load cell. 2.4 GHz wireless technology interconnects the display and control unit and the scale platform. This wireless scale system has a range of 30 feet (9m)
CC240RF Specifications
| CC240RF Specifications | |
| Working Load Capacity | 110 kg / 240 lbs |
| Overload Warning | 110 kg / 240 lbs |
| Operating Temperature | 14˚F to 122˚F or -10˚C to 50˚C |
| Operating and Storage Humidity | 0 to 95% non-condensing |
| Resolution | .25 oz (10 g) |
| Accuracy | +/- 0.05% of reading or +/- 0.25 (10 g) whichever is greater |
| Display & Control Unit Batteries | One 9V alkaline (ANSI 1604AC-IEC 6LR61) |
| Scale Platform Batteries | Four AA alkaline (ANSI 15A-IEC LR6) |
| Battery Life | 32 hrs. of continuous use |
| Battery Indicator | Battery symbol with 3 segment Power Level Bar Graph |
| Weight | 8 lbs 15 oz. (4.00 kg) with batteries |
| RF Frequency Range | 2.4 GHz, ISM band |
| RF Transmission Range | 30 feet (9m) |
| Warranty | 1 year |
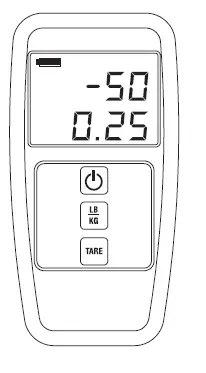
Key Functions
NOTE: Every key press received by the scale platform is acknowledged with a beep. If you have lost connectivity, there will be no beep from the scale platform and the display may freeze. It will be necessary to re-enter the key stroke when you are within range and connectivity is restored.
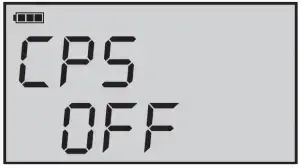
POWER [ ]: Turns the display and control unit as well as the weighing platform ON or OFF. Press once to turn power ON, if the display and control unit is OFF. To turn OFF press and hold until a beep is heard and CPS OFF appears on the screen
(See Fig. 11). This turns off both the scale platform and the display and control unit and also clears all memory and settings.
 Your body is an effective absorber of 2.4 GHz energy. DO NOT STAND
WITH YOUR BACK TO THE SCALE PLATFORM!
 Do not turn the display and control unit OFF if connection to the scale platform has been lost.
LB / KG (UNITS): Momentarily press to toggle units between Imperial and metric units.
TARE: Momentarily press to tare the weight on the platform. The weight display returns to zero.
Display Screens
The CC240RF can be used for weighing, charging and recovering refrigerants. The following are instructions on how to use the CC240RF for common refrigeration service functions.
You must be within 5 feet to initially connect to the scale. Range extends to 30 feet when connected. Turning the system ON and linking with the weighing platform:
Press the POWER [ ] key in the display and control unit. The following series of screens will appear as the display and control unit establishes communication with the weighing platform. A lot of useful information is displayed in the screens in the following figures.
OPERATION

Figure – 1: Displays the software version of the unit.
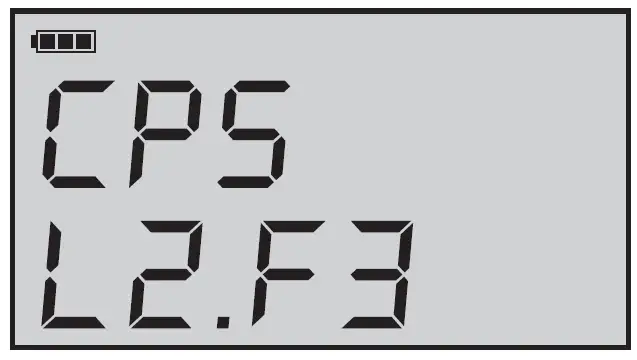
Figure – 2: Automatic Power Off enabled. Press [TARE] key to change. (See page 8 for details)

Figure – 3: Shows the display and control unit battery voltage.
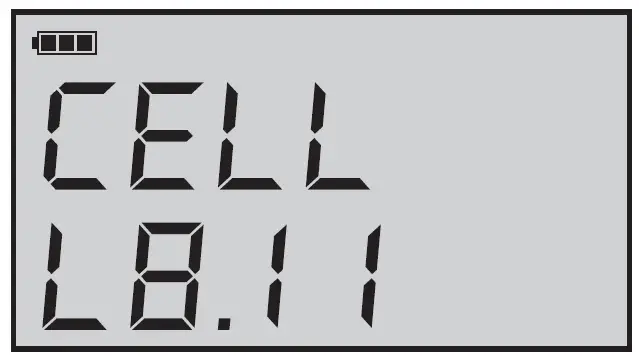
Figure – 4: Count down to connect with the scale platform on channel 0.
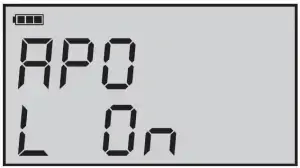
Figure – 5: Connection established. Displays software version of scale platform.
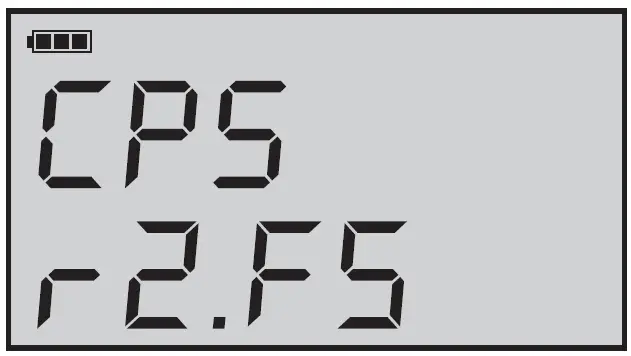
Figure – 6: Scale platform Automatic Power Off status.
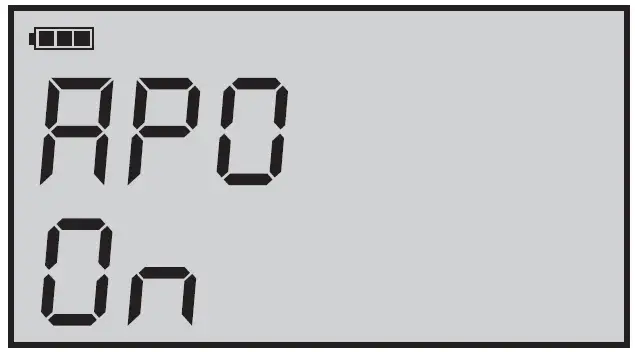
Figure – 7: Scale platform battery voltage.
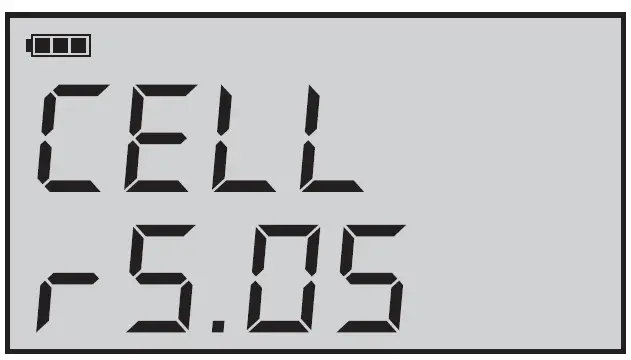
Figure – 8: Notifies the user that a zero calibration is being performed.
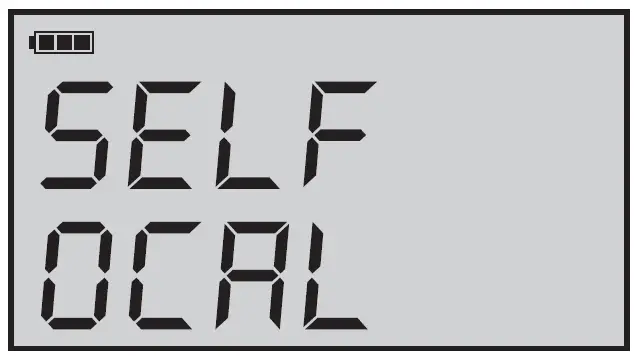
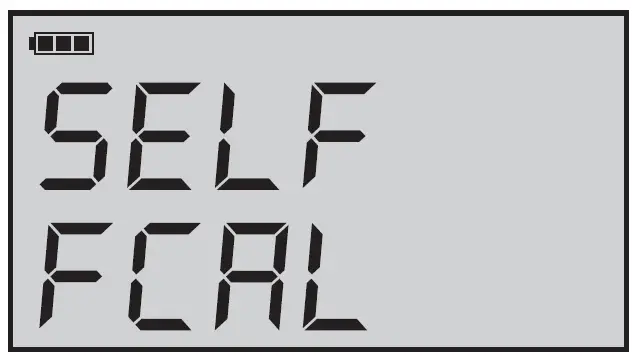
Figure – 9: Notifies the user that a full scale calibration is being performed.
Weigh Mode
- Place the weighing platform on a level, rigid surface.
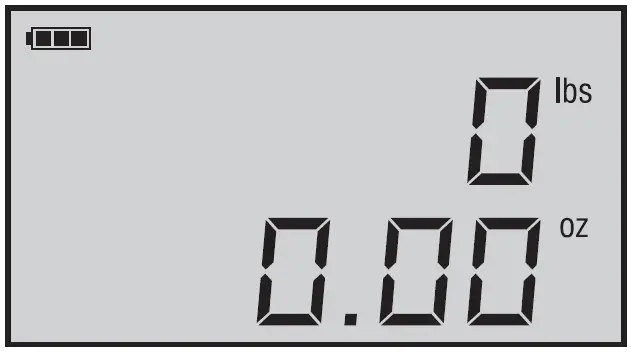
Figure – 11: Press and hold the POWER [ ] key until this message is displayed on the screen. - Press POWER [ ] key to turn the unit ON, any weight on platform will be set to zero. (See figures 1-10 for the screen squence while CC240RF turns on).
- Select the desired unit by pressing the [LB / KG] key.
- Place the object that is to be weighed on the platform.
- Gross weight will display.
- When weighing has been completed, press and hold the POWER key for 4 seconds to turn the unit OFF.
Charge Mode
- Place the weighing platform on a level, rigid surface.
- Press POWER [ ] key to turn the unit ON any weight on platform will be set to zero. (See figures
1-10 for the screen squence while CC240RF turns on).
- Select the desired units by pressing [LB / KG] key.
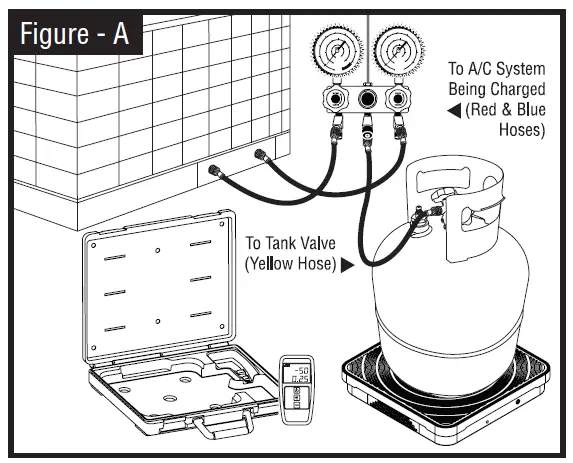
- Place cylinder on scale and connect scale as shown in Figure-A. The display will show the weight of the Freon® plus the weight of the cylinder. Press [TARE] to zero the scale platform.
- Open the cylinder valve and all other valves that are in the charging pathway.
- The display will show the amount of refrigerant leaving the tank.
- When the desired amount is reached, close the cylinder valve and the valves in the manifold.
- Press and hold the POWER [ ] key for 4 seconds to turn the unit off.
Recovery Mode
- Place the weighing platform on a level, rigid surface.
- Press POWER [ ] key to turn the unit ON any weight on platform will be set to zero. (See figures
1-10 for the screen squence while CC240RF turns on). - Select the desired units by pressing [LB / KG] key.
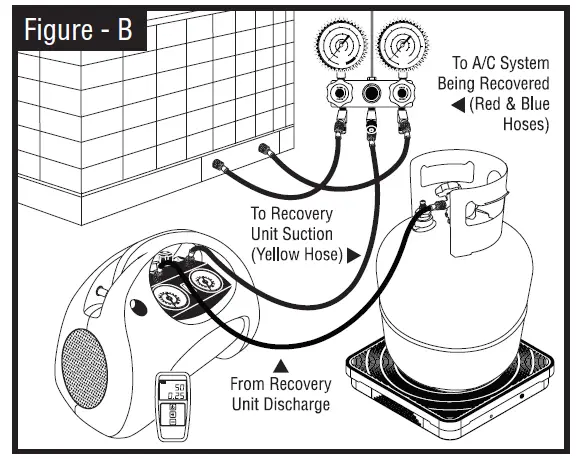
- Place cylinder on scale and connect scale as shown in Figure-B. Note the weight of the empty tank. Do not press [TARE] to zero the scale platform.
 When recovering refrigerant do not exceed the maximum tank fill weight. This weight equals the empty tank weight plus 80% of the water capacity
weight. The water capacity weight is usually stamped on the tank.

- Open the cylinder valve and all other valves that are in the recovery pathway. This allows the flow of refrigerant to the refrigerant recovery unit.
Danger – the recovery cylinder used contains liquid refrigerant. Overfilling of the recovery tank may cause a violent explosion resulting in severe injury or even death. - Turn on the refrigerant recovery unit. Follow the recovery unit’s instructions.
- If the recovery process finishes before the weight reaches the maximum tank fill weight, close the cylinder valve and all other valves that are in the recovery pathway. (Go to step #10)
- If the maximum tank fill weight is reached before the recovery process is finished, stop the recovery unit; close the cylinder valve and all other valves that are in the recovery pathway to the cylinder.
- Exchange the cylinder with an empty one and proceed back to STEP 4.
- When the recovery operation is completed, stop the recovery machine, close all the valves in the recovery pathway and press and hold the POWER [ ] key for 4 seconds to turn the unit OFF.
Additional Features
Battery Life Indications [  ] :
] :
The battery life remaining in the scale is shown on the LCD as a battery shape with 3 segment bar graph.
| 3 segments of Bar Graph | Battery at 100% to 80% |
| 2 segments of Bar Graph | Battery at 80% to 60% |
| 1 segment of Bar Graph | Battery at 60% to 20% |
| 0 segments of Bar Graph | Battery at 20% to 5%, recommend replace |
| LO CELL displayed on LCD | Battery below 5% |
Auto Tare and Overload Indicator Feature:
The unit will tare off any weight less than (240 lbs / 110 kg) while powering up. If the weight is more than its capacity, the unit will display “OL” to indicate overload. The “OL” will also display when the gross weight is more than its capacity.
For example: The unit starts with 230 pounds on its platform-display reads 0; placing 25 pounds makes the unit display OL.
Auto Shut Off Feature:
Auto Shut Off (APO) – The unit will automatically shut off after 10 minutes if the weight on its platform does not change by more than 1oz (40g) in that period of time. Pressing [TARE] key when the unit displays the message in Figure-2 toggles between APO ON and APO OFF.
 If the display and control unit is out of range of the scale platform and it turns off because of the APO, the scale platform will remain ON and subsequent connection will not be possible unless the batteries in the platform are removed and re-installed after a 60 second delay.
Troubleshooting
The CC240RF has been designed with the rough conditions of service work in mind. However, it is a precision instrument and, as such, certain precautions need to be observed to enjoy the benefits of its performance for a long time.
- Control and display unit does not turn on:
a. Check for dead batteries.
b. Check for reversed polarity.
c. Remove 9 volt alkaline battery for one minute; replace battery, listening for the battery installed tones.
The control and display unit will produce 2 beeps then 5 faster beeps. - Control and display unit fails to connect to scale platform:
a. Make sure you are within 5 feet (1.5 m.) of the scale platform.
b. Check for dead batteries in the scale platform.
c. Check the polarity of the batteries in the scale platform.
d. Use 4 fresh AA alkaline batteries. - Items 1 and 2 are satisfied but the control and display unit still fails to connect:
a. Place the control and display unit close to but
not on top of the scale platform then press
POWER [ ] key on the control and display
unit.
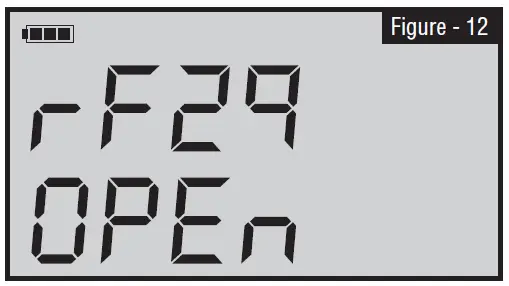
b. When the display gets to rf29 / CH x (See Fig.
4), press [TARE] the display will change to rf29/ OPEn (See Fig. 12).
c. When the control and display unit connects to the scale platform and the display enters the weighing mode, press and hold the POWER [ ] key and then press the [LB / KG] key and release both.
d. In addition to displaying the current channel, the display will compare 4 ID’s between the control and display unit and the scale platform.
e. The display will show the word “Good” in each case. If the ID’s do not match then a new application ID needs to be programmed. Please, contact the factory for instructions on how to do this.
Application ID:
The control and display unit and the scale platform are paired together at the factory. This feature allows the scale platform to communicate only with it’s paired control and display unit. Occasionally, is may be required to link the scale platform with a different control and display unit. Please, contact the factory for assistance with this function.
Install Batteries:
When the control and display unit is turned on, it will display the voltage of its battery (See Fig. 3). CPS recommends replacing the battery in the control and display unit with a fresh 9 V alkaline battery when the reading is 7.00 VDC, although useful operation can be obtained with battery voltages all the way to 6.00 VDC. During operation, the amount of battery life remaining will be displayed in the battery symbol on the display. When the battery is correctly installed, you will hear 2 tones followed by 5 faster tones. After the control and display unit connects with the scale platform, the voltage of the battery pack in the platform will be shown on the display (See Fig. 7). CPS recommends changing the scale platform batteries when the reading is 4.5 volts, although useful battery operation will result all the way down to 4.2 VDC; always use a set of 4 AA alkaline cells. When batteries are correctly installed, the scale platform will product a 7 tone musical tune.
 Note : For optimum performance, always replace both the HHLD and the Scale Platform batteries atthe same time. Ensure that you hear the appropriate tone, if not, remove, wait 1 minute and reinstall battery.
 Note : It is recommended that the HHLD and the Scale Platform be turned off prior to removing any batteries. Removing a battery when the Scale Platform is connected to the Hand Held, may cause the system to hang-up.Remove batteries from both devices if you feel you must remove a battery during operation.
Low Battery Indication:
If the system detects a low battery condition, the system will turn itself off in a safe condition. The display will show the word “CELL” and either “rxxx” or “Lxxx”. The “r” indicates the voltage of the scale platform batteries and “L” the voltage of the control and display unit battery voltage (See Fig. 3 & 7). The display then changes to “CPS Abrt” after a brief delay and then the system shuts off.
External Interference:
In the unlikely event that the CC240RF has difficulty maintaining connectivity or has numerous instances of the display freezing, no response to key entries, etc. the most probable cause is interference from other ISM band devices in the same channel. In that case, press and hold the POWER [ ] key and press the [TARE] key. To check that the channel has changed, press and hold the POWER [ ] key and then press the [LB / KG] key. The display will show all [4 id / Good] settings and then will show the new channel number and return to the normal weigh mode.
This instrument contains one or more
RF devices with FCC ID: X8BMT240, IC: 8826-MT240.
This product conforms to the applicable parts of FCC Rule 15.