Sections in this Manual
- Getting Started
- What’s in the box
- What’s in this document
- Setting up your Fitbit Charge
- Syncing your tracker data to your Fitbit account
- Getting to know your Fitbit Charge
- Using your Charge in wet conditions
- Battery life and charging
- Care
- Tracking with Fitbit Charge
- Using Silent Alarms
- Receiving Call Notifications
- Using your fitbit.com Dashboard
- Updating Fitbit Charge
- Troubleshooting
- Info & Specifications
- Help
- Return policy and warranty
- Safety Statement
- Disposal and Recycling Information
Syncing your tracker data to your Fitbit account
Once you’ve set up and started using Charge, you’ll need to make sure it regularly ntransfers (syncs) its data to Fitbit so you can track your progress, see your exercise history, earn badges, analyze your sleep logs, and more on your Fitbit dashboard. A ndaily sync is recommended but not required.
The Fitbit apps use Bluetooth Low Energy (BLE) technology to sync with your Fitbit tracker. Each time you open the app it will sync if the tracker is nearby, and the app will also sync periodically throughout the day if you have the all-day sync setting enabled. If you’re running the Fitbit app on a Windows 10 PC that doesn’t have Bluetooth, you’ll need to make sure the tracker is connected to the computer.
Fitbit Connect on a Mac® also uses Bluetooth for syncing (if available), otherwise you’ll need to make sure your wireless sync dongle is plugged into the computer.
Fitbit Connect on a PC requires that you plug in your wireless sync dongle. You can force Fitbit Connect to sync at any time or it will happen automatically every 15 minutes if:
- The tracker is within 15-20 feet of your computer.
- The computer is powered on, awake, and connected to the Internet.
Getting to know your Fitbit Charge
This section tells you how best to wear, recharge, and care for your tracker.
Wrist placement
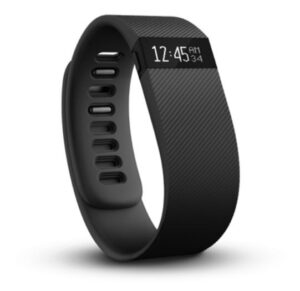
Your Charge is designed to be most accurate when worn on your wrist. Though it will track stats such as steps and floors when placed in a pocket or backpack, it is most accurate on the wrist.
Putting on your Charge
- Put on the wristband so the screen is closest to the outside of your wrist and facing you.
- Align both ends of the wristband so they are directly overlapping each other with the clasp over the two holes that best fit your wrist.
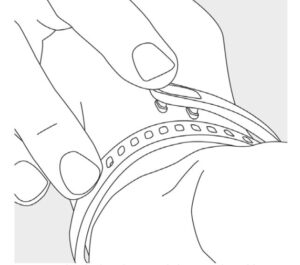
- Squeeze both the clasp and the wristband between your thumb and forefinger nuntil you hear a soft click.
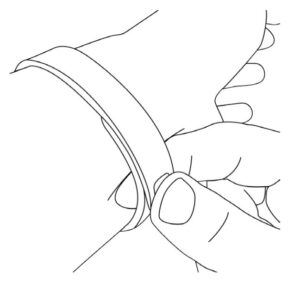
- You’ll know your Charge wristband is securely fastened if both pegs on the clasp are fully inserted.

NOTE: If you’re having trouble, try securing the wristband off your wrist to get a feel for how it securely clasps and then try again on your wrist.
Wearing on your dominant vs. non-dominant wrist
To get the most accurate reading from your Charge, configure whether you are wearing the wristband on your dominant or non-dominant wrist. Your dominant wrist is the one you use for most day-to-day activities, such as writing or throwing a ball.
To configure this setting:
- Log in to fitbit.com.
- Click the gear icon in the top-right corner of the dashboard.
- Click Settings.
- Find and edit the Dominant Wrist setting.
- Sync your Charge to send the change to your tracker.
