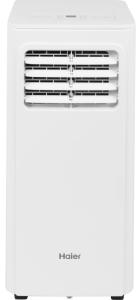
This manual for the Haier Portable Air Conditioner (mode number QPCA09) contains all sorts of installation instructions and troubleshooting tips. It explains the front, back and remote control buttons including the all important reset button. If you find that your Haier portable air conditioner is not working then you can use the troubleshooting section to find out what the problem is, or what the error codes mean.
Manufactured by Haier

Haier QPCA09 Portable Air Conditioner
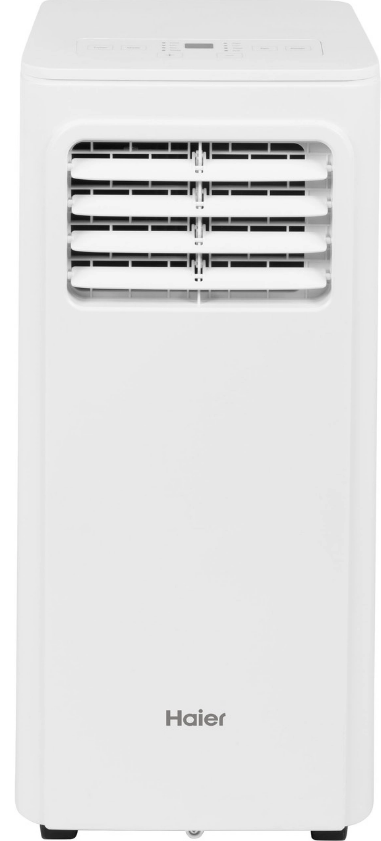
Haier QPCA09 Portable Air Conditioner
SAFETY INFORMATION
To reduce the risk of fire, electrical shock, injury to persons, or damage when using the air conditioner, follow basic precautions, including the following:
- Read all of the instructions before using this appliance.
- Plug into a grounded 3-prong outlet.
- Do not remove the ground prong.
- Do not use an adapter.
- Do not use an extension cord.
- Do not operate the air conditioner if it has a damaged cord or plug, if it is not working properly, or if it has been damaged or dropped.
- The air conditioner should be serviced only by qualified service personnel. Call an authorized service company for examination, repair, or adjustment.
- Disconnect power before servicing.
- Disconnect power before cleaning.
NOTE: Turning off the power by pressing the Power button does NOT disconnect the appliance from the power supply. - Do not install or use the air conditioner in any area where the atmosphere contains combustible gases or where the atmosphere is contaminated. Avoid any chemicals coming in contact with your air conditioner.
- Do not store anything directly on top of the air conditioner.
- Use two or more people to move and install air conditioner.
- Never operate the air conditioner without the filters in place.
- Do not use the air conditioner near a bathtub, shower or washbasin or another wet area.
CONTROLS
Features and appearance will vary. Lights next to the touch pads on the air conditioner control panel indicate the selected settings.
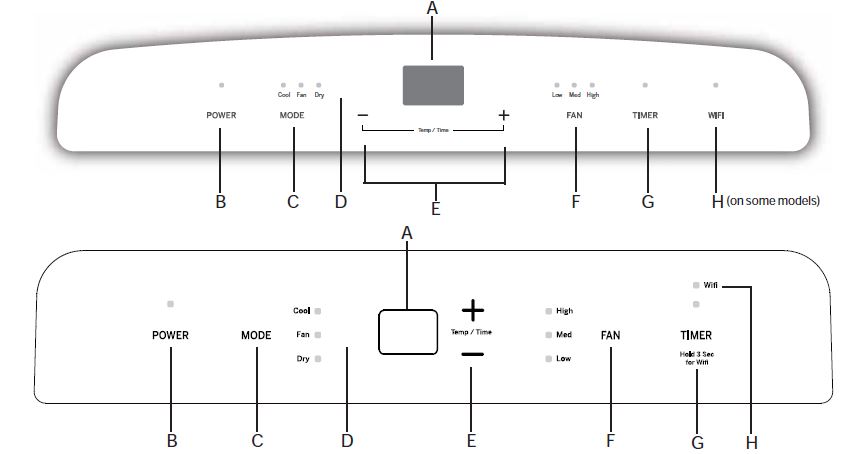
- CONTROL PANEL DISPLAY
Displays the Set Temperature in degrees Fahrenheit or
degrees Celsius, or the hours remaining in a Time Delay. The corresponding indicator light will illuminate. - Power Button
Turns ON/OFF power to the air conditioner.
NOTE: Turning off power by pressing the POWER button does NOT disconnect the appliance from the power supply.
• Press the POWER button. The Power indicator will illuminate. - Mode Button
Press the MODE button to toggle among the operating options. The corresponding indicator will illuminate:
Cool – Cools the room to the set temperature
Dry – Reduces the humidity in the room
Fan – Circulates the air in the room without cooling. - Remote Control Signal Receiving Window
Aim the Remote Control at this window so the Control will receive the signal. - + and – Buttons
Adjusts the Temperature or Hours in Time Delay.
To Set the Temperature:
The temperature can be set between 61ºF and 89ºF (17ºC and 30º C) when the air conditioner is in Cool mode.
1. Press the MODE button until the Cool mode is selected.2
2. Press the + or – buttons to select the Temperature.
NOTE: The temperature cannot be set when the air conditioner is in either Fan or Dry mode. - Fan Speed Button
The fan speed can be adjusted from Low speed, Medium speed, to High speed when the air conditioner is either in Cool or Fan mode. NOTE: The fan speed cannot be adjusted when the unit is in Dry mode.
• Press the Fan Speed button to toggle among the three speeds. The corresponding fan speed indicator will illuminate. - Timer Button
Program a time from (1-hour to 24-hours) for the air conditioner to turn Off or On. When a Time Delay is programmed, the Timer indicator light will illuminate.
While it is operating:
- Press the TIMER button.
- Press the + or – buttons to select the number of hours you want the air conditioner to continue to operate before turning Off. NOTE: Wait approximately 5 seconds for the Turn-Off time to be saved.
While the air conditioner is off:
- Press the TIMER button.
- Press the + or – buttons to select the number of hours you want the air conditioner to remain off before turning On.
NOTE: Wait approximately 5 seconds for the Turn-On time to be saved.
To cancel the timer:
- Press the Timer button once, the hours remaining will flash, press the timer button again and the timer will be canceled.
- WiFi Connect Pad (on some Models)
- Connect your air conditioner to WiFi router.
- Press and hold the TIMER button for 3 seconds to connect the app or disconnect the app.
The display will always default to show the room temperature. When the air conditioner is turned on, it will automatically start in the last mode and fan settings selected.
Cool Mode
Use the COOL mode for cooling. To set the COOL mode:
- Press the MODE pad until the COOL indicator light is lit.
- Press the FAN speed.
- Press + or – to set the desired temperature between 61°F and 89°F in 1°F increments.
After settings have been made, the display will change back to show the room temperature. The temperature control is used to maintain the room temperature. The compressor will cycle on and off to keep the room at the set level of comfort. Set the temperature control at a lower number and the indoor air will become cooler. Set the temperature control at a higher number
DRY Mode—Dehumidification
Use the DRY mode to provide dehumidification only. The fan will run at a fixed speed at this setting, so a fan speed cannot be set. Keep windows and doors closed for the best dehumidifying effects.
To set the DRY mode:
- Press the MODE pad until the DRY indicator light is lit.
FAN Mode
Use the FAN mode to provide air circulation and filtering without cooling.
To set the FAN mode:
- Press the FAN pad until the desired indicator light for high, medium, or low fan speed is lit.
HEAT Mode
Use the Heat mode at Low, Med, High or Auto Fan Speed for heating. Use the Temperature Increase (+) /Decrease (-) pads to set the desired temperature between 61°F and 86°F in 1°F increments.
Power Outage Recovery Feature
In the case of a power outage or interruption, the unit will automatically re-start in the settings last used after the power is restored. and the indoor air will become warmer. NOTE: If the air conditioner is off and is then turned on while set to COOL, it will take approximately 3 minutes for the compressor to start and cooling to begin.
Cooling Descriptions
For Normal Cooling—Select the COOL mode and HIGH, MEDIUM, or LOW fan speed with a middle set temperature.
For Maximum Cooling—Select the COOL mode
and HIGH fan speed with a lower set temperature.
For Quieter & Nighttime Cooling—Select the COOL mode and LOW fan speed with a middle set temperature.
NOTE: If you switch from COOL or DRY mode setting to OFF, wait 3 minutes before restarting.
Since fan only settings do not provide cooling, a set been set, the display will change back to show the room temperature. The exhaust hose and window kit do not need to be installed when operating in fan mode.” An electronic thermostat is used to maintain the room temperature. The heater will cycle on and off to keep the room at the set level of comfort.
NOTE: If the TIMER was set before the power outage, it will need to be reset after power is restored.
Features and appearance may vary. Icons on the remote control indicate the selected settings
