Sections in this Manual
- Turn Off Power to Heating/Cooling System
- Remove Old Thermostat
- Label Wires with Tags
- Separate Wallplate from New Thermostat
- Wallplate
- Connect Wires
- Install Batteries
- Install Thermostat onto Wallplate
- Turn Power Back On
- Advanced Installation
- Changing Settings
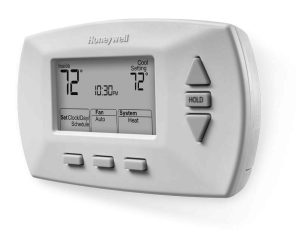
- About your new thermostat
- Thermostat controls
- Program Schedule
- Built-in compressor protection
- Battery replacement
- Troubleshooting
- Warranty
- FAQs

Connect Wires
Simply match wire labels.
If labels do not match letters on the thermostat, check Alternate Wiring on page 6 and connect to terminal as shown (see notes, below).

We are here to help. Call 1-800-468-1502 for wiring assistance.
Alternate Wiring (Conventional Systems)
If labels do not match terminals, connect wires as shown here (see notes, below).

Wiring—Heat Pump
If E and Aux do not each have a wire connected, use a small piece of wire to connect them to each other.

Alternate Wiring (Heat Pump Only)
If labels do not match letters on the thermostat, check the chart below and connect to terminal as shown here (see notes, below).

Install Batteries

Install Thermostat onto Wallplate
Install thermostat onto the wall plate on the wall.

Turn Power Back On
Turn the power back on to the heating/cooling system.

If your system type is:
- Single Stage Heat and Cool
If your system type is:
- Multistage Heat and Cool
- Heat Pump* without Backup Heat
- Heat Pump* with Backup Heat
- Heat Only
- Cool Only
Continue with Advanced Installation to match your thermostat to your system type.
*Heat Pump—an air conditioner that provides cooling in the summer, and also runs in reverse in the winter to provide heating.
If you are not sure of your system type or if you have other questions, call us toll-free at 1-800-468-1502.
This thermostat works on 24 volt or 750 mV systems. It will NOT work on 120/240 Volt systems.
Advanced Installation
Enter System Setup
To enter system setup, press and hold both the ▲ and FAN buttons until the display changes (approximately 5 seconds).

Changing Settings
- Press the ▲ or ▼ button to change the setting.
- Press NEXT to advance to the next function.
- Press DONE to exit and save settings.


