Keep your Keurig K-Mini Plus coffee maker clean and performing properly for years by following online version of the manual. The quick start section at the beginning will have you up and running in no time!
Page 1 of 3
Next »
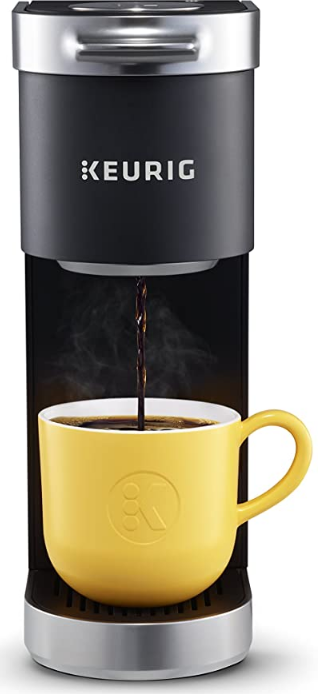
Keurig K-Mini Plus Single Serve Coffee Maker

Keurig K-Mini Plus Single Serve Coffee Maker
Get the most from your new Keurig® brewer.
Before You Brew
- Plug & Power
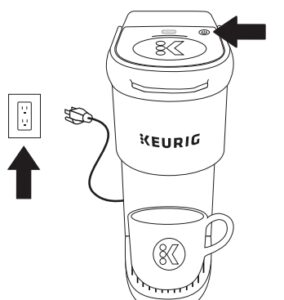
Remove packing tape from brewer.
Pull plug and extend cord from cord storage located at the back of the brewer. Plug into a grounded outlet.
Press the power button. The power button will illuminate. - Fill & Place
Add 1 cup (8oz) of water into a mug. Lift the water reservoir lid and pour the water into the reservoir. Do not fill past the MAX or below the MIN fill lines. Lower the lid and place your mug on the drip tray.
NOTE: Do not use distilled water
- Lift & Lower

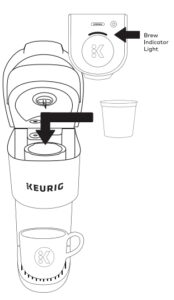
Lift and lower the handle. Do not insert a K-Cup® pod. The brew indicator light will flash to indicate that the brewer is ready.
- Cleansing Brew
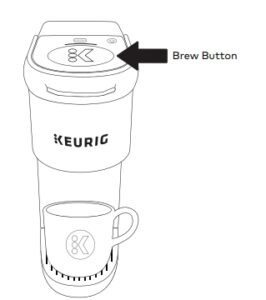
Press the brew button. The brew indicator light will illuminate solid, then begin to pulse while the brewer is heating. After about 2 minutes, the brew indicator light will illuminate solid again and the water will begin to dispense. Pour the hot water into the sink.
The one-time setup process is now complete and you are ready to brew! - Fill & Place Mug
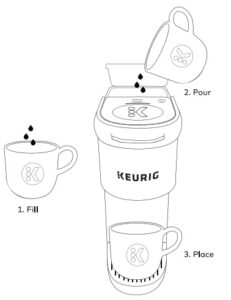
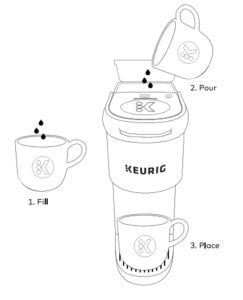
Add desired amount of water into a mug (6oz minimum, 12oz maximum). Lift the water reservoir lid and pour the water into the reservoir. Do not fill past the MAX or below the MIN fill lines. Lower the lid and place your mug on the drip tray. - Lift & Place Pod
Lift the handle. Place a K-Cup® pod in the K-Cup® pod holder. Lower the handle completely to close the lid. The brew indicator light will flash to indicate that the brewer is ready. Do not remove the foil lid on the K-Cup® pod. High Altitude Brewing: While holding the brewer handle up, push down slowly on the K-Cup® pod in the pod holder until the bottom of the
K-Cup® pod is punctured by the exit needle. - Brew & Enjoy!
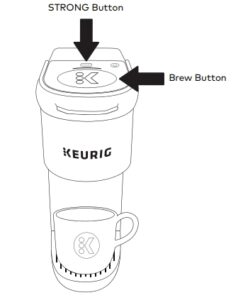


Brewer Features
- Strong Brew increases your coffee strength and intensity. For bolder coffee
press the STRONG button. Pod Storage holds 9 K-Cup® pods and fits in your brewer to save counter space. - Removable Water Reservoir for easy cleaning and filling.
- Auto Off: Automatically turns your brewer off 90 seconds after the last brew for energy savings.
- Cord Storage: Makes transporting your brewer convenient and keeps
countertops tidy. - Travel Mug Friendly: Remove the drip tray to accomodate a travel mug.
Page 1 of 3
Next »
[View Manual Contents]