Manufactured by VIOFO
Operating the Dashcam
Switch ON
Insert the Micro SD card into the camera’s card slot. Plug the USB car adapter into the vehicle’s 12V/24V female power socket, connect the Mini USB cable’s USB port end to the USB car adapter and the Mini USB end to the camera’s female Mini USB port. Start the engine, the device will switch ON automatically.
Switch OFF/ON
- Automatic: When the camera is ON, simply turn OFF the engine or unplug the charging cable and the camera will switch OFF automatically.
- Manual: Switching the camera OFF manually is required for vehicles where the 12V/24V female power socket provides continuous power after the engine is turned OFF.
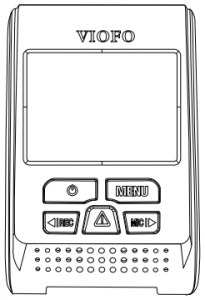
- When the camera is ON, press and hold the power button for at least 5 seconds to turn the camera OFF.
- Press the power button for at least 3 seconds to turn the camera ON.
Loop Recording
- Insert a Micro SD card into the camera’s card slot and automatic loop recording will begin once the camera detects power.
- Time frame for each video file is 1/2/3/5/10 minutes.
- When there is insufficient space on the Micro SD card, loop recording will automatically overwrite the oldest files (one by one).
- Loop recording files are saved to SD card:DCIMMovie folder.
Emergency Recording
- Automatic: When the G-sensor is activated due to a collision, current footage will be automatically locked to avoid being overwritten by loop-recording. ( Note: Collision sensing feature can be adjusted in settings under the ”G-sensor” option )
- Manual: Pressing the emergency record button during a recording will lock the current file being recording. Once locked, the file will not be overwritten by the loop-recording feature.
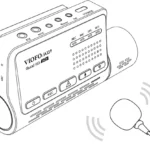
Motion Detection
If turned ON, the camera will start recording on detecting any movement within its FOV (field of view). Once the camera does not detect any movement for 60 seconds, it will stop recording and go back to ‘Motion-Detection’ mode. A recording will resume if any new movement is detected.
Playing the footage back
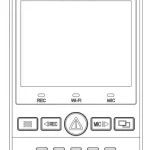
- Under video mode, press [

- Use the arrow buttons [


- Press the menu button to exit.


PC Mode
- Connect the camera to a computer using a Mini USB cable.
- Device will automatically turn on and “Mass Storage” will be displayed.
- The computer will detect “removable disk”.
- There will be three folders under the DCIM folder:
Movie ( Loop recording video files )
RO ( Event recording files )
Photo ( Video snapshot ) - Copy files are needed to computer drive.
Mute
During a private conversation, pressing the ‘ MIC ’ button will mute the audio.
Firmware Upgrade
- Download the latest firmware, unzip the file. Copy & paste or drag & drop the .bin file to the root of the Micro SD card.
- Insert the Micro SD card into the camera’s card slot once the transfer is completed.
- Plug into a power source and then turn the camera ON.
- LED indicator will start flashing to confirm the update’s progress.
- The camera will automatically reboot after the upgrade is completed.
- Currently installed firmware version can be verified by accessing the ‘Version’ tab within the settings menu (last tab).
Note:
- Before using a Micro SD card to upgrade the firmware, formatting the card in-camera is necessary to ensure stable read and write operation.
- Do not unplug or power-off the camera during a firmware upgrade, it may cause the camera to fail from booting.