![]()
Goodmans 363306 DM/FM Radio User Manual
MODEL: 363306
1. Welcome
Thank you for choosing this Goodmans product. We have been making electrical products for the British people for over 90 years. Each of our products have been carefully designed to be great at what they do and this one is no exception. We hope you enjoy your new Goodmans DAB / FM Radio.
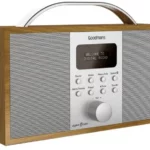
2. Your DAB / FM Radio
In the Box
Carefully remove your DAB / FM Radio from the box. Inside the box you will find:
- DAB / FM Radio
- Power Adapter
- Quick Start Guide
- Instruction Manual
- Safety & Guarantee Leaflet
Mains Power
Your DAB DIGITAL/FM Radio uses a DC 5V 1A power adapter. Please ensure that your mains supply is compatible before use.
Position DAB / FM Radio
Place on a flat, stable surface that is not subject to vibrations. Avoid the following locations:
- Where it is exposed to direct sunlight.
- Where it is close to heat radiating sources.
- Where the humidity is high and ventilation is poor.
- Where it is dusty.
Adjusting the Aerial
Fully extend the aerial to ensure good reception in both DAB and FM Radio modes. It may be necessary to alter the position of the DAB DIGITAL/FM Radio and/or the aerial to achieve the best signal.
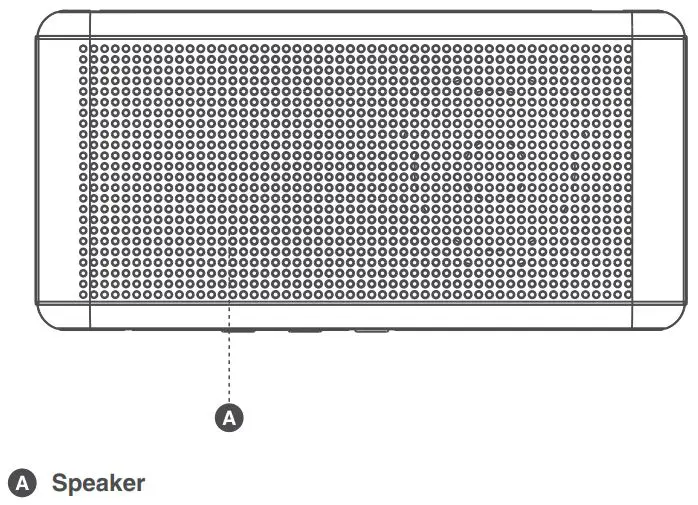
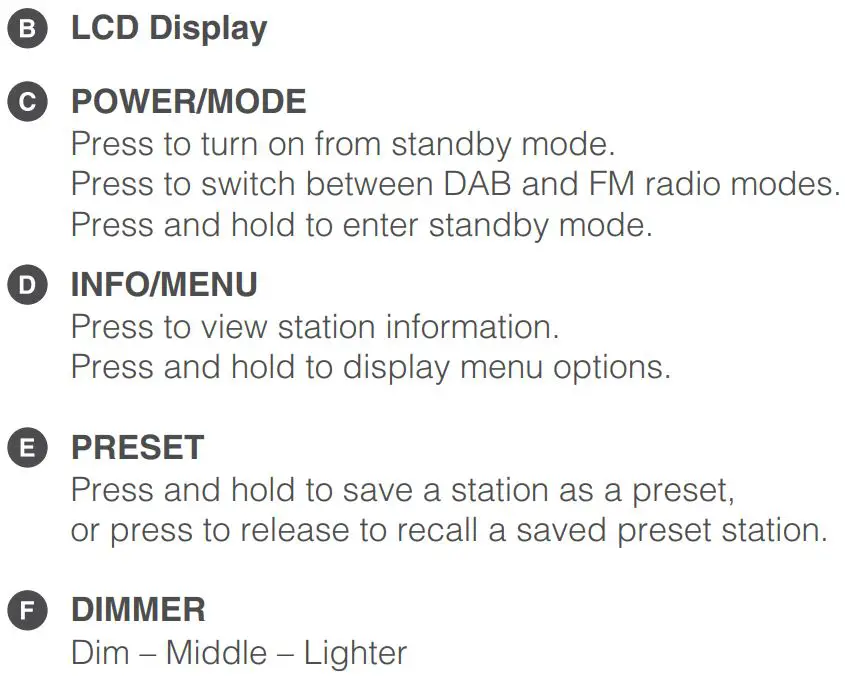
Front View

Top View

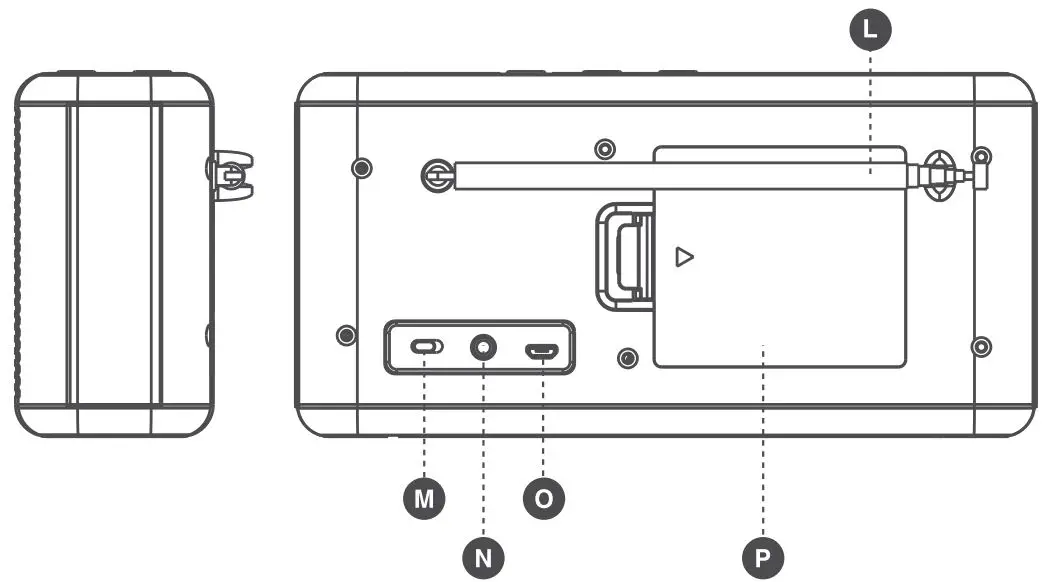
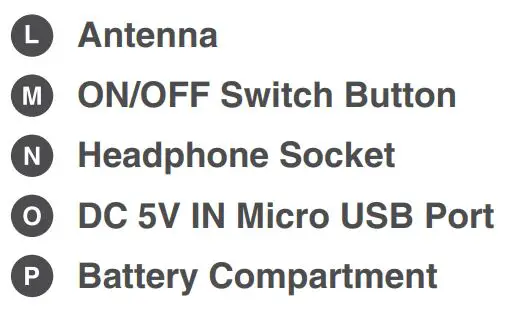
Rear View
Insert 4×1.5V AA batteries into battery compartment (4×1.5V AA battery not included).
CAUTION
Danger of explosion if battery is incorrectly replaced.
Replace only with the same or equivalent type.
Quick Setup
Connecting the Power
- Insert the power adapter to the 5V DC Micro USB port on your DAB / FM Radio, or insert 4 x 1.5V AA batteries in to battery compartment (4 x 1.5 AA battery not included).
- Insert the power adapter into a suitable mains socket.
- Slide the ON/OFF switch button on the back of your DAB / FM Radio.
Using your DAB / FM Radio
- Extend the telescopic antenna for the best reception possible.
- Make sure the DAB DIGITAL/FM Radio has been switched ON.
- When powering on for the first time, the radio will perform a DAB station scan automatically. After that the radio will tune in to the last station played before it was turned off.
- Press the Power/Mode button to switch between DAB and FM modes.
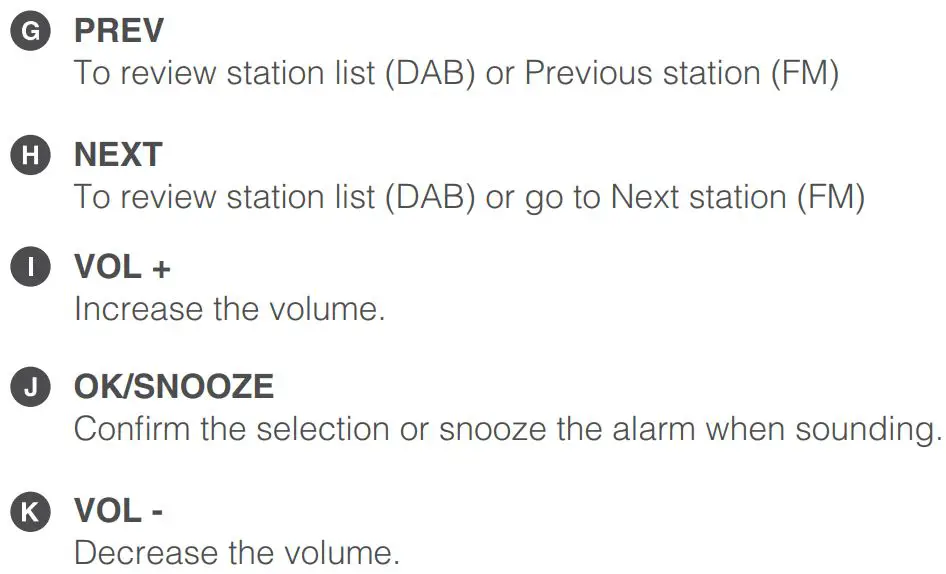
- Press the VOL+ and VOL- control button to increase / decrease the volume.
- During scanning the screen will display a slide bar that indicates the progress of the scan, and the amount of radio stations that have been found so far. Once the scan has finished, the radio will select the first alphanumeric station.
- Slide the ON/OFF switch button to OFF position to turn the DAB DIGITAL/FM Radio off.
Note: Press and hold Power/Mode button and unit will go to standby mode. Press the Power/Mode button to turn on from standby mode.
Operation
DAB Operation
When you slide the ON/OFF switch button to ON the DAB DIGITAL/FM Radio again after a switch off. It will automatically tune into the same station (DAB of FM) that was last selected. Make sure it is DAB mode.
Full Scan
- Extend the telescopic antenna for the best reception possible.
- Slide the OFF/ON switch to the ON position on the back of your DAB Radio to power up the DAB Radio.
- A full scan will automatically commence. The unit will search for all available DAB stations.
Storing Stations
- You can store up to 10 DAB stations to the memory presets for quick and easy recall of your favourite stations.
- To store a preset, you must first be listening to the station that you would like to save. Press and hold the PRESET button. The display will show “Preset Store<#:(Empty)>”. If a station is already stored. The display will show ”<#: Station name>”.
- Press the PRE/NEXT buttons to select the preset station number 1-10.
- Press the PRE/NEXT buttons to select the preset station number 1-10.
- To save to the selected preset station number, press the OK button. The display will then show” Preset# stored”.
Recalling Stored Stations
Once you have saved a station to one of the preset buttons, you can:
- Press the PRESET button and press the PREV/NEXT button to select your desired preset station’s number.
- Press the OK button to recall a preset station number.
Information on DAB Mode
- Press the INFO/MENU button repeatedly to show the different program information.
- Signal Strength: Displays a signal bar with the strength of the current station.
- Bit Error Rate(BER): Provides details of the signal error rate.
- Channel and Frequency: Displays the station’s transmission channel number and frequency.
- PTY (Program Type): Shows the type and description of the program provided by the DAB station.
- Time and Date: Displays the time and date information provided by the broadcaster.
- Dynamic Label Segment(DLS): Displays scrolling text information supplied by the broadcaster.
- Bit Rate: The data rate of which the signal is being transmitted.
Removing Stations
- When the DAB DIGITAL/FM Radio has performed a Scan in several locations you may find there are stored stations that you can no longer receive. This function automatically removes them from the stored station list.
- Press and hold the INFO/MENU button to enter Prune, then press the OK to confirm and select YES then press OK button to remove.
FM Operation
In order to switch the DAB DIGITAL/FM Radio from DAB to FM mode, press the POWER/MODE button once.
Auto Scan
- To search for an FM station, press and hold the NEXT button. This will start scanning up the frequency band.
- To scan down the frequency band. Press and hold the PREV button.
- Once a station has been found. the scanning will stop automatically. If no station is found, then the tuning will stop one it has cycled through the entire FM band (87.5-108 MHz).
Manual Scan
To search FM stations manually, simply press the PREV/NEXT buttons repeatedly until your desired frequency is reached.
Storing Stations
- You can store up to 10 FM stations to the memory presets for quick and easy recall of your favourite stations.
- To store a preset, you must first be listening to the station that you would like to save. Press and hold the PRESET button. The display will show “Preset store <#:(Empty)>”. If a station is already stored, the display will show “<#: Station frequency>”.
- Press the PREV/NEXT button to select the preset station number 1-10.
- To save to the selected preset station number, press the OK button. The display will then show “Preset # stored”.
Recalling Stored Stations
Once you saved a station to one of the preset buttons, you can:
- Press the PRESET button and press the PREV/NEXT buttons to select your desired preset station’s number.
- Press the OK button to recall a preset station number.
Station Information on FM Mode
Press the INFO/MENU button repeatedly to show the different program information.
Program Type: Displays a description of the type of program provided by the broadcaster.
Signal Strength: Displays a signal bar with the strength of the current station.
Time and Date: Displays the time and the date.
Frequency: Displays the station’s transmission frequency.
Audio Type: Displays the audio type of the station you are listening to. It will either be Stereo or Mono.
Radio Text: Displays scrolling test information supplied by the broadcaster.
System Settings
Switch the ON/OFF button to position ON to turn on the unit, Press and hold the Power/Mode button into standby mode. press and hold the INFO/MENU. This will open the “Set Menu”. Press the PREV/NEXT buttons to select your desired Sub-option between:
Setting the Time/Date
- Press the OK button, the hour digitals will flash.
- Press the PREV/NEXT buttons to set the hour correctly.
- Press the OK button to confirm.
- Repeat the last two steps to set the minutes, the Year, Month, Date.
System Version
You can check the software version number
Factory Reset/ Resetting the Radio
Resetting the Radio will delete all the tuned DAB stations and all the preset memory stations in FM and DAB modes. To reset the radio:
- Press and hold the INFO/MENU button.
- Press the NEXT button repeatedly until “Factory Reset” is displayed on the screen.
- Press the OK button and the display will show “Factory Reset?”, Press the NEXT button until the word “YES” is flashing.
- Press the OK button again, this will reset the radio.
Alarm Setting
- Press the OK button to use Alarm 1 or press next to access Alarm2.
- Press the NEXT button so the word ”ON” is flashing and press OK button to confi.
- The hour digits for the alarm will flash, press the PREV or NEXT to change the hour and press the OK button to confirm.
- Press the PREV or NEXT button to change the minute and press the OK button to confirm.
- Press the PREV or NEXT button to change the volume and press the OK button to confirm.
- Press the PREV or NEXT button to change between Alarm-DAB-FM and press the OK button to confirm.
- Press the PREV or NEXT button to select between ONCE-DAILY-WEEKENDS and press the OK button to confirm.
- To set the Alarm 2, follow the Alarm 1 instructions.
Note: You can press the INFO/MENU button to get back last one step when in the process of setting the alarm.
Turn off the Alarm
To turn off the alarm, press the NEXT button so the word “OFF” is flashing and press OK button. The alarm is now OFF.
Turn off the Alarm when Sounding
Press the POWER/MODE button to turn off the alarm when sounding.
Note: The alarm will keep ringing for one hour if you do not turn it off when it is sounding.
Sleep Setting
- Press the PREV or NEXT button to select either OFF-120-90-60-45-30-15-5 minutes.
- Press the OK button to confirm your selection.
Language Setting
Press the OK button to select the language you want and press the OK button to confirm.
FM Scan Setting
Turn on the unit and state at FM mode, Press and hold the INFO/MENU button, press the next button into FM scan setting, to select Only or All. If select Only, the radio only scan the strong signal station and play. If select All, the radio will also scan the weak signal station and play.
Snooze Function
- When the alarm sounds, press the OK button to delay the alarm for another 9 mins. The radio will go to Standby mode.
- You can press POWER/MODE button to stop the Snooze function and go to the operation mode before the alarms rings.
5. Operation
6. Technical Specifications
7. EC Declaration
This product is intended for use within the UK.
This appliance complies with the below listed EU directives.
2014/30/EU Electromagnetic Compatibility Directive
2014/35/EU Low Voltage Directive
2011/65/EU Restriction of Hazardous Substances Directive
2009/125/EC Eco-design Directive
2014/53/EU Radio Equipment Directive
The complete declaration of conformity is available upon request for relevant enquiries.
Information on Waste Disposal for Consumers of Electrical & Electronic Equipment
![]() This mark on a product and/or accompanying documents indicates that when it is to be disposed of, it must be treated as Waste Electrical & Electronic Equipment (WEEE).
This mark on a product and/or accompanying documents indicates that when it is to be disposed of, it must be treated as Waste Electrical & Electronic Equipment (WEEE).
Any WEEE marked waste products must not be mixed with general household waste, but kept separate for the treatment, recovery and recycling of the materials used.
For proper treatment, recovery and recycling; please take all WEEE marked waste to your Local Authority Civic waste site, where it will be accepted free of charge.
If all consumers dispose of Waste Electrical & Electronic Equipment correctly, they will be helping to save valuable resources and preventing any potential negative effects upon human health and the environment, of any hazardous materials that the waste may contain.

Made in China
Imported by B&M Retail Ltd., Dakota Drive, Liverpool, L24 8RJ, UK
![]()