Sections in this Manual
- Included in the box
- Tools you will need
- Tools you may need
-
Removing your old thermostat
- Turn power OFF
- Check that your system is off.
- Remove the old thermostat’s faceplate.
- Make sure there are no 120/240V wires.
- Take a picture of how your wiring looks right now.
- Record which R-wire(s) you have and write down the color of the wire(s).
- Record the remaining wires and write down the color of the wires.
- Disconnect the wires and remove the old wall plate.
- Installing your RTH5160 thermostat
- Bundle and insert wires through the UWP.
- Insert the wall anchors.
- Set R-switch position and insert R-wire(s).
- Connect remaining wires.
- Confirm wiring matches snapshot.
- Mount the UWP and close the door.
- Install batteries.
- Attach your thermostat.
- Turn your power ON.
- System Setup
- Wiring—conventional systems
- Wiring—heat pump
- Battery Replacement
- Alerts Screen
- Alerts Codes
- Troubleshooting
- 1-year limited warranty
- FAQs
Battery Replacement
Batteries are required to provide power. Install fresh batteries immediately when the low battery icon appears. The icon appears about two months before the batteries are depleted.
Even if the low battery icon does not appear, you should replace batteries once a year, or before leaving home for more than a month.

If batteries are inserted within two minutes, the time and day will not have to be reset. All other settings are permanently stored in memory, and do not require battery power.
NOTE: When replacing batteries, alkaline batteries are recommended.
Alerts Screen
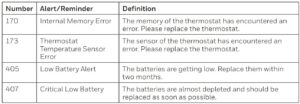
- You will see the alert icon and the alert number on the screen.
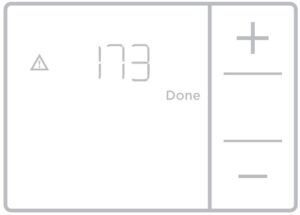
- Press Next (+) to see additional alerts, if any. Then press Done to go back to the home screen.
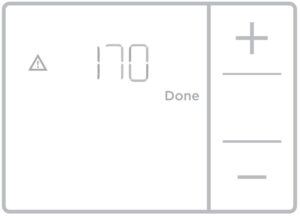
NOTE: If the alert is a critical alert, you may not be able to access the home screen and should call a HVAC professional.
Alerts Codes
