Sections in this Manual
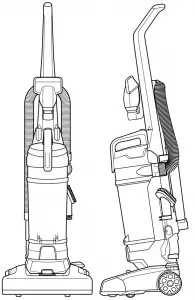

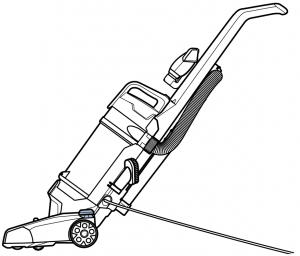
Assembly

WARNING: Do not plug in your vacuum until you are familiar with all instructions and operating procedures.
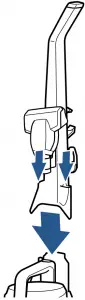
- First, place the upper handle onto the base and push it down. Then attach the handle with the 2 screws that are taped to the handle in a plastic bag.
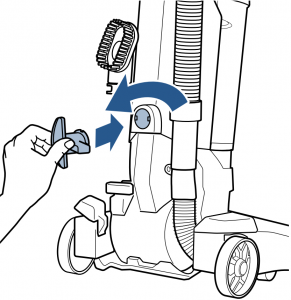
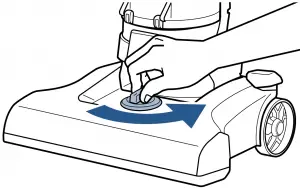
- Next, insert the lower cord wrap and turn it to the left to lock it into place.
- Then wrap the power cord around the cord release clips and clip the end of the plug to the power cord.
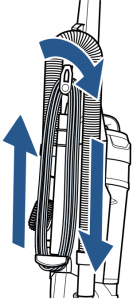
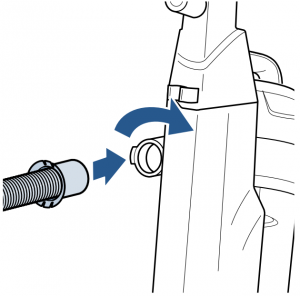
- Next, insert the end of the hose into the back of the vacuum and twist to lock it into place.
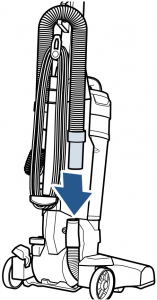
- Now wrap the hose through the hose clip and connect the hose wand to the foot hose down at the bottom of the vacuum.
- Put your accessory tools on the vacuum and you’re ready to go!
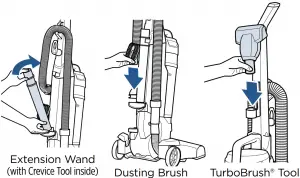


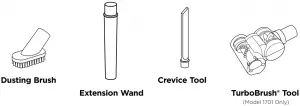
NOTE: The crevice tool can be found inside the extension wand. You can remove it to use it and put it back to store it neatly out of your way when you’re finished.
Operation
Using Your Cleaner
- Press the red power switch with your foot to turn on your vacuum. Press it again to turn your vacuum off when you’ve finished cleaning.
- Press the recline pedal to lean your vacuum back for cleaning. To get even lower, press the recline pedal a second time. When you’re finished, lean it all the way back up to lock it into the upright position.


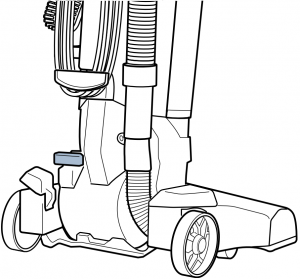
Using the Height Adjustment
You can easily raise or lower your vacuum to adjust to different flooring types. Simply turn the knob towards the desired flooring type. If your vacuum becomes too difficult to push, just move to a higher setting.
NOTE: Some frieze and berber carpets have long delicate fibers or threads that may be damaged by rotating brush. Repeated strokes in the same area may
enhance this condition
WARNING: Before using your vacuum, make sure that the dirt container is in locked position and that all filters, both pre and post-motor filters are in place. DO NOT operate your vacuum without these filters.
WARNING: The rotating floor brush continues to rotate while tools are in use. To reduce the risk of injury from moving parts, always move the cleaner with the carry handle at the front of the unit. Always place the cleaner on the floor with the handle in the upright position when using tools. Never place your fingers under the cleaner when it is running. Never place the powerfoot on furniture or uneven surfaces. Do not place vacuum cleaner close enough to objects to pull them into rotating brush. To prevent carpet damage, do not lean on the vacuum or let the powerfoot tilt forward.
Using the Specialized Tools
Your new PowerForce Helix vacuum not only does a great job on your floors, it also comes with a complete set of accessory tools to make your above floor cleaning jobs easier. Just put your vacuum in the upright position, pick the accessory tool that best fits your needs and attach it to the end of your hose. You’re ready to clean base boards, curtains, upholstery and much more.
Maintenance and Care
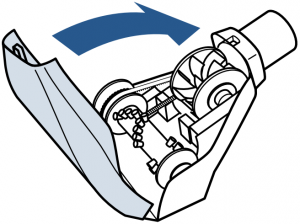
Maintaining the TurboBrush® Tool
NOTE: TurboBrush only comes standard with 1701 series.
- Twist gray collar counterclockwise, until slot appears then separate faceplate. Carefully remove brush, replace belt and brush if needed.
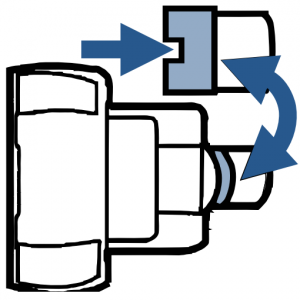
- If paddle wheel gets dislodged, align the two clips on each side and pop into place.
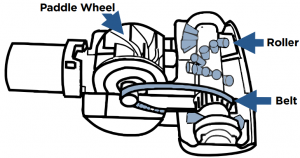
- The faceplate will not close properly if all parts are not aligned correctly.