Sections in this Manual
- Connecting to your Wi-Fi network
- Registering your thermostat online
- Setting the clock
- Setting the fan
- Selecting system mode
- Adjusting program schedules
- Overriding schedules temporarily
- Overriding schedules permanently
- Setting vacation hold
- Setting filter reminder intervals
- Cleaning the screen
- Unregistering thermostat
- Disconnecting Wi-Fi
- Smart Response Technology
- Compressor protection
- Auto changeover
- Setting functions and options
- System setup
- FAQs
- Troubleshooting
- Glossary
- Regulatory information
- 1-year limited warranty
Setting the clock
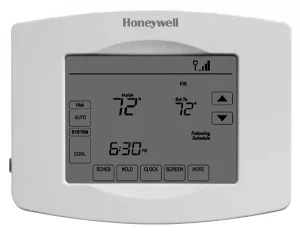
- Press CLOCK to display setting arrows.
- Press or to adjust the time. (You can advance the time more quickly by holding the s or t buttons.)
- Press DONE to save and exit (or press CANCEL to exit without changing the time).
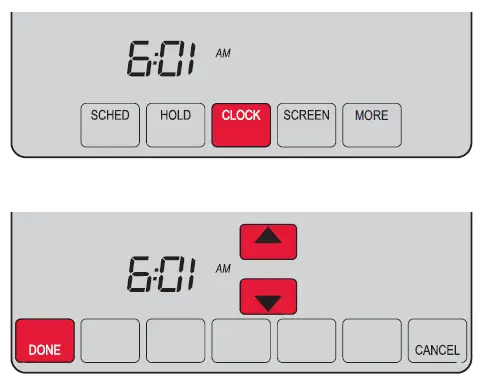
Note: You should never need to adjust the real-time clock; it automatically updates for daylight saving time and all date/time information is stored.
Note: To change the current week day format, see “Schedule Options” on page 53.
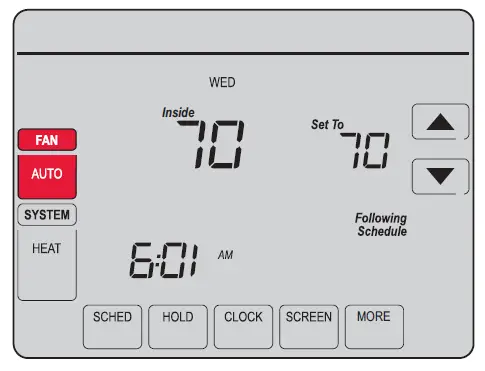
Setting the fan
- Press FAN to select fan operation.
- Press FAN again to select ON or AUTO (toggle to re-select). The selected option blinks.
- Press DONE to save setting. Your selection appears under FAN.
ON: Fan is always on.
AUTO: Fan runs only when the heating or cooling system is on.
Selecting system mode
- Press SYSTEM to display options.
- Press SYSTEM again to select an option. You may need to press two or three times to make a selection—the selected option blinks.
- Press DONE to save setting.
Possible system modes:
HEAT: Controls only the heating system.
COOL: Controls only the cooling system.
OFF: Heating/cooling systems are off.
AUTO: Selects heating or cooling depending on the indoor temperature.
EM HEAT (heat pumps with aux. heat): Controls auxiliary/emergency heat. Compressor is locked out.
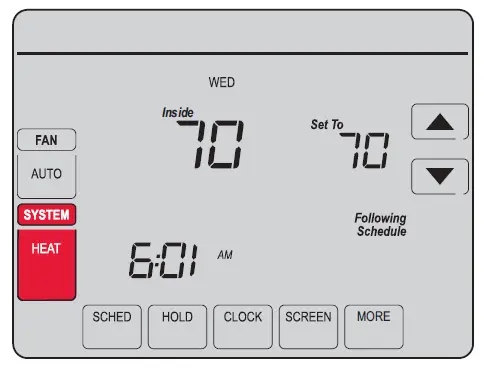
Note: The AUTO and EM HEAT system settings may not appear, depending on how your thermostat was installed.
